Tuesday, April 29, 2008

Click!

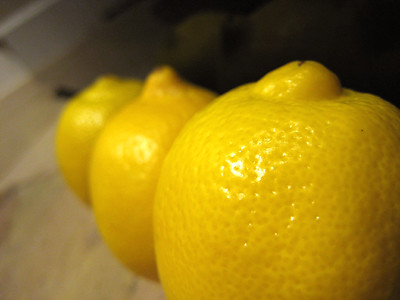
I haven't had much time to blog lately, but I did want to tell you about Click! Unlike DMBLGIT (Does My Blog Look Good in This?) which is a monthly blogging event that showcases the best food photographs featured on food blogs from the previous month, Click! is a monthly food photography event that is theme-based (not blog-based), so all you need is a good photograph to participate. This month's theme is au naturel: food in its natural state, uncooked and unprocessed.

I didn't really have time to shoot any photographs specifically for this event, but what came to mind was this picture I took when I made tiramisù last month:


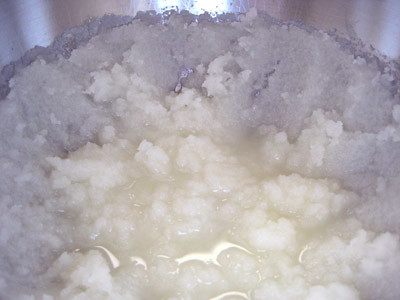
I didn't think anything of it as I was adding the yolks one by one, but then I glanced over at the bowl and it really caught my eye. I love how the gloss of the yolks caught the light, and how it looks like a beautiful yellow flower.

If you'd like to participate in this month's Click! event, you have a little bit of time left (deadline is midnight EST April 30th). Otherwise, you can participate in May's event: Beans 'n Lentils.

TWD: Fluted Polenta and Ricotta Cake

This week's Tuesdays with Dorie (TWD) recipe was chosen by Caitlin of Engineer Baker: Fluted Polenta and Ricotta Cake. Several members of TWD described it as a sweet cornbread, and I've yet to make a cake with ricotta in it... so this recipe seemed particularly interesting to me. Unfortunately, I was unable to participate this week because I am now in southern California doing some continuing education. I'll still be in California for a while, but I hope to make the Peanut Butter Torte next week when I visit my parents. In the meantime, make sure you check out the Tuesdays with Dorie blogroll to see what everyone else thought of this cake.

Fluted Polenta and Ricotta Cake
from Baking: From My Home to Yours, by Dorie Greenspan

About 16 moist, plump dried Mission or Kadota figs, stemmed
1 c. medium-grain polenta or yellow cornmeal
½ c. all-purpose flour
1 tsp baking powder
1 c. ricotta
1/3 c. tepid water
¾ c. sugar
¾ c. honey (if you’re a real honey lover, use a full-flavored honey such as chestnut, pine, or buckwheat)
Grated zest of 1 lemon
2 large eggs

Getting Ready:
Center a rack in the oven and preheat the oven to 325 degrees F. Butter a 10 ½-inch fluted tart pan with a removable bottom and put it on a baking sheet lined with parchment or a silicone mat.

Check that the figs are, indeed, moist and plump. If they are the least bit hard, toss them into a small pan of boiling water and steep for a minute, then drain and pat dry. If the figs are large (bigger than a bite), snip them in half.

Whisk the polenta, flour, baking powder, and salt together.

Working with a stand mixer fitted with the whisk attachment or with a hand mixer in a large bowl, beat the ricotta and water together on low speed until very smooth. With the mixer at medium speed, add the sugar, honey, and lemon zest and beat until light. Beat in the melted butter, then add the eggs one at a time, beating until the mixture is smooth. Reduce the mixer speed to low and add the dry ingredients, mixing only until they are fully incorporated. You’ll have a sleek, smooth, pourable batter.

Pour about one third of the batter into the pan and scatter over the figs. Pour in the rest of the batter, smooth the top with a rubber spatula, if necessary, and dot the batter evenly with the chilled bits of butter.

Bake for 35 to 40 minutes, or until a thin knife inserted into the center of the cake comes out clean. The cake should be honey brown and pulling away just a little from the sides of the pan, and the butter will have left light-colored circles in the top. Transfer the cake to a rack and remove the sides of the pan after about 5 minutes. Cool to warm, or cool completely.

Sunday, April 27, 2008

Dessert on a Stick


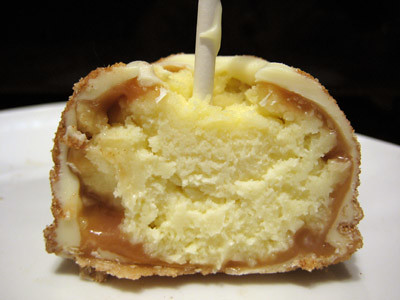
This month's Daring Bakers challenge was chosen by Elle of Feeding my Enthusiasms and Deborah of Taste and Tell: cheesecake pops! These totally reminded me of the frozen cheesecake slices dipped in chocolate that I used to get at the boardwalk (or at the Rocky Mountain Chocolate Factory now that we live nowhere near the beach).


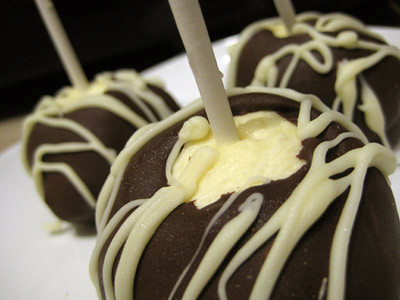
After reading comments about how several bakers were having problems with their cheesecakes not setting after the recommended 45 minute baking time, I baked mine for approximately 60 minutes until it was mostly set around the edges and just slightly jiggly in the center. I've never really had problems with my cheesecake setting before, so I was fairly confident that I had baked mine long enough. Turns out it was cooked all the way through and was sufficient for consumption, but it wasn't firm enough in the center to roll into balls for dipping (I've since read that several had to bake theirs well over 1 hour). I made do, however, and got them into the roundest shape I could using my ice cream scoop, popped them in the freezer for a few hours, and then dipped them. They turned out really well, but had to stay in the freezer until just before serving. I left a few in the refrigerator and they were still fine, but the lollipop sticks would fall out if you tried to eat one that had been in the refrigerator and not the freezer.
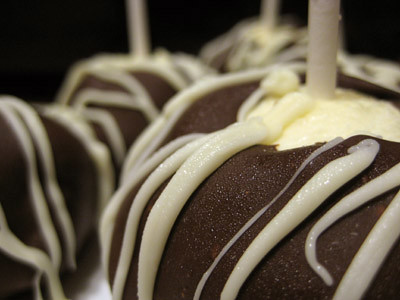

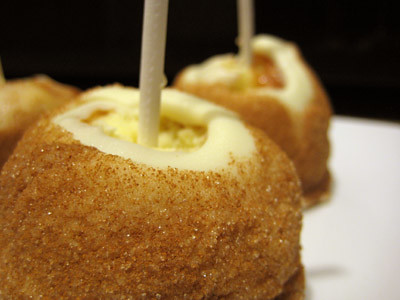
When I first found out that this was the April challenge, so many different dipping ideas went through my head... the possibilities were endless. Alas, I only had 2 weeks to complete this challenge, as I was on vacation at the beginning of the month and then left on a business trip yesterday. Then of course I had to get sick, injure my hand, etc. after my vacation so I really ended up with only 1 week to do this... and it was the week that my in-laws were visiting so my time was truly limited. So, I ended up going very simple with this recipe: I made one batch dipped in semi-sweet chocolate and then drizzled them with white chocolate; the second batch I dipped in caramel sauce, popped them back in the freezer for a bit, then dipped them in white chocolate and rolled them in a cinnamon/sugar mixture. (My favorite caramel apple at the Rocky Mountain Chocolate Factory is the "Apple Pie" Apple, so that's where I got the idea.)


The flavor of the cheesecake itself was really good. So rich and creamy. I preferred the ones dipped in caramel/white chocolate/cinnamon/sugar over the ones that were simply dipped in chocolate, and so did my husband.
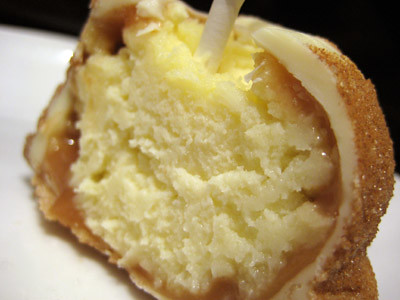

Aside from extending the baking time for the cheesecake, I would also recommend going a bit smaller than 2 ounces for each cheesecake pop. When I rolled out the cheesecake balls, I took out my kitchen scale to make sure they were 2 ounces each, as it states in the recipe. They looked quite large to me. Elle and Deborah said they shouldn't be much larger than a golf ball, but at 2 ounces, they definitely were. Even at that size, the 8-inch lollipop sticks seemed to be too long. Luckily, I had also purchased 6-inch lollipop sticks, so I ended up using those instead.

Thanks again to Elle and Deborah for hosting this month's challenge. These were a lot of fun to make and I would definitely like to make them again in the future. I wish I could have done something more impressive with the dipping and decorations, but time was not on my side. You'll have to visit the other Daring Bakers' blogs to see how creative everyone else got with their cheesecake pops--I've already seen several that are just amazing!

Aside from the blogroll, the Daring Bakers now has its own new website (still a work in progress). What's exciting about the new site is that there is a forum for discussion/questions that is available to both members and non-members, so go check it out! (The members' forum is not visible to the public.)


I'm also submitting this to Joelen's Tasty Tools event. The idea is to feature a particular kitchen tool so that we'll all have a collection of recipes to inspire us to use our kitchen tools more often. It's funny how Joelen is not a Daring Baker, and yet for two months in a row now, she has chosen a kitchen tool that I have had to use for the Daring Baker's challenge! This month's tasty tool was ice cream scoops and portion scoops. I think most everyone who made these cheesecake pops found that it was much easier to make the cheesecake balls using a scoop. Be sure to head on over to Joelen's blog on May 5th to see the round up, and get great ideas on how you can get more use of out your scoops!

Cheesecake Pops
from Sticky, Chewy, Messy, Gooey: Desserts for the Serious Sweet Tooth by Jill O'Connor

5 8-oz. packages cream cheese at room temperature (I used 1/3 less fat Neufchatel cheese)
2 cups sugar
¼ cup all-purpose flour
¼ teaspoon salt
5 large eggs
2 egg yolks
2 teaspoons pure vanilla extract
¼ cup heavy cream
Boiling water as needed
Thirty to forty 8-inch lollipop sticks (I used 6-inch sticks purchased from Michael's)

1 pound chocolate, finely chopped – you can use all one kind or half and half of dark, milk, or white (Alternately, you can use 1 pound of flavored coatings, also known as summer coating, confectionary coating or wafer chocolate – candy supply stores carry colors, as well as the three kinds of chocolate.)

2 tablespoons vegetable shortening

(Note: White chocolate is harder to use this way, but not impossible)

Assorted decorations such as chopped nuts, colored jimmies, crushed peppermints, mini chocolate chips, sanding sugars, dragees) - Optional

Position oven rack in the middle of the oven and preheat to 325 degrees F. Set some water to boil.

In a large bowl, beat together the cream cheese, sugar, flour, and salt until smooth. If using a mixer, mix on low speed. Add the whole eggs and the egg yolks, one at a time, beating well (but still at low speed) after each addition. Beat in the vanilla and cream.

Grease a 10-inch cake pan (not a springform pan), and pour the batter into the cake pan. Place the pan in a larger roasting pan. Fill the roasting pan with the boiling water until it reaches halfway up the sides of the cake pan. Bake until the cheesecake is firm and slightly golden on top, 35 to 45 minutes.

Remove the cheesecake from the water bath and cool to room temperature. Cover the cheesecake with plastic wrap and refrigerate until very cold, at least 3 hours or up to overnight.

When the cheesecake is cold and very firm, scoop the cheesecake into 2-ounce balls and place on a parchment paper-lined baking sheet. Carefully insert a lollipop stick into each cheesecake ball. Freeze the cheesecake pops, uncovered, until very hard, at least 1 – 2 hours.

When the cheesecake pops are frozen and ready for dipping, prepare the chocolate. In the top of a double boiler, set over simmering water, or in a heatproof bowl set over a pot of simmering water, heat half the chocolate and half the shortening, stirring often, until chocolate is melted and chocolate and shortening are combined. Stir until completely smooth. Do not heat the chocolate too much or your chocolate will lose it’s shine after it has dried. Save the rest of the chocolate and shortening for later dipping, or use another type of chocolate for variety.

Alternately, you can microwave the same amount of chocolate coating pieces on high at 30 second intervals, stirring until smooth.

Quickly dip a frozen cheesecake pop in the melted chocolate, swirling quickly to coat it completely. Shake off any excess into the melted chocolate. If you like, you can now roll the pops quickly in optional decorations. You can also drizzle them with a contrasting color of melted chocolate (dark chocolate drizzled over milk chocolate or white chocolate over dark chocolate, etc.) Place the pop on a clean parchment paper-lined baking sheet to set. Repeat with remaining pops, melting more chocolate and shortening (or confectionary chocolate pieces) as needed.

Refrigerate the pops for up to 24 hours, until ready to serve.

Makes 30 – 40 Pops

Tuesday, April 22, 2008

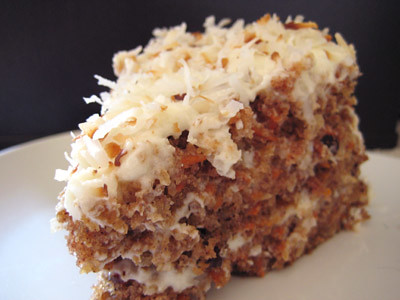
TWD: Bill's Big Carrot Cake


Well, I've still got some mild sniffles and it took a few days for me to be able to use my hand again without too much pain, but I'm happy to report that I'm better now. You don't realize how much you grasp things in day to day life until you lose the ability to do so (I wasn't even able to turn a door knob or start my car engine!). So needless to say, I'm happy to be back in the kitchen and baking again :) Thank you to all who left me comments with get well wishes.

This week's Tuesdays with Dorie (TWD) recipe was chosen by Amanda of Slow like honey: Bill's Big Carrot Cake. Who's Bill you ask? Apparently he was one of Dorie's friends. Not a baker, but a jeweler... with a recipe so good that Dorie calls it "perfect."

I was eager to try this recipe, because after deeming the Pastry Queen's carrot cake the best carrot cake ever, I wasn't sure how Dorie's (err, Bill's) recipe would compare. I have to say that the jury's still out--my husband and I can't come to an agreement. Don't get me wrong; this was a very good carrot cake. It did not last very long in our household. It was completely consumed by five people within a twenty-four hour period! (It was great for breakfast!) It had a nice, chunky texture, as all carrot cakes should, with the dried cranberries and nice big pieces of shredded carrots and coconut (I omitted the nuts). The cinnamon spice was probably one of the more prominent flavors in this cake. It was moist, but very dense. My husband said that this carrot cake was better, but I still feel that the Pastry Queen's carrot cake is the best. Her carrot cake has pineapple in it, which I really love. It's also more moist and light. I really feel that the coconut cream that is in both the cake and the frosting are what make that carrot cake special. I really enjoyed the dried cranberries in Dorie's version, however, so the next time I make a carrot cake I think will use the Pastry Queen's recipe and just add the dried cranberries to it.


I did run across a small problem with this cake. My layers sunk quite a bit in the middle. I'm not sure exactly why. Initially they were only slightly sunken, but after I opened the oven midway through baking to rotate the cake pans, they seemed to sink even more. So I had to even out my cakes with a serrated knife before assembling the whole cake. As a result, the layers wouldn't have looked as pretty if I had only frosted between the layers (as depicted in the cookbook) so I frosted the entire cake and the decorated it with toasted coconut.


Thanks Amanda, for picking this week's recipe. I've been curious to try this recipe. While it was indeed a very good carrot cake, I think I will stick to the Pastry Queen's recipe. Make sure you check out the Tuesdays with Dorie blogroll to see everyone else's beautiful cakes.


Bill's Big Carrot Cake
from Baking: From My Home to Yours, by Dorie Greenspan

Ingredients:
For the cake:
2 cups all purpose flour
2 teaspoons baking powder
2 teaspoons baking soda
2 teaspoons ground cinnamon
¾ teaspoon salt
3 cups grated carrots (about 9 carrots, you can grate them in food processor fitted w/ a shredding a blade or use a box grater) (I bought a 10 oz bag of pre-shredded carrots and it was enough)
1 cup coarsely chopped walnuts or pecans (I omitted these)
1 cup shredded coconut (sweetened or unsweetened)
½ cup moist, plump raisins (dark or golden) or dried cranberries (I used cranberries)
2 cups sugar
1 cup canola oil
4 large eggs

For the frosting:
8 ounces cream cheese, room temperature
1 stick (8 tablespoons) unsalted butter, at room temperature
1 pound or 3 and ¾ cups confectioners' sugar, sifted
1 tablespoon fresh lemon juice or ½ teaspoon pure lemon extract
½ cup shredded coconut (optional)
Finely chopped toasted nuts and/or toasted shredded coconut (optional)

Getting ready: Position the racks to divide the oven into thirds and preheat the oven to 325 degrees Fahrenheit. Butter three 9-x-2-inch round cake pans, flour the insides, and tap out the excess. Put the two pans on one baking sheet and one on another.

To make the cake: Whisk the flour, baking powder, baking soda, cinnamon and salt. In another bowl, stir together the carrots, chopped nuts, coconut, and raisins.

Working with a stand mixer, preferably fitted with a paddle attachment, or with a hand mixer in a large bowl, beat the sugar and oil together on a medium speed until smooth.


Add the eggs one by one and continue to beat until the batter is even smoother.


Reduce the speed to low and add the flour mixture, mixing only until the dry ingredients disappear.


Gently mix the chunky ingredients. Divide the batter among the baking pans.


Bake for 40-50 minutes, rotating the pans from top to bottom and front to back at the midway point, until a thin knife inserted into the centers comes out clean. The cakes will have just started to come away from the sides of the pans. Transfer the cakes to cooling racks and cool for about 5 minutes, then run a knife around the sides of the cakes and unmold them. Invert and cool to room temperature right side up.

The cakes can be wrapped airtight and kept at room temperature overnight or frozen for up to 2 months.

To make the frosting: Working with a stand mixer, preferably fitted with a paddle attachment or with a hand mixer in a large bowl, beat the cream cheese and butter together until smooth and creamy. Gradually add the sugar and continue to beat until the frosting is velvety smooth. Beat in the lemon juice or extract.

If you'd like coconut in the filling, scoop about half of the frosting and stir the coconut into this position.

To assemble the cake:
(I used a long serrated knife and a gentle sawing motion to even out my cake layers before assembling the cake.)
Put one layer top side up on a cardboard cake round or a cake plate protected by strips of wax or parchment paper. If you added the coconut to the frosting, use half of the coconut frosting to generously cover the first layer (or generously cover with plain frosting). Use an offset spatula or a spoon to smooth the frosting all the way to the edges of the layer. Top with the second layer, this time placing the cake stop side down, and frost with the remainder of the coconut frosting or plain frosting. Top with the last layer, right side up, and frost the top- and the sides- of the cake. Finish the top with swirls of frosting. If you want to top the cake with toasted nuts or coconut, sprinkle them on now while the frosting is soft.

Refrigerate the cake for 30 minutes, just to set the frosting before serving.

Serving: This cake can be served as soon as the frosting is set. It can also wait, at room temperature and covered with a cake keeper overnight. The cake is best served in thick slices at room temperature and while it's good plain, it's even better with vanilla ice cream or some lemon curd.

Storing: The cake will keep at room temperature for 2 to 3 days. It can also be frozen. Freeze it uncovered, then when it's firm, wrap airtight and freeze for up to 2 months. Defrost, still wrapped, overnight in the refrigerator.

Yield: 10 servings

Tuesday, April 15, 2008

I'm Back, But No Marshmallows Here


This week's Tuesdays with Dorie (TWD) recipe was chosen by Judy of Judy's Gross Eats: Marshmallows. I was excited to find out that this was the chosen recipe, as I've heard that homemade marshmallows are so much better than the store-bought kind. I'm afraid you won't find any marshmallows here, though. We're finally back from our vacation and I had every intention of making them after we returned late last Tuesday night. Unfortunately, I was severely jet lagged and still had to go to work Wednesday morning. My lack of sleep caused me to catch the nasty cold my dear husband got on our trip back (which I now believe was the flu), so I was planning on making them over the weekend after I felt a little better. Then came Saturday, when a dog tried to take my hand off. I was bitten multiple times - luckily it didn't break the skin and all I got was a bad contusion. But it caused my hand to be extremely swollen and painful and I was unable to use it for anything - including making marshmallows! So make sure you visit the Tuesdays with Dorie blog to see everyone else's fluffy creations.

I was hoping to also post some pictures from our vacation, but between getting sick and hurting my hand, that's all been put on the back burner. I will post as soon as I can though. Hopefully I'll be back and baking next week... so stay tuned for Bill's Big Carrot Cake next Tuesday.

In case you are interested, here is the recipe for the marshmallows...

Marshmallows
from Baking: From My Home to Yours, by Dorie Greenspan

About 1 cup potato starch (found in the kosher foods section of supermarkets) or cornstarch
2 tablespoons light corn syrup
2 1/4-ounce packets unflavored gelatin
3 large egg whites, at room temperature
3/4 cup cold water
1 tablespoon pure vanilla extract
1 1/4 cups plus 1 tablespoon sugar

Getting Ready:
Line a rimmed baking sheet -- choose one with a rim that is 1 inch high -- with parchment paper and dust the paper generously with potato starch or cornstarch. Have a candy thermometer at hand.

Put 1/3 cup of the water, 1 1/4 cups of the sugar and the corn syrup in a medium saucepan over medium heat. Bring the mixture to a boil, stirring until the sugar dissolves. Once the sugar is dissolved, continue to cook the syrup -- without stirring -- until it reaches 265 degrees F on the candy thermometer, about 10 minutes.

While the syrup is cooking, work on the gelatin and egg whites. In a microwave-safe bowl, sprinkle the gelatin over the remaining cold water (a scant 7 tablespoons) and let it sit for about 5 minutes, until it is spongy, then heat the gelatin in a microwave oven for 20 to 30 seconds to liquefy it. (Alternatively, you can dissolve the gelatin in a saucepan over low heat.)

Working in the clean, dry bowl of a stand mixer fitted with the whisk attachment or in another large bowl with a hand mixer, beat the egg whites on medium-high speed until firm but still glossy -- don't overbeat them and have them go dull.

As soon as the syrup reaches 265 degrees F, remove the pan from the heat and, with the mixer on medium speed, add the syrup, pouring it between the spinning beater(s) and the sides of the bowl. Add the gelatin and continue to beat for another 3 minutes, so that the syrup and the gelatin are fully incorporated. Beat in the vanilla.

Using a large rubber spatula, scrape the meringue mixture onto the baking sheet, laying it down close to a short end of the sheet. Then spread it into the corners and continue to spread it out, taking care to keep the height of the batter at 1 inch; you won't fill the pan. Lift the excess parchment paper up to meet the edge of the batter, then rest something against the paper so that it stays in place (I use custard cups).

Dust the top of the marshmallows with potato starch or cornstarch and let the marshmallows set in a cool, dry place. They'll need about 3 hours, but they can rest for 12 hours or more.

Once they are cool and set, cut the marshmallows with a pair of scissors or a long thin knife. Whatever you use, you'll have to rinse and dry it frequently. Have a big bowl with the remaining potato starch or cornstarch at hand and cut the marshmallows as you'd like -- into squares, rectangles or even strips (as they're cut in France). As each piece is cut, drop it into the bowl. When you've got 4 or 5 marshmallows in the bowl, reach in with your fingers and turn the marshmallows to coat them with starch, then, one by one, toss the marshmallows from one hand to the other to shake off the excess starch; transfer them to a serving bowl. Cut and coat the rest of the batch.

Yield: about 1 pound marshmallows

Serving:
Put the marshmallows out and let everyone nibble as they wish. Sometimes I fill a tall glass vase with the marshmallows and put it in the center of the table -- it never fails to make friends smile. You can also top hot chocolate or cold sundaes with the marshmallows.

Storing: Keep the marshmallows in a cool, dry place; don't cover them closely. Stored in this way, they will keep for about 1 week -- they might develop a little crust on the outside or they might get a little firmer on the inside, but they'll still be very good.
Playing Around

Raspberry Marshmallows:
Fruit purees are excellent for flavoring these candies.

For raspberry marshmallows, you'll need a generous 1/3 cup of puree; reduce the vanilla extract to 1/4 teaspoon. After the batter is mixed, gently fold in the puree with a rubber spatula. You can use the same measurements and technique for other purees, such as strawberry, mango and passion fruit.

Cappuccino Marshmallows:
Sift 1/4 cup unsweetened cocoa powder, 2 tablespoons instant espresso powder and 1/2 teaspoon ground cinnamon together into a small bowl. Stir in 1/3 cup boiling water and mix until smooth. Reduce the vanilla extract to 1/2 teaspoon, and add it to the espresso mix. After you add the sugar syrup and gelatin to the meringue, beat in the espresso mixture and continue.

Light Chocolate Marshmallows:
Melt 3 ounces bittersweet or semisweet chocolate and stir in 2 1/2 tablespoons unsweetened cocoa powder. Reduce the vanilla extract to 1/4 teaspoon, and after the marshmallow batter is mixed, fold in the chocolate mixture with a large rubber spatula.

Pumpkin Spice Marshmallows:
Whisk together 1/2 cup canned unsweetened pumpkin puree, 1 teaspoon ground cinnamon, 1/2 teaspoon ground ginger, a pinch of freshly grated nutmeg and a pinch of ground allspice. After the marshmallow batter is mixed, fold in the spiced pumpkin with a large rubber spatula.

Tuesday, April 8, 2008

TWD: The Most Extraordinary French Lemon Cream Tart


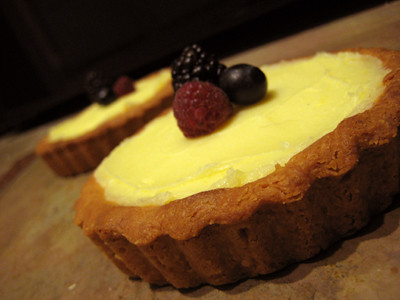
This week's Tuesdays with Dorie (TWD) recipe was chosen by Mary of Starting from Scratch: the Most Extraordinary French Lemon Cream Tart. That's quite a name to live up to, but I can tell you that this tart certainly earns its title! The crust is buttery and flaky and wow... the filling! It is definitely more tart, than sweet, which I loved! Despite the amount of butter in it, it does not taste heavy at all. Dorie accurately describes it as having the "airy texture of lemon-cream dreams."


For this recipe I decided that instead of making a single 9-inch tart, that I would make cute little tartlets instead. I halved the lemon cream recipe but actually used the full Sweet Tart Dough recipe. This yielded three 4-inch tartlets which were just the perfect size for consumption :) If you make the crust a tad thinner, you could probably get four tartlets from the sweet tart dough recipe. My crusts are more on the golden side, as Dorie states that "a well-baked golden brown crust has more taste than an underbaked one and more texture too--the better baked the curst, the livelier the contrast with the soft, creamy filling." In order to get my crust nice and golden without burning the edges, I had to adjust Dorie's instructions a bit. I left the foil on the tartlets for 25 minutes, as directed, then removed the foil. I let the edges of the crust brown, and then I cut a hole in the center of the foil pieces I was using and put them back on the tartlets until the centers were golden. (This was similar to what I had to do with the Russian Grandmother's Apple Pie-cake.)


I got quite the workout making the creamy lemon filling for this tart. Dorie says that it can take up to 10 minutes for it to reach 180F, depending on how much heat you're giving the cream. It thickened up for me after about 15 minutes, but the temperature was still hovering around 160F so I wasn't sure if I needed to continue heating it further. So I whisked on... and on... and on... for a full thirty minutes! (Boy, was my arm cramping!) In the end, I only got it up to 172F, but figured that if it hadn't reached 180F after thirty minutes, it probably never would. So I took it off the heat and crossed my fingers that I had cooked it adequately. Thankfully, I think the lemon cream still came together nicely - it was nice and thick and very easy to spread into the tart shells. Since I was leaving on vacation, I made this before any comments were left on the TWD blog - apparently many others had problems getting their cream up to temperature as well. Some said that using a metal bowl instead of glass will work better, and Dorie said that as long as you get up to 165F, you should be fine. So next time, I think I will probably just stop after it has thickened and looks to be the right consistency and just use the thermometer as a rough guideline. I probably cooked it much longer than necessary this time around.


These tarts were amazing! The aroma of the lemon zest and sugar coming together is just a small indication of how wonderful and lemony these tarts are. I think they would be the perfect dessert to make for dinner guests, as they are simple to make and you can make each individual component ahead of time and then assemble right before serving (note that the lemon cream needs to be refrigerated for at least 4 hours before serving). Plus, most people are generally impressed with tarts. It's a nice, light dessert that would be a great way to end any meal, but it would particularly balance out a heavier meal.

Thanks Mary, for picking this week's recipe. This was only my second time making a tart and after trying this wonderful tart, I look forward to making many more! Make sure you check out the Tuesdays with Dorie blogroll to see everyone else's lemony creations.


The Most Extraordinary French Lemon Cream Tart
from Baking: From My Home to Yours, by Dorie Greenspan


Tart
1 cup sugar
Grated zest of 3 lemons
4 large eggs
¾ c fresh lemon juice (from 4-5 lemons)
2 sticks plus 5 T butter (10 ½ ounces) unsalted butter, cut into tablespoon size pieces, at room temperature.
1 9-inch tart shell made with sweet tart dough (see below).

Getting ready:
Have a instant-read thermometer, a strainer and a blender (1st choice) or food processor at hand. Bring a few inches of water to a simmer in a saucepan.

Put the sugar and zest in a large heatproof bowl that can be set over the pan of simmering water. Off the heat, rub the sugar and zest together between your fingers until the sugar is moist, grainy, and very aromatic. Whisk in the eggs, followed by the lemon juice.

Set the bowl over the pan and start stirring with the whisk as soon as the mixture fees tepid to the touch. Cook the lemon cream until it reaches 180 degrees F. As you whisk- you whisk constantly to keep the eggs from scrambling- you’ll see that the cream will start out light and foamy, then the bubbles will get bigger, and then, as it gets closer to 180F, it will start to thicken and the whisk will leave tracks. Heads up at this point- the tracks mean the cream is almost ready. Don’t stop whisking or checking the temperature, and have patience- depending on how much heat you’re giving the cream, getting to temp may take as long as 10 minutes.

As soon as it reaches 180F, remove the cream from the heat and strain it into the container of the lender (or food processor); discard the zest. Let the cream stand, stirring occasionally, until it cools to 140 degrees F, about 10 minutes.

Turn the blender to high (or turn on the processor) and, with the machine going, add the butter about 5 pieces at a time. Scrape down the sides of the container as needed as you incorporate the butter. Once the butter is in, keep the machine going- to get the perfect light, airy texture of lemon-cream dreams, you must continue to bend the cream for another 3 minutes. If your machine protests, and gets a bit too hot, work in 1-minute intervals, giving the machine a little rest between beats.

Pour the cream into a container, press a piece of plastic wrap against the surface to create an airtight seal and refrigerate at least 4 hours, or overnight. (The cream will keep in the fridge for 4 days or, tightly sealed, in the freezer for up to 2 months; thaw it overnight in the refrigerator.)

When you are ready to assemble the tart, just whisk the cream to loosen it and spoon it into the tart shell. Serve the tart, or refrigerate until needed.

Sweet Tart Dough
1 ½ cups all purpose flour
½ cup confectioners’ sugar
¼ tsp salt
1 stick plus 1 tablespoon (9 T) very cold (or frozen) unsalted butter, cut into small pieces
1 large egg yolk

Put the flour, sugar, and salt in a food processor and pulse a couple of times to combine. Scatter the pieces of butter over the dry ingredients and pulse until the butter is coarsely cut in- you should have some pieces the size of oatmeal fakes and others the size of peas. Stir the yolk, just to break it up, and add it a little at a time, pulsing after each addition. When the egg is in, process in long pulses- about 10 seconds each- until the dough, which will look granular soon after the egg is added, forms clumps and curds. Just before you reach this stage, the sound of the machine working the dough will change- heads up. Turn the dough out onto a work surface and, very lightly and sparingly, knead the dough just to incorporate and dry ingredients that might have escaped mixing.

To press the dough into the pan: butter a 9-inch fluted tart pan with a removable bottom. Press the dough evenly over the bottom and up the sides of the pan, using all but one little piece of dough, which you should save in the refrigerator to patch any cracks after the crust is baked. Don’t be too heavy handed- press the crust in so that the edges of the pieces cling to one another, but not so hard that the crust loses its crumbly texture. Freeze the crust for at least 30 minutes, preferable longer, before baking.

To partially or fully bake the crust: center a rack in the center of the oven and preheat to 375 degrees F.

Butter the shiny side of aluminum foil and fit the foil, buttered side down, against the crust. (Since you froze it, you can bake it without weights). Put the tart pan on a baking sheet and bake the crust for 25 minutes. Carefully remove the foil. If the crust has puffed, carefully press it down with the back of a spoon. For partially baked crust, patch the crust if necessary, then transfer the crust to a cooling rack. To fully bake the crust, bake for another 8 minutes or so, or until it is firm and golden brown. Transfer pan to a rack and cool the crust to room temperature before filling.

Thursday, April 3, 2008

Mojito Chicken


I miss living in California. Being able to drive just 30 minutes to the beach. All the beautiful sunshine and mild winters. And Trader Joe's. Yep, one of the things I really miss about living in CA is having access to Trader Joe's. They have such a great selection of food there, and at such reasonable prices. And after seeing on Peabody's blog that they have chocolate covered sunflower seeds, I am even more sad that I do not live near one. I know that they've expanded and you can now find them in several other states. In fact, after living in North Carolina for 6 years, they finally opened up a store close to where I lived... right before I moved! I was so upset that I only got to shop there once before we had to relocate, and now I am stuck again living nowhere near a Trader's Joes.


So, needless to say, whenever I am near one, I like to stock up :) I had heard some good things about their Mojito Simmer Sauce, and being that the mojito is one of my favorite drinks (a Cuban cocktail consisting of rum, sugar cane juice, lime, club soda, and mint), I knew I had to try it. I only bought two jars on my last trip, though, because I didn't want to stock up on something that I had never tried before.

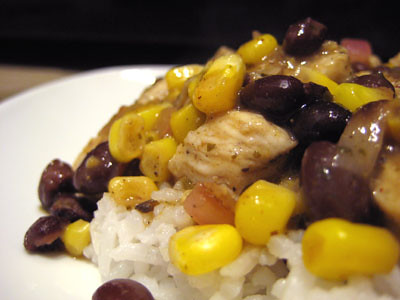
Well, the sauce sat in my pantry for a short while before I figured out what I wanted to do with it. I was presented with the opportunity to use it when I came home from work late one night, with very little time on my hands and very little food in my fridge with which to cook. I had stumbled across and bookmarked this recipe from Envious Edibles, and it looked easy enough to throw together. I had some frozen corn in my freezer, some canned black beans in my pantry, and I always have onions and garlic laying around. I was pleasantly surprised at how quickly this dinner came together, and how flavorful it was!


I'm wasn't sure what Caribbean seasoning was, but my mom had given me some Walkerswood Jamaican Jerk Seasoning that she picked up while in Jamaica and it seemed like it would be a good fit for this dish. I simply added a tablespoon of the seasoning to my chicken, tossed it, and then cooked it. Since the jerk seasoning is already spicy, I omitted the crushed red pepper from the recipe. In writing this blog post, I decided to do a little research to find out where you could get this jerk seasoning without buying an airline ticket to Jamaica :) Looks like you can get it not only from Walkerswood, but you can also get it on Amazon.com!


This was really good. I love that the ingredient list is simple, and that it all comes together in under 30 minutes. I will definitely be making this again (and plan to really stock up on some more Mojito Simmer Sauce the next time I'm at Trader Joe's). I went simple this time and served it with plain rice, but I think it would be great to serve this next time with some cilantro lime rice, rolled up in a burrito.

So tell me, what are your favorite items from Trader Joe's? I'd like to get a list together for the next time I'm there :)

Mojito Chicken
from Envious Edibles

1/2 onion, diced
2 cloves of garlic, diced
2 chicken breasts, cut into bite sized pieces
1 jar of Trader Joe's Mojito Simmer Sauce
1 can of corn, drained (I used 8 oz frozen corn)
1 can of black beans, drained
1 tablespoon of Caribbean seasoning (I used 1 tbsp of Jamaican Jerk Seasoning)
1/3 cup of Bacardi 151 Rum (or any rum of your choice) (I used Jamaican Appleton Estate)
1 pinch of crush red red pepper (I omitted this)

Salt and pepper chicken, sprinkle with Caribbean seasoning, crush red red pepper and cook until brown in small amount of olive oil. Add Rum and cook until alcohol burns off, remove from pan and set aside.

Saute onions and garlic, add corn and black beans. Simmer for just a few minutes, then add simmer sauce and add chicken back into the sauce.

Serve over rice.

Yield: 3-4 Servings.

Tuesday, April 1, 2008

TWD: Gooey Chocolate Cakes


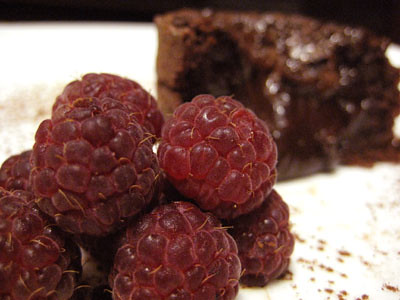
This week's Tuesdays with Dorie (TWD) recipe was chosen by Leigh of Lemon Tartlet: Gooey Chocolate Cakes. If you've been reading my blog, you'll remember reading a post I wrote not too long ago where I talked about these ooey gooey molten chocolate lava cakes! I have only made this type of cake once, and it was from a box mix (that was before I realized how easy these are to make from scratch!). When I received Dorie's book, this recipe was one of the many to catch my eye. I've seen several recipes for this type of cake, but I knew that I wanted to try Dorie's version. So I was really excited when I saw that Leigh had chosen these for this week's TWD.


After our honeymoon, I had my heart set on making these. So much so that I added this pan to my Christmas wish list :) The cake pan is perfect for these gooey chocolate cakes, but is also great for making muffins and mini cheesecakes. If you're not in the market to purchase yet another cake pan, Dorie points out that disposable aluminum foil muffin pans are also perfect for making these.


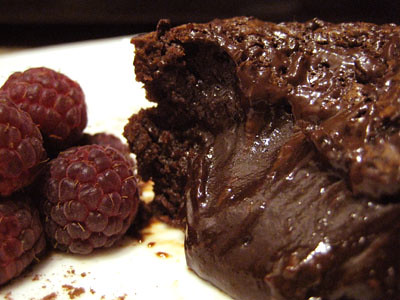
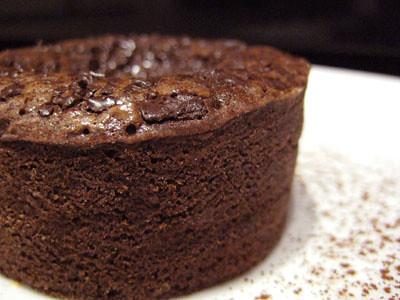
These were so good! This is definitely going to be my go-to molten chocolate lava cake recipe from now on. What I love about these is that they will satisfy any chocolate craving you have, and yet they are so simple to make. They really aren't any more work than a boxed cake mix. So if you're going to be entertaining and want to make something that will impress your guests that won't keep you in the kitchen all night, this is the dessert for you.


The only change I made to this recipe was to use semisweet chocolate instead of bittersweet. I'm not a fan of dark chocolate and as Dorie points out, "the most important rule to remember in making these individual cakes is to use not only the best chocolate you can find, but the chocolate you most love to eat, since that's the ingredient you will taste." I took this opportunity to use the TCHO chocolate I received from Blake Makes.


I simply used 4 ounces of semisweet chocolate chips for the batter and then 1 ounce of the TCHO chocolate to decorate the tops. My only complaint is that this recipe yielded only 4 small cakes for me, instead of the 6 that Dorie said it would. I think the cakes would have been really small if I had made 6 cakes with the batter.


Thanks Leigh, for picking this week's recipe. This was my first time making chocolate lava cakes from scratch and it certainly won't be the last! Make sure you check out the blog roll on the Tuesdays with Dorie blog to see everyone else's gooey creations.

Gooey Chocolate Cakes
from Baking: From My Home to Yours, by Dorie Greenspan

1/3 cup all purpose flour
3 tbsp unsweetened cocoa powder
1/4 tsp salt
5 ounces bittersweet chocolate (4 ounces coarsely chopped, 1 ounce very finely chopped)
1 stick (8 tbsp) unsalted butter, cut into 8 pieces
2 large eggs, at room temperature
1 large egg yolk, at room temperature
6 tbsp sugar


Getting Ready:
Center a rack in the oven and preheat the oven to 400°F. Butter (or spray-it's easier) 6 cups of a regular-size muffin pan, preferably a disposable aluminum foil pan, dust the insides with flour and tap out the excess. Put the muffin pan on a baking sheet.

Sift the flour, cocoa and salt together.

Set a heatproof bowl over a saucepan of gently simmering water, put the coarsely chopped chocolate and the butter in the bowl and stir occasionally over the simmering water just until they are melted-you don't want them to get so hot that the butter separates. Remove the bowl form the pan of water.

In a large bowl, whisk the eggs and yolk until homogenous. Add the sugar and whisk until well blended, about 2 minutes. Add the dry ingredients and, still using the whisk, stir (don't beat) them into the eggs. Little by little, and using a light hand, stir in the melted chocolate and butter. Divide the batter evenly among the muffin cups and sprinkle the finely chopped chocolate over the batter.

Bake the cakes for 13 minutes. Transfer them, still on the baking sheet, to a rack to cool for 3 minutes. (There is no way to test that these cakes are properly baked, because the inside remains liquid.)

Line a cutting board with a silicone baking mat or parchment or wax paper, and, after the 3-minute rest, unmold the cakes onto the board. Use a wide metal spatula to lift the cakes onto dessert plates.

Yield: 6 Servings

*Note: For recipe tips, click here.