Sunday, June 29, 2008

Cinnamon Apple Danish Braids

This month's Daring Bakers Challenge was chosen by Kelly of Sass and Veracity and Ben of What's Cookin'?: the Danish Braid. Danish dough is in the family of butter-laminated (or layered) doughs, with puff pastry being the ultimate. While similar to puff pastry, it is sweet and yeast-leavened, while puff pastry is not. While I have recently become comfortable working with yeast, I have never made a laminated dough before, so this was a great challenge and learning experience for me.

This particular Danish dough is a yeast dough, flavored with orange zest, cardamom (I used cinnamon instead), and vanilla. To laminate the dough, it is rolled out thinly, coated with butter, and then folded into thirds, like a tri-fold brochure. This process is repeated several times (or "turns"), resulting in numerous layers of butter and dough. The dough is allowed to rest and chill in the refrigerator between "turns" to allow the butter to firm back up and the gluten in the dough to relax. All the rolling and folding results in a dough that is buttery and flaky.What is great about this recipe is its versatility. While this month's challenge required us to make at least one Danish braid, the recipe yields enough dough to make two braids, so we were also allowed to use any extra dough to make pastries of other shapes as well. I decided to make two smaller braids, and then used the extra dough to make some small croissants and a round pastry.
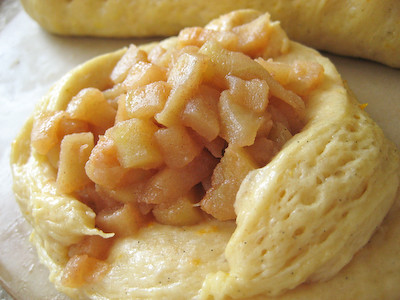
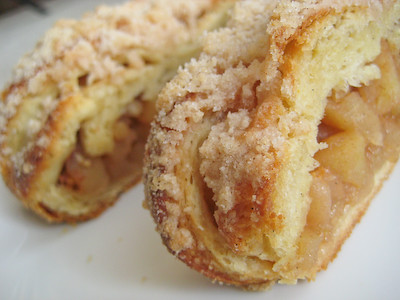
While the challenge instructions included a recipe for an apple filling, we were also allowed to vary the filling, as long as it was made from scratch. I had originally planned on making one braid with the apple filling, and then the second one with a fruit and almond paste or pastry cream filling, but I misread the recipe and did not realize that the apple filling recipe was double what was required for the braids so I ended up with a lot of apple filling! I used way more than the recommended one cup of apple filling in each braid, but still ended up with some left over. I used some of it to fill the round pastry, and then saved the rest for another use. I drizzled the round pastry as well as one of the braids with a simple glaze.

I topped the other braid with a streusel topping, inspired by my favorite apple crumb pie (which I still need to blog about!).
For the mini croissants, I decided to do a chocolate filling.

I've been holding on to my (free) Amano chocolate from Blake Makes for a while now... waiting for the perfect opportunity to use it. I knew this was it. For those who are not familiar with Amano, it is one of the few manufacturers in the U.S. that makes its chocolate from the raw, natural bean. They strive to make the highest-quality product possible by creating the chocolate in small batches with the best ingredients. Since this danish dough was flavored with orange juice and orange zest, I decided to fill these croissants with the Amano Madagascar chocolate. This chocolate has a "mild chocolate flavor, accented with citrus and highlighted by the particularly flavorful Venezuelan bean" - a flavor unique to chocolate from Madagascar.
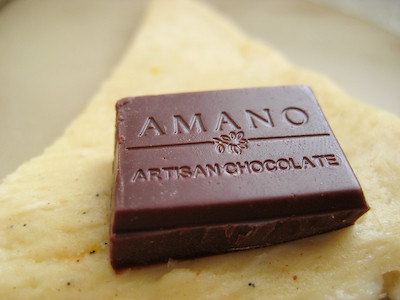
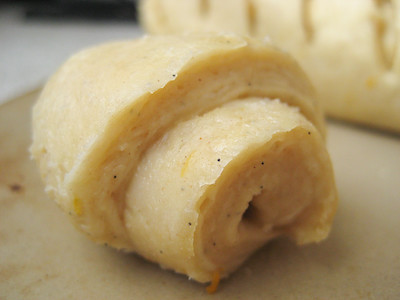
I love chocolate filled croissants, and these were no exception. The citrus undertone of the Amano chocolate really complemented this dough. To satisfy any healthy chocolate craving, I also drizzled these with chocolate and then sprinkled them with a little confectioner's sugar.

Overall, I was very happy with this challenge. I never realized just how easy it is to create your own buttery, flaky goodness :) While initially this challenge seemed very daunting, if you just take it one step at a time, it is very easy to complete. I've included lots of step by step pictures below, but if you still need another visual, you can check out Julia Child's video demonstration here.

The recipe is a bit time consuming (there are three 30 minute chilling intervals as well as one last 5 hour interval for the laminated dough), so I would recommend making it over the course of two days. You can start the laminated dough on the first day, and make the filling during the 30 minute chilling intervals. Then on the second day you can assemble the braid, let it proof, and then bake it.

Never in a million years would I have imagined myself making a Danish braid with laminated dough! So thank you to Kelly and Ben for choosing this recipe. You introduced me to a wonderful new baking technique and now I'm one tiny step closer to attempting puff pastry dough - the ultimate challenge. Make sure you visit the Daring Bakers Blogroll and see everyone else's buttery, flaky creations!

DANISH BRAID
from The Secrets of Baking: Simple Techniques for Sophisticated Desserts, by Sherry Yard

Makes enough for 2 large braids

Ingredients1 recipe Danish Dough (see below)
2 cups apple filling, jam, or preserves (see below)
Glaze, optional (see below)
Streusel Topping, optional (see below)

For the egg wash: 1 large egg, plus 1 large egg yolk

1. Line a baking sheet with a silicone mat or parchment paper. On a lightly floured surface, roll the Danish Dough into a 15 x 20-inch rectangle, ¼ inch thick. If the dough seems elastic and shrinks back when rolled, let it rest for a few minutes, then roll again. Place the dough on the baking sheet.

2. Along one long side of the pastry make parallel, 5-inch-long cuts with a knife or rolling pastry wheel, each about 1 inch apart. Repeat on the opposite side, making sure to line up the cuts with those you’ve already made.3. Spoon the filling you’ve chosen to fill your braid down the center of the rectangle.
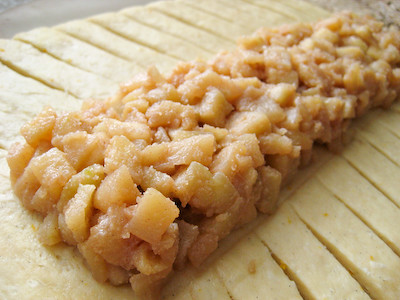
Starting with the top and bottom “flaps”, fold the top flap down over the filling to cover.
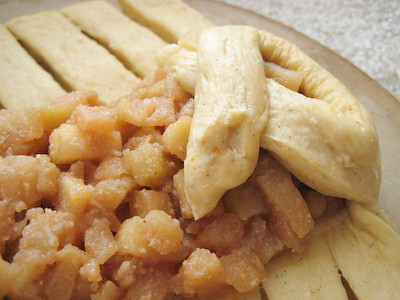
Next, fold the bottom “flap” up to cover filling. This helps keep the braid neat and helps to hold in the filling.
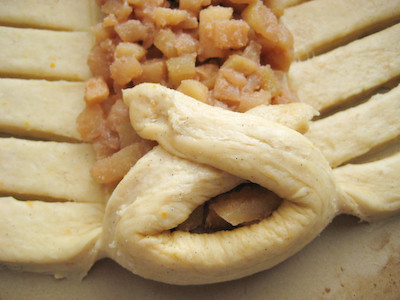
Now begin folding the cut side strips of dough over the filling, alternating first left, then right, left, right, until finished.
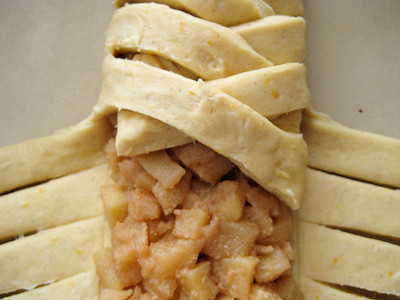
Trim any excess dough and tuck in the ends.

Egg Wash
Whisk together the whole egg and yolk in a bowl and with a pastry brush, lightly coat the braid.

Proofing and Baking
1. Spray cooking oil (i.e. Pam) onto a piece of plastic wrap, and place over the braid. Proof at room temperature or, if possible, in a controlled 90 degree F environment for about 2 hours, or until doubled in volume and light to the touch. (I like to set my oven to 170°F, let it preheat for 30 seconds to let it warm up just a bit, turn it off, and then let the dough rise in the warmed oven.)
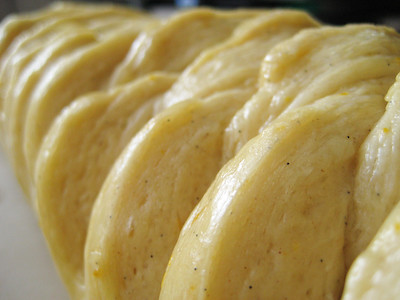
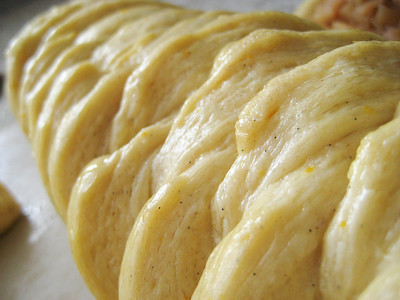
2. Near the end of proofing, preheat oven to 400 degrees F. Position a rack in the center of the oven.

3. Bake for 10 minutes, then rotate the pan so that the side of the braid previously in the back of the oven is now in the front. Lower the oven temperature to 350 degrees F, and bake about 15-20 minutes more, or until golden brown.
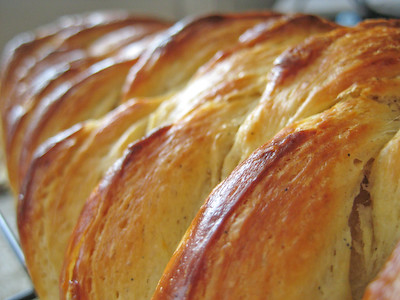
Cool and serve the braid either still warm from the oven or at room temperature. The cooled braid can be wrapped airtight and stored in the refrigerator for up to 2 days, or freeze for 1 month.

DANISH DOUGH

Makes 2-1/2 pounds dough

Ingredients
For the dough (Detrempe)

1 ounce fresh yeast or 1 tablespoon active dry yeast
1/2 cup whole milk
1/3 cup sugar
Zest of 1 orange, finely grated
3/4 teaspoon ground cardamom (I used cinnamon)
1-1/2 teaspoons vanilla extract
1/2 vanilla bean, split and scraped
2 large eggs, chilled
1/4 cup fresh orange juice
3-1/4 cups all-purpose flour
1 teaspoon salt

For the butter block (Beurrage)
1/2 pound (2 sticks) cold unsalted butter
1/4 cup all-purpose flour

DOUGH
Combine yeast and milk in the bowl of a mixer fitted with the paddle attachment and mix on low speed. (I proofed the yeast first by adding 1 tablespoon of sugar (from the 1/3 cup) to lukewarm milk. I dissolved the yeast and sugar in the milk, and let it rest, covered, for about 5 minutes.) Slowly add sugar, orange zest, cardamom, vanilla extract, vanilla seeds, eggs, and orange juice. Mix well. Change to the dough hook and add the salt with the flour, 1 cup at a time, increasing speed to medium as the flour is incorporated. (I kept the paddle attachment on until all of the flour was incorporated, then switched to the dough hook for the kneading. KitchenAid does not recommend using the dough hook at speeds higher than level 2, so using the paddle attachment allowed me to mix the flour it at medium speed.) Knead the dough for about 5 minutes, or until smooth. You may need to add a little more flour if it is sticky. (I had to add almost 3/4 cup more flour. This will vary depending on the humidity of your kitchen and moisture content of your flour, but you can definitely start to see when the dough stops sticking to the sides. It will start to follow the dough hook around as it spins and will start flopping around the bowl in a large ball.) Transfer dough to a lightly floured baking sheet and cover with plastic wrap. Refrigerate for 30 minutes.

Without a standing mixer: Combine yeast and milk in a bowl with a hand mixer on low speed or a whisk. Add sugar, orange zest, cardamom, vanilla extract, vanilla seeds, eggs, and orange juice and mix well. Sift flour and salt on your working surface and make a fountain. Make sure that the “walls” of your fountain are thick and even. Pour the liquid in the middle of the fountain. With your fingertips, mix the liquid and the flour starting from the middle of the fountain, slowly working towards the edges. When the ingredients have been incorporated start kneading the dough with the heel of your hands until it becomes smooth and easy to work with, around 5 to 7 minutes. You might need to add more flour if the dough is sticky.

BUTTER BLOCK
1. Combine butter and flour in the bowl of a mixer fitted with a paddle attachment and beat on medium speed for 1 minute. Scrape down the sides of the bowl and the paddle and then beat for 1 minute more, or until smooth and lump free. Set aside at room temperature.

2. After the detrempe has chilled 30 minutes, turn it out onto a lightly floured surface. Roll the dough into a rectangle approximately 18 x 13 inches and ¼ inch thick. The dough may be sticky, so keep dusting it lightly with flour.

Spread the butter evenly over the center and right thirds of the dough.

Fold the left edge of the detrempe to the right, covering half of the butter.

Fold the right third of the rectangle over the center third.

The first turn has now been completed. Mark the dough by poking it with your finger to keep track of your turns, or use a sticky and keep a tally. Place the dough on a baking sheet, wrap it in plastic wrap, and refrigerate for 30 minutes.

3. Place the dough lengthwise on a floured work surface. The open ends should be to your right and left.
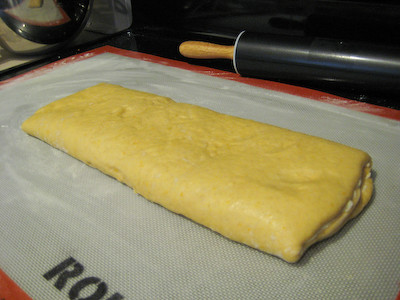
Roll the dough into another approximately 13 x 18 inch, ¼-inch-thick rectangle. (It is recommended that long, continuous strokes be used to roll the dough rather than short, jerky strokes to make sure the butter block is evenly distributed.)
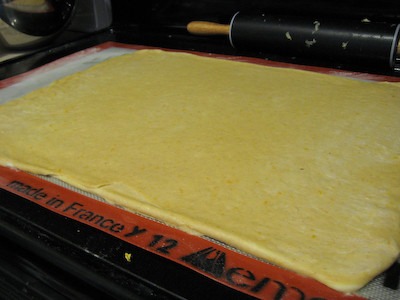
Again, fold the left third of the rectangle over the center third and the right third over the center third. No additional butter will be added as it is already in the dough. The second turn has now been completed. Refrigerate the dough for 30 minutes.

4. Roll out, turn, and refrigerate the dough two more times, for a total of four single turns. Make sure you are keeping track of your turns. Refrigerate the dough after the final turn for at least 5 hours or overnight. The Danish dough is now ready to be used.

If you will not be using the dough within 24 hours, freeze it. To do this, roll the dough out to about 1 inch in thickness, wrap tightly in plastic wrap, and freeze. Defrost the dough slowly in the refrigerator for easiest handling. Danish dough will keep in the freezer for up to 1 month.

APPLE FILLING
Makes 4 cups (enough for two braids or 5 pounds of dough) (I went heavy on the apple filling so I used about 3 to 3-1/2 cups of filling for the 2-1/2 pound dough recipe)

Ingredients
4 Fuji or other apples, peeled, cored, and cut into ¼-inch pieces (I used Granny Smith)
1/2 cup sugar
1 tsp. ground cinnamon
1/2 vanilla bean, split and scraped
1/4 cup fresh lemon juice
2 tablespoons brown sugar
4 tablespoons unsalted butter

Toss all ingredients except butter in a large bowl.

Melt the butter in a sauté pan over medium heat until slightly nutty in color, about 6 - 8 minutes. Then add the apple mixture and sauté until apples are softened and caramelized, 10 to 15 minutes. If you’ve chosen Fujis, the apples will be caramelized, but have still retained their shape. Pour the cooked apples onto a baking sheet to cool completely before forming the braid. (If making ahead, cool to room temperature, seal, and refrigerate.) They will cool faster when spread in a thin layer over the surface of the sheet. After they have cooled, the filling can be stored in the refrigerator for up to 3 days. Left over filling can be used as an ice cream topping, for muffins, cheesecake, or other pastries.

GLAZE
Makes enough to drizzle over 1 recipe Danish dough (2.5 pounds)

1 cup confectioners' sugar
2 teaspoons milk

Mix together confectioners' sugar and milk in a ziplog bag until smooth. Snip the corner of the bag and drizzle icing over danishes.

STREUSEL TOPPING
Makes enough to for 1 recipe Danish dough (2.5 pounds)

1/2 cup sugar
1/2 tsp cinnamon
3/4 cup flour
1/3 cup cold unsalted butter
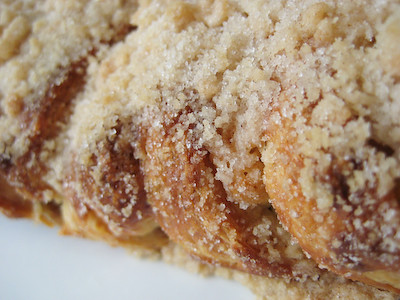
Combine sugar and cinnamon with flour; using two knives or a pastry blender, cut in butter until crumbly. Sprinkle crumb mixture over pastry.
Bake as directed.

Tuesday, June 24, 2008

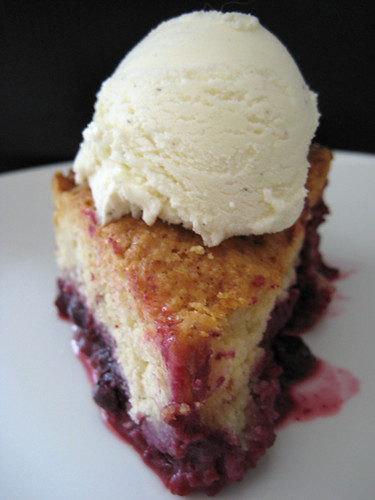
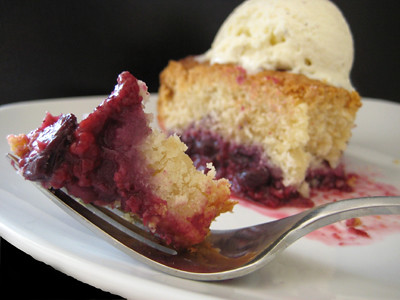
TWD: Mixed Berry Cobbler


This week's Tuesdays with Dorie (TWD) recipe was chosen by Beth of Our Sweet Life: Mixed Berry Cobbler. The great thing about this recipe is that you can make it year round. While fresh berries also work in this, Dorie actually intends for this recipe to be made with a bag of frozen mixed berries. Not only does this make the recipe practical, it also makes it very affordable. You can use any type of frozen berry (individually frozen, not in syrup), but if you are particularly fond of strawberries, you'll have to pare back on them, as they contain too much liquid to be used in this recipe. I used a bag of frozen mixed berries containing blueberries, raspberries, blackberries, and strawberries. I heeded Dorie's warning and only included a few of the strawberries in the bag.


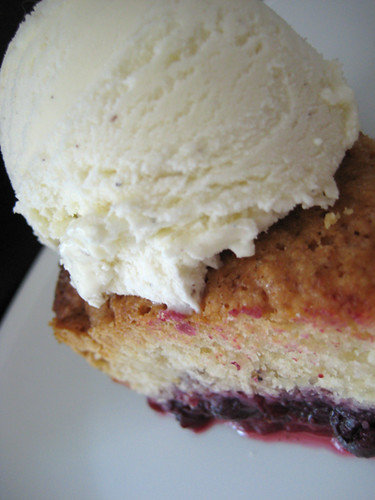
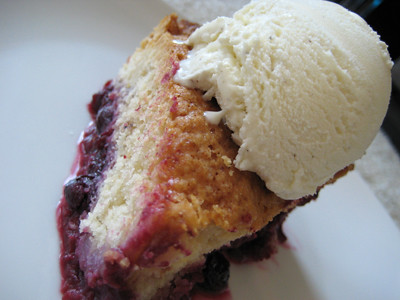
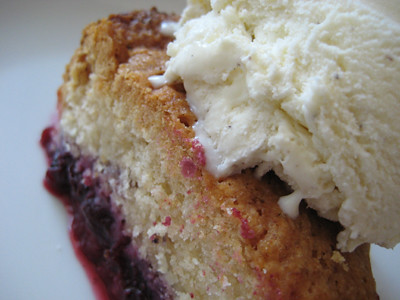
Dorie describes the cobbler topping as biscuit like. I think that's a very appropriate description for the texture of this crust. While several other TWD bakers complained that the crust lacked flavor and did not enjoy it, I thought it was quite good. My only complaint about the recipe is the crust to fruit ratio - there aren't nearly enough berries in this cobbler if you only use the indicated 5 cups. I prefer much more fruit in my cobbler and will probably double the amount of fruit in this the next time I make it. My husband, however, who is a crust lover, had no complaints whatsoever. So I guess it just depends on personal preference! :) I also used a trick I learned from my favorite cobbler recipe when making this - I brushed the top of the crust with some milk and sprinkled it with granulated sugar to add a little extra sweetness and a nice crunch to the the top.


I did have one small problem with this cobbler - the baking time. I found that even at 75 minutes, the upper end of Dorie's recommended baking time, the crust was still raw in the middle. I had to bake it for an additional 30 minutes before it was fully baked throughout. What's nice though, is that Dorie has you cut out a little hole in the middle of the cobbler, which makes it very easy to check the crust for doneness. If you find yourself baking the cobbler for a longer period of time like I did, be sure to cover it up with foil before it goes from golden brown to burnt!


So how did it compare to my favorite cobbler recipe? It was good, but I will probably stick with my old favorite for a few different reasons: (1) the spices add a nice subtle flavor to the crust (2) it uses milk instead of heavy cream and I could not taste a difference in Dorie's crust with the heavy cream - I prefer to consumer fewer calories if possible :) (3) the brown sugar lends the crust a sweeter flavor than the plain white sugar.


Thanks again to Beth for choosing the Mixed Berry Cobbler. It was so simple to make and perfect with a scoop of vanilla ice cream. If you would like the recipe, you can find it here (with recipe tips here), or on Our Sweet Life. Make sure you visit the TWD Blog Roll to see everyone else's cobbled creations.

Tuesday, June 17, 2008

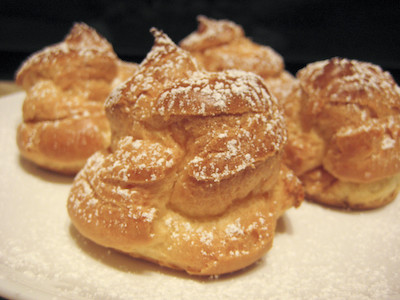
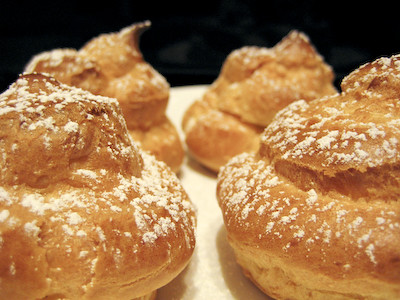
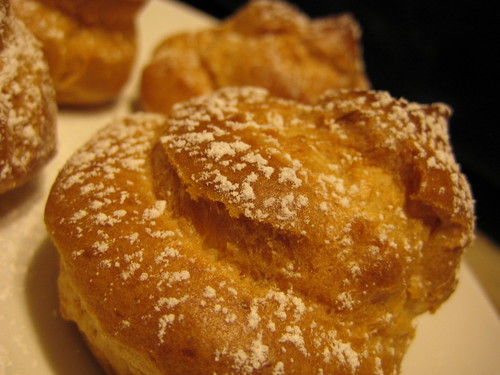
TWD: Chocolate and Peppermint Cream Puffs and Éclairs


This week's Tuesdays with Dorie (TWD) recipe was chosen by Caroline of A Consuming Passion: the Peppermint Cream Puff Ring. It is inspired by the Paris-Brest, shaped like a wheel to commemorate the Paris-to-Brest bicycle race. The pastry is a classic pâte à choux, but instead of buttercream, Dorie fills it with light, tangy and refreshing peppermint cream. In place of a light dusting with confectioner's sugar, Dorie tops this dessert with a beautiful chocolate glaze. Knowing that I would be bringing these in to work, I opted to make mini éclairs and cream puffs instead of the large cream puff ring. I doubled the recipe and was able to make 48 éclairs and 9 cream puffs (I also sent a batch to the hospital with my husband). I had to adjust the baking times a bit (noted below), since they are much smaller.


Growing up, my mom was always baking things for church potlucks. One of the things that was repeatedly requested from her was her cream puffs. I honestly never paid attention to how she made them, but I was always involved in helping her with the assembly process - cutting them open and stuffing them with delicious pastry cream. I've always been intimidated by them - partly because they look so fancy, and partly because it's always hard to live up to something that Mom makes; so I honestly never saw myself even attempting these. That's one of the things that I love about being a part of TWD and the Daring Bakers - they challenge me to make things I would otherwise never make. It's also really nice baking the same recipe with hundreds of other bakers, because you can pick up on helpful tips along the way to ensure your recipe is successful.


For this recipe, I learned from the group that you should let the hot dough cool down a little bit before adding the eggs. So I let my KitchenAid mix the dough for about 1 minute before adding the eggs. Some had their pastry collapse after baking, while others found the center to be soft and eggy. Both problems, I learned, are from under baking. Knowing this, I made sure to let my pastry get nice and golden before removing it from the oven. Some suggested letting them dry out by leaving them in the oven after it is turned off. Since I was making multiple batches, this was not possible for me, but I found this step unnecessary as long as I let them bake until they were thoroughly browned before removing them from the oven. Instead of lining a baking sheet with parchment paper, I simply used a baking stone (and had no problems with sticking).


One of the reasons why I love baking more than cooking is the precision involved with it. I'm not good with subjective measurements like "to taste." So when Dorie instructs you to "whisk the remaining egg in a small bowl and very gradually add enough of the beaten egg to form a dough that is thick, shiny and silky," I was afraid. Very afraid. How would I possibly know when it was "shiny and silky" enough? As I added the egg, I could definitely see it becoming more shiny, but how would I know when it was shiny enough? I hesitantly added more and more egg, watching the dough become shinier and shinier. What would happen if I added too much egg, I wondered? I honestly don't understand enough of the principles behind baking to tell you what would happen if you add too much egg... all I know is that whatever I did, it seemed to work. So, for those who have never made a pâte à choux dough before, I give you a picture of my "thick, shiny and silky" dough:


I had planned on making half with the peppermint cream and the other half with chocolate pastry cream. While the peppermint cream was delicious, it was a little runny and not thick enough to pipe. The only thing I can think of that might have led to this problem was not chilling the cream long enough before whipping it up. It seemed plenty cold after two hours, so I did not wait the full 3 hours as Dorie suggested. I guess I was a little too impatient in this case! So in the end, I only made a handful with the peppermint cream and filled the rest with chocolate pastry cream. While the peppermint cream-filled éclairs were pretty good, I definitely prefer the chocolate pastry cream-filled ones.


Thanks again to Caroline for choosing this week's recipe. After further discussion about the topic, it has been decided that we will continue posting the recipes, but only on the blog of the person who chose the recipe. So if you would like this week's recipe, you can find it here. What I've included below are instructions on how I made my cream puffs and éclairs. Make sure you visit the TWD Blog Roll to see everyone else's lovely cream puffs this week.

*Quick Note: My laptop decided to die on me Monday night so I had to post without the benefit of Adobe Lightroom (if you've never heard of this program, you must download the free 30-day trial!) I know my photos are a bit too dark and leave a lot to be desired right now, but I wanted to post something rather than nothing. I plan to update my post with the edited pictures as soon as I get my computer up and running again.

*Update: The new photos have been updated!


For recipe tips click here.

Chocolate and Peppermint Cream Puffs and Éclairs
Adapted from Baking: From My Home to Yours, by Dorie Greenspan
Full recipe on A Consuming Passion

Pastry Dough (I ended up using about 3 1/2 eggs in mine)
Mint Cream Filling
Chocolate Pastry Cream Filling (recipe below)
Chocolate Glaze (I needed a double recipe for the éclairs and cream puffs)
White Chocolate Chips, optional

Fit a large pastry bag with a 1/2-inch-diameter plain piping tip. If you do not have this size tip, you can use a pastry bag with a 1/2-inch hole. If you do not have a pastry bag, you can simply use a ziploc bag and cut the corner of the bag for piping.

For cream puffs, simply pipe out a spiral shape (similar to a soft serve ice cream cone) until you end with the pointed tip.


For mini éclairs, pipe out a strip of dough approximately 2-3 inches long, then pipe a second strip next to it.

Bake at 425F for 10 minutes, then reduce the oven temperate to 375F. Bake for another 15 to 20 minutes, or until puffed, brown and firm.

To Assemble:
Using kitchen scissors, gently cut around the base of each cream puff or éclair, yielding two separate pieces. You can pull out and discard any soft dough from the inside if needed.

Spoon the mint cream into a clean pastry bag and pipe large rosettes into each cream puff or éclair (if using chocolate pastry cream, you can simply spoon the cream directly into each puff or éclair). If making cream puffs, carefully set the top of each cream puff on to the base-don't press down too hard, you want the top to just rest lightly. Then dust with confectioner's sugar. If making the éclairs, refrigerate the base while you make the glaze.

Once the glaze has been prepared, use a small icing spatula (I simply used a butter knife) to spread the glaze over the top half of the pastry. Carefully set the top over the base - again, don't press down too hard, just allow the top to rest lightly over the base.
Drizzle with melted white chocolate (you can add a small amount of shortening with the chocolate to thin it out) and refrigerate for at least 1 hour before serving.


Yield: 24 Éclairs, 4 Cream Puffs

Chocolate Pastry Cream
from Baking: From My Home to Yours, by Dorie Greenspan

2 cups whole milk
4 large egg yolks
6 tablespoons sugar
3 tablespoons cornstarch, sifted
Pinch of salt
7 ounces bittersweet chocolate, melted (I used semisweet)
2 1/2 tablespoons unsalted butter, cut into bits at room temperature

Bring the milk to a boil in a small saucepan.

Meanwhile, in a medium heavy-bottomed saucepan, whisk the egg yolks together with the sugar, cornstarch and salt until thick and well blended. Still whisking, drizzle in about 1/4 cup of the hot milk-- this will temper, or warm, the yolks so they won't curdle. Whisking all the while, slowly pour in the remainder of the milk. Put the pan over medium heat and, whisking vigorously, constantly and thoroughly (making sure to get the edges of the pot), bring the mixture to a boil. Keep at a boil, still whisking, for 1 to 2 minutes, then remove the pan from the heat.

Whisk in the melted chocolate. Let sit for 5 minutes, then whisk in the bits of butter, stirring until they are full incorporated and the pastry cream is smooth and silky. Scrape the cream into a bowl. You can press a piece of plastic wrap against the surface of the cream to create an airtight seal and refrigerate the pastry cream until cold or, if you want to cool it quickly--as I always do--put the bowl into a larger bowl filled with ice cubes and cold water, and stir the pastry cream occasionally until it is thoroughly chilled, about 20 minutes.

Yield: About 2 1/2 cups

Tuesday, June 10, 2008

TWD: La Palette's Strawberry Tart


This week's Tuesdays with Dorie (TWD) recipe was chosen by Marie of A Year in Oak Cottage: La Palette's Strawberry Tart. It's a tart lined with strawberry jam, then topped with fresh strawberries. It is so named after the café where Dorie first enjoyed it.

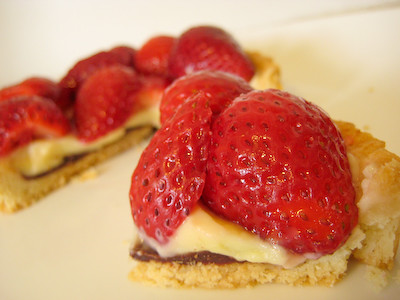
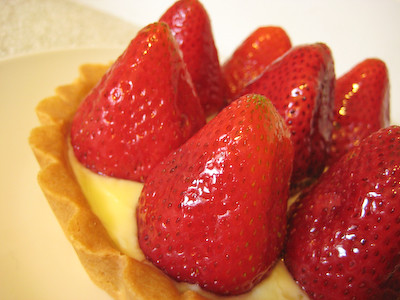
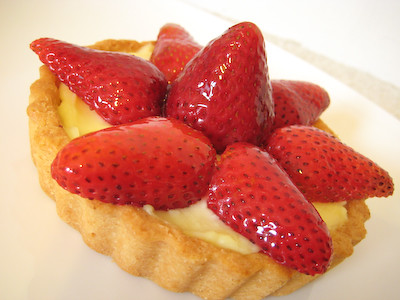
As I read about the recipe, I started thinking about how I could adapt it. The only "playing around" option that Dorie suggests is using different types of fruit in place of the strawberries. I love strawberries, though, so I knew I wanted to stick with the strawberries. Then I remembered the wonderful pastry cream from the brioche raisin snails and got the idea to add it to these tarts in place of the jam. And since I love chocolate covered strawberries, I thought the addition of a chocolate ganache would be perfect.


As I was waiting for the tarts and pastry cream to cool, I started flipping through the book... only to realize that the recipe following La Palette's Strawberry Tart is Dorie's "Quick Classic Berry Tart" which is basically what I had decided to make, just without the chocolate ganache! (Oops!) When I saw this, I knew that I had to at least make one tart into La Palette's Strawberry tart, otherwise I wouldn't really be making the chosen recipe at all.


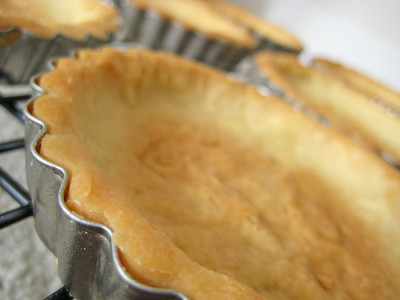
Not a problem, as I do not own a 9" tart pan and had decided to make tartlets. I made a double recipe of Dorie's sweet tart dough, yielding six 4" tartlets and a 7" tart (a single recipe will yield four 4" tartlets).


We previously made the sweet tart dough for The Most Extraordinary French Lemon Cream Tart so I knew that I wouldn't have any problems with it. If you find the edges of your tart beginning to brown too quickly, there are some tips on how to avoid that here.


So of the seven tarts I made, I used one of the 4" tartlets to make La Palette's Strawberry tart. Oddly enough, Dorie suggests embellishing the strawberries with some black pepper. I was a bit hesitant about this, but decided to trust Dorie and added just a touch of pepper. I have to admit that the pepper gave it an delightfully interesting undertone.

La Palette's Strawberry Tart

The strawberries in La Palette's Tart are supposed to be spooned on haphazardly. Dorie actually recommends cutting the crust into slices, then spooning the strawberries onto each slice. Since I was using tartlets, I did not do that, but I did kind of let the strawberries fall into place on the tart without worrying about their arrangement.

La Palette's Strawberry Tart

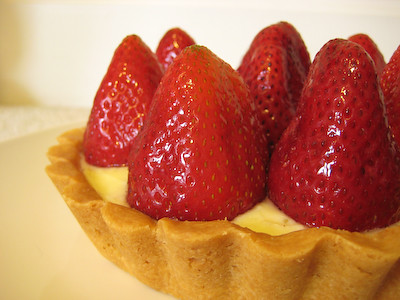
For the other tarts, however, I wanted a less rustic appearance. Being as indecisive as I am, I ended up decorating my tarts in a variety of ways. (And because of the number of different arrangements I created, this post is particularly dense in photos.)


With the exponential growth of the Tuesdays with Dorie group (over 200+ members now!), Laurie has understandably requested that, out of respect to Dorie, we no longer post the full recipe each week. It would take some time, but obviously Dorie's entire cookbook would be on our blogs if we continued to post the recipes each week. I've included the recipe for my pastry cream/ganache adaptation below. Since there are components of this recipe that we have previously made (and posted), I have included links to those below.
*Update: It's been decided that we will simply link to the recipe each week. If you're interested in this week's recipe, you can find it at Serious Eats.


Oh, and the secret to the even glaze on the strawberries? Jell-o. Yep, it's a trick my mom showed me. You prepare the Jell-o as directed and then as it firms up, use a pastry brush to glaze the strawberries. I prefer this to other glazes containing cornstarch.


Thanks again to Marie for choosing this week's recipe. It was a nice change from your traditional fruit tart, though I have to admit that I prefer the pastry cream and ganache combination :) Make sure you visit the TWD Blog Roll to see everyone's beautiful tarts this week.


Strawberry Tart
Adapted from Baking: From My Home to Yours, by Dorie Greenspan

1 1/2 cups Pastry Cream
8 four-inch tartlets made with 2 x Sweet Tart Dough
Chocolate Ganache (recipe below)
2 lbs fresh strawberries
0.75 ounces (1/4 package) of strawberry Jell-o gelatin
3 tablespoons of boiling water
5 tablespoons of cold water


To Assemble the Tart:
Spread about 1 tablespoon of chocolate ganache onto the bottom of the tart, refrigerate for approximately 5-10 minutes to allow it to firm up a bit. Next, spoon enough of the pastry cream into the tart crust to come almost to the rim, then even the surface with a spatula.


Arrange the strawberries on top of the pastry cream in any pattern you would like.


To Prepare the Glaze:
In a small bowl, stir 3 tablespoons of boiling water into the gelatin for approximately 2 minutes, or until completely dissolved. Refrigerate 5 minutes.


Gently add and stir in 5 tablespoons of cold water. Cover and refrigerate.


After the Jell-o has thickened but not completely hardened, use a pastry brush to spread the glaze evenly over all the strawberries. Refrigerate until the glaze is completely set.


Serve the tart as soon as the glaze has set. It is best served on the day it is made. If you need to keep it in the refrigerator for a few hours, make sure to keep it away from any foods with strong odors.

Yield: 8 tartlets


Chocolate Ganache
from the May Daring Baker's Challenge

3.5 ounces premium chocolate
1 1/2 tbsp. heavy cream

Melt the chocolate and heavy cream in a small saucepan. Stir to ensure that it’s smooth and that the chocolate is melted. Set aside to cool completely.