Wednesday, July 30, 2008

Good Things Come in Small Packages


This month's Daring Bakers Challenge was chosen by Chris of Mele Cotte: the Filbert Gateau with Praline Buttercream. Filberts are more commonly known as hazelnuts and a gateau is basically a fancy word for a light sponge cake filled with a rich filling. In this case, that rich filling is a decadent praline buttercream. At first glance, this recipe looks quite similar to the May Daring Bakers Challenge (Opéra Cake). It's a layer cake, soaked in a sugar syrup, filled with buttercream, and topped with a ganache. On the surface, they're very similar - but once you start to make the gateau, you realize that this recipe teaches/hones a few other techniques and skills as well.

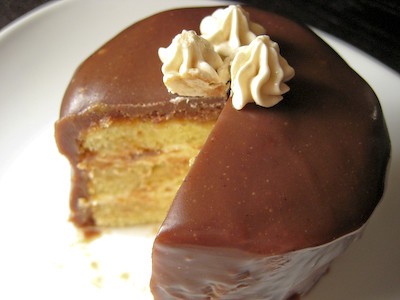
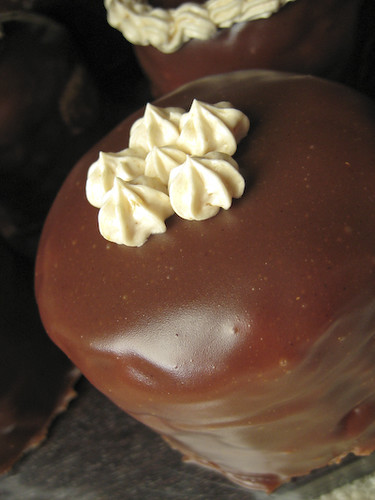
Instead of one large, round cake, I decided to make mini cakes to take to work with me (yes, my coworkers love me!). I had the perfect pan that allowed me to make eight of the most adorable little cakes! I was in such a rush to bake the cakes, that I forgot to butter and flour the pan - thankfully, since the pan has removeable bottoms, I was still able to easily remove them from the pan.

I hate nuts. But I love peanuts and hazelnuts. The most frustrating part of this recipe was dealing with the hazelnuts. I thought about purchasing them online and getting the ones that have already been peeled and roasted, but with the added costs of shipping, I decided I could just as easily buy them locally, roast and peel them myself, and save a little money. Boy did I regret that decision later!


The hazelnuts aren't quite as good if you blanch them before peeling them (it partially cooks them), so I tried just roasting them and then peeling them. The skins don't rub off quite as easily as you would hope - I was only able to peel about half of my hazelnuts using this method. The other half I had to blanch in boiling water, and then roast. It was extremely labor intensive. But when all of the hazelnuts were peeled and I had my pile of hazelnuts skins, I had a huge sense of accomplishment. Look - they look like raked up leaves on an autumn day! :)


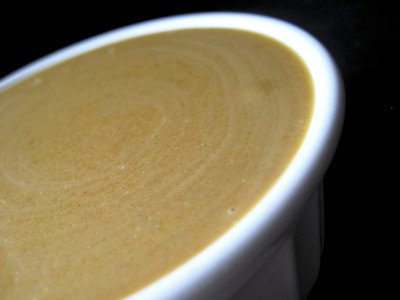
This was my first time making and tasting praline paste - I had actually never heard of it before. You basically make a candy brittle with the hazelnuts by caramelizing sugar and mixing the nuts in, then break the brittle into pieces and process in the food processor until it becomes a thick paste. Pure liquid heaven. I could eat the stuff by the spoonful! This was definitely my favorite component of the challenge. A few other bakers complained about chunks of praline in their praline paste - I initially had similar problems with a stubborn chunk of brittle that refused to liquefy but I simply transferred the bulk of my paste into a small bowl, then continued running my food processor until it was completely smooth.
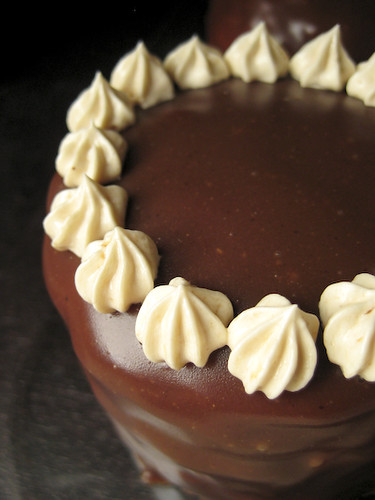

The other big challenge for me in this recipe was in creating a layer cake. I tend to have problems getting my layers cut evenly, or filling the layers nicely. Despite all the tricks in the book (twirling the cake on a stand while holding the knife in one place, marking with toothpicks and cutting, slicing with dental floss, etc.) I always seem to end up with uneven layers. Luckily for me, the mini cake option made cutting the cake much easier. I was able to simply lay the mini cake on its side and slice it like bread with a serrated knife. Some of my layers were less than perfect, but for the most part, I had much more success cutting these layers than I do when cutting a larger cake. I make just stick with cute mini cakes from now on!

As a side note - if you're interested in honing your layer cake skills, check out this new blogging event - Layers of Cake - hosted by Laurie of Quirky Cupcake.
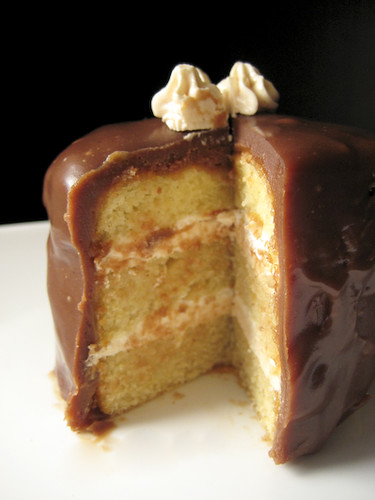

Assembly was straight forward. I brushed each cake layer generously with the sugar syrup, but somehow ended up only using about three quarters of it. One huge difference between this gateau and the Opéra Cake was the cake itself. I found the Opéra Cake's jaconde to be a bit coarse in texture and slightly dry from the almond meal. The genoise in this recipe was so soft and moist in comparison - not coarse at all from the hazelnut meal (perhaps it was the trick of using the strainer in this recipe to avoid any large pieces of nuts?).

I skipped the step where we were supposed to cut the edge of the cake off to smooth it out - I'm guessing that's why my cake didn't turn out perfectly smooth around the edges like it was supposed to. I had some trouble with my ganache being too thin - it just ran over the edges of the cake and into the pan. I had to add an extra two ounces of melted chocolate, and then it was perfect.
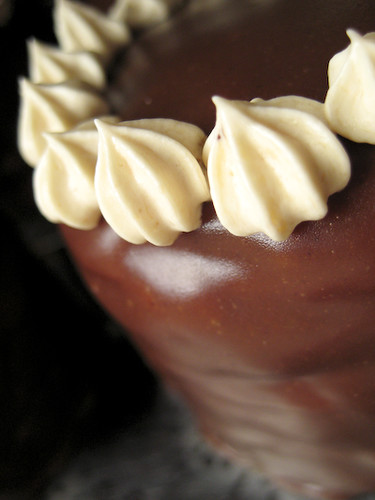

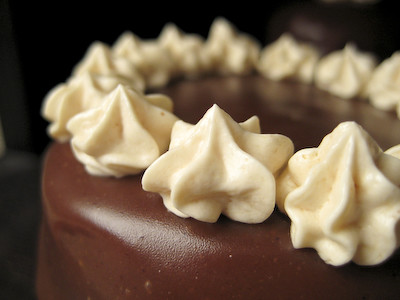
My baking skills have vastly improved since I started this food blog. One thing that remains extremely lacking, however, are my cake decorating skills. This was my first time piping buttercream, and it's pretty obvious! I used my pastry bag and piped a few different designs on these mini cakes, but they still looked very amateur. I hope to be able to take cake decorating courses some day.


Be sure you heed the recommendation to leave the cake to sit at room temperature before serving. I did not initially see this and had my first few bites of this cake after it was well chilled. It was good, but the buttercream was too firm and the flavors were very mild. After it has been allowed to come to room temperature, the hazelnut, rum, and apricot flavors really shine. This cake was so good!
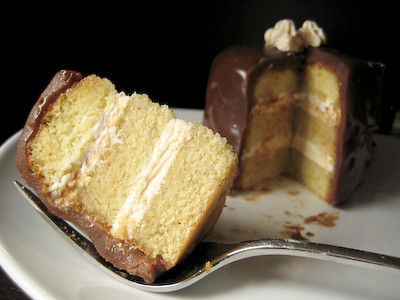

Thank you, Chris, for choosing this fantastic recipe. You challenged me to make a cake that I would have never made on my own. I discovered my love for praline paste, decorated with piped buttercream for the first time, and found out how enjoyable it is to make mini cakes! Make sure you visit the Daring Bakers Blogroll and see all the other beautiful cakes.

Filbert Gateau with Praline Buttercream
from Great Cakes by Carol Walter

1 Filbert Genoise, recipe below
1 recipe sugar syrup, flavored with dark rum, recipe below
1 recipe Praline Buttercream, recipe below
½ cup heavy cream, whipped to soft peaks
1 recipe Apricot Glaze, recipe below
1 recipe Ganache Glaze, prepared just before using, recipe below
3 tablespoons filberts, toasted and coarsely chopped

Filbert Genoise
Because of the amount of nuts in the recipe, this preparation is different from a classic genoise.

1 ½ cups hazelnuts, toasted/skinned*
2/3 cup cake flour, unsifted
2 Tbsp. cornstarch
7 large egg yolks
1 cup sugar, divided ¼ & ¾ cups
1 tsp. vanilla extract
½ tsp. grated lemon rind
5 large egg whites
¼ cup warm, clarified butter (100 – 110 degrees)

* To Skin Hazelnuts: Heat the oven to 300 degrees. Spread the hazelnuts on a baking sheet and toast them in the oven until golden brown, about 15 minutes. Immediately rub the hazelnuts between your fingers or the folds of a clean kitchen towel to remove their skins. You can use a paring knife to scrape the stubborn ones that won't come off otherwise. If there are too many to do this, bring water to a boil in a large saucepan, toss the hazelnuts in there for 30 seconds, then drain and rinse with cold water to stop the cooking process. The skins should easily come off now. Place them back in the oven for a few minutes to toast them.

** To Make Clarified Butter:
Melt butter over low heat; use a spoon to remove the foam from the top. Let the butter sit for a few minutes to let all the milk solids sink to the bottom - you want the clear yellow liquid layer in the middle. (You need to use about 25% more butter than the desired amount of clarified butter you need. In this case, you should use 1/3 cup of butter to yield the desired 1/4 cup.)

Position rack in the lower 3rd of the oven and preheat to 350 degrees. Grease and flour a 10” X 2” inch round cake pan.

Using a food processor, process nuts, cake flour, and cornstarch for about 30 seconds. Then, pulse the mixture about 10 times to get a fine, powdery mixture. You’ll know the nuts are ready when they begin to gather together around the sides of the bowl. While you want to make sure there aren’t any large pieces, don’t over-process. Set aside.

Put the yolks in the bowl of an electric mixer (if you only have one mixer bowl, skip to the next paragraph and whisk the egg whites first to avoid any residual yolks in your bowl that might interfere with the whipping of the whites - then transfer the whites to a bowl and proceed with the yolks; no need to wash the bowl in between), with the whisk attachment, and beat until thick and light in color, about 3-4 minutes on med-high speed. Slowly, add ¾ cup of sugar. It is best to do so by adding a tablespoon at a time, taking about 3 minutes for this step. When finished, the mixture should be ribbony. Blend in the vanilla and grated lemon rind. Remove and set aside.

Place egg whites in a large, clean bowl of the electric mixer with the whisk attachment and beat on medium speed, until soft peaks. Increase to med-high speed and slowly add the remaining ¼ cup of sugar, over 15-20 seconds or so. Continue to beat for another ½ minute.
Add the yolk mixture to the whites and whisk for 1 minute.

Pour the warm butter in a liquid measure cup (or a spouted container). * It must be a deep bottom bowl and work must be fast.* Put the nut meal in a mesh strainer (or use your hand – working quickly) and sprinkle it in about 2 tablespoons at a time – folding it carefully for about 40 folds. Be sure to exclude any large chunks/pieces of nuts. Again, work quickly and carefully as to not deflate the mixture. When all but about 2 Tbsp. of nut meal remain, quickly and steadily pour the warm butter over the batter. Then, with the remaining nut meal, fold the batter to incorporate, about 13 or so folds.

With a rubber spatula, transfer the batter into the prepared pan, smoothing the surface with the spatula or back of a spoon. **If collected butter remains at the bottom of the bowl, do not add it to the batter! It will impede the cake rising while baking.

Tap the pan on the counter to remove air bubbles and bake in the preheated oven for 30-35 minutes (I baked my mini cakes for 25-30 minutes). You’ll know the cake is done when it is springy to the touch and it separates itself from the side of the pan. Remove from oven and allow to stand for 5 minutes. Invert onto a cake rack sprayed with nonstick coating, removing the pan. Cool the cake completely.

*If not using the cake right away, wrap thoroughly in plastic wrap, then in a plastic bag, then in the refrigerator for up to 3 days. If freezing, wrap in foil, then the bag and use within 2-3 months.

Sugar Syrup
Makes 1 cup, good for one 10-inch cake – split into 3 layers (I only used about 3/4 cup during the assembly)

1 cup water
¼ cup sugar
2 Tbsp. dark rum or orange flavored liqueur

In a small, yet heavy saucepan, bring the water and sugar to a boil and simmer for 5 minutes. Remove from heat, add the liqueur. Cool slightly before using on the cake. *Can be made in advance.

Praline Buttercream
1 recipe Swiss Buttercream (see below)
1/3 cup praline paste (see below)
1 ½ - 2 Tbsp. Jamaican rum (optional)

Blend ½ cup buttercream into the paste, then add to the remaining buttercream. Whip briefly on med-low speed to combine. Blend in rum.

Swiss Buttercream - (I used Dorie's buttercream instead)
4 lg. egg whites
¾ cup sugar
1 ½ cups (3 sticks) unsalted butter, slightly firm
1 ½ -2 Tbsp. Grand Marnier or liqueur of your choice
1 tsp. vanilla

Place the egg whites in a lg/ bowl of a electric mixer and beat with the whisk attachment until the whites are foamy and they begin to thicken (just before the soft peak stage). Set the bowl over a saucepan filled with about 2 inches of simmering water, making sure the bowl is not touching the water. Then, whisk in the sugar by adding 1-2 tablespoon of sugar at a time over a minutes time. Continue beating 2-3 minutes or until the whites are warm (about 120 degrees) and the sugar is dissolved. The mixture should look thick and like whipped marshmallows.
Remove from pan and with either the paddle or whisk attachment, beat the egg whites and sugar on med-high until its a thick, cool meringue – about 5-7 minutes. *Do not over beat*. Set aside.

Place the butter in a separate clean mixing bowl and, using the paddle attachment, cream the butter at medium speed for 40-60 seconds, or until smooth and creamy. *Do not over beat or the butter will become toooooo soft.*

On med-low speed, blend the meringue into the butter, about 1-2 Tbsp. at a time, over 1 minute. Add the liqueur and vanilla and mix for 30-45 seconds longer, until thick and creamy.

Refrigerate 10-15 minutes before using.

Wait! My buttercream won’t come together! Reheat the buttercream briefly over simmering water for about 5 seconds, stirring with a wooden spoon. Be careful and do not over beat. The mixture will look broken with some liquid at the bottom of the bowl. Return the bowl to the mixer and whip on medium speed just until the cream comes back together.

Wait! My buttercream is too soft! Chill the buttercream in the refrigerator for about 10 minutes and rewhip. If that doesn’t work, cream an additional 2-4 Tbsp. of butter in a small bowl– making sure the butter is not as soft as the original amount, so make sure is cool and smooth. On low speed, quickly add the creamed butter to the buttercream, 1 Tbsp. at a time.

Refrigerate in an airtight container for up to 5 days, or can be frozen for up to 6 months. If freezing, store in 2 16-oz. plastic containers and thaw in the refrigerator overnight or at room temperature for several hours.

Praline Paste (you can halve this recipe for the Praline Buttercream)
1 cup (4 ½ oz.) Hazelnuts, toasted/skinless
2/3 cup Sugar
Line a jelly roll pan with parchment and lightly butter.

Put the sugar in a heavy 10-inch skillet. Heat on low flame for about 10-20 min until the sugar melts around the edges. (Mine seemed to move from one side of the pan to the other - my stove may not heat evenly.)
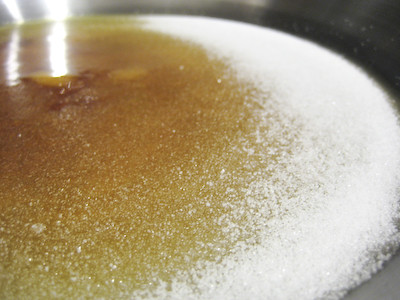

Do not stir the sugar. Swirl the pan if necessary to prevent the melted sugar from burning. Brush the sides of the pan with water to remove sugar crystals. (I had trouble removing the crystals from the edges.) If the sugar in the center does not melt, stir briefly. When the sugar is completely melted and caramel in color, remove from heat.
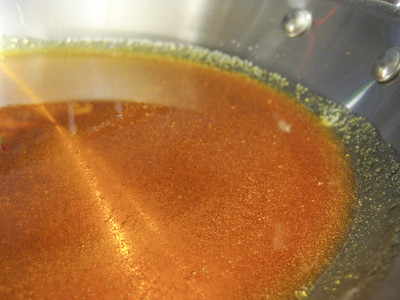

Stir in the nuts with a wooden spoon and separate the clusters. Return to low heat and stir to coat the nuts on all sides.


Cook until the mixture starts to bubble. **Remember – extremely hot mixture.** Then onto the parchment lined sheet and spread as evenly as possible. As it cools, it will harden into brittle.
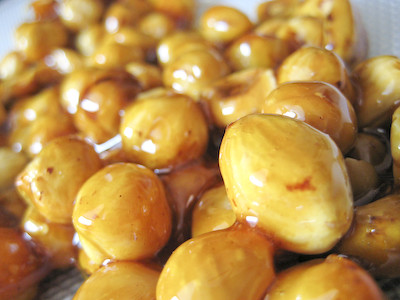

Break the candied nuts into pieces and place them in the food processor.
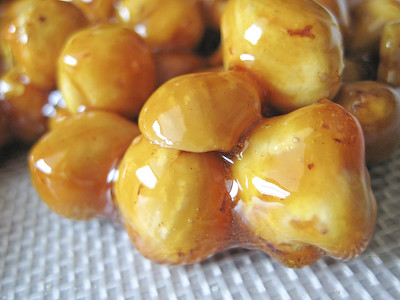

Pulse into a medium-fine crunch or process until the brittle turns into a powder. To make paste, process for several minutes. (If you have any stubborn chunks of praline brittle that won't turn into paste, just pour your paste into a small bowl and continue processing the chunks until the they become smooth.) Store in an airtight container and store in a cool dry place. Do not refrigerate.

Apricot Glaze
Good for one 10-inch cake

2/3 cup thick apricot preserves
1 Tbsp. water

In a small, yet heavy saucepan, bring the water and preserves to a slow boil and simmer for 2-3 minutes. If the mixture begins to stick to the bottom of the saucepan, add water as needed.

Remove from heat and, using a strainer, press the mixture through the mesh and discard any remnants. With a pastry brush, apply the glaze onto the cake while the cake is still warm. If the glaze is too thick, thin to a preferred consistency with drops of water.

Ganache Glaze
Makes about 1 cup, enough to cover the top and sides of a 9 or 10 inch layer or tube cake

**Ganache can take on many forms. While warm – great fudge sauce. While cool or lukewarm – semisweet glaze. Slightly chilled – can be whipped into a filling/frosting. Cold & solid – the base of candied chocolate truffles.

6 oz. (good) semisweet or bittersweet chocolate, like Lindt (I used 8 oz. Callebaut Gianduja chocolate)
6 oz. (¾ cup heavy cream)
1 tbsp. light corn syrup
1 Tbsp. Grand Marnier, Cointreau, or dark Jamaican rum (optional) (I used Jamaican rum)
¾ tsp. vanilla
½ - 1 tsp. hot water, if needed

Blend vanilla and liqueur/rum together and set aside.

Break the chocolate into 1-inch pieces and place in the basket of a food processor and pulse until finely chopped. Transfer into a medium sized bowl and set aside.

Heat the cream and corn syrup in a saucepan, on low, until it reached a gentle boil. Once to the gently boil, immediately and carefully pour over the chocolate. Leave it alone for one minute, then slowly stir and mix the chocolate and cream together until the chocolate is melted and incorporated into the cream. Carefully blend in vanilla mixture. If the surface seems oily, add ½ - 1 tsp hot water. The glaze will thicken, but should still be pourable. If it doesn’t thicken, refrigerate for about 5 minutes, but make sure it doesn’t get too cold!

Assembling the Cake

Cut a cardboard disk slightly smaller than the cake. Divide the cake into 3 layers and place the first layer top-side down on the disk. Using a pastry brush, moisten the layer with 3-4 Tbsp. of warm sugar syrup. Measure out 1 cup of praline buttercream and set aside.

Spread the bottom layer with a ¼-inch thickness of the remaining buttercream. Cover with ½ of the whipped cream, leaving ¼-inch border around the edge of the cake. Place the middle layer over the first, brush with sugar syrup, spreading with buttercream. Cover with the remaining whipped cream.

Moisten the cut side of the third layer with additional sugar syrup and place cut side down on the cake. Gently, press the sides of the cake to align the layers. Refrigerate to chill for at least 30 minutes.

Lift the cake by sliding your palm under the cardboard. Holding a serrated or very sharp night with an 8-inch blade held parallel to the sides of the cake, trim the sides so that they are perfectly straight. Cut a slight bevel at the top to help the glaze drip over the edge. (I skipped this step - perhaps that is why my cake did not have smooth edges?) Brush the top and sides of the cake with warm apricot glaze, sealing the cut areas completely. Chill while you prepare the ganache.

Place a rack over a large shallow pan to catch the ganache drippings. Remove the gateau from the refrigerator and put it the rack. With a metal spatula in hand, and holding the saucepan about 10 inches above the cake, pour the ganache onto the cake’s center. Move the spatula over the top of the ganache about 4 times to get a smooth and mirror-like appearance. The ganache should cover the top and run down the sides of the cake. When the ganache has been poured and is coating the cake, lift one side of the rack and bang it once on the counter to help spread the ganache evenly and break any air bubbles. (Work fast before setting starts.) Patch any bare spots on the sides with a smaller spatula, but do not touch the top after the “bang”. Let the cake stand at least 15 minutes to set after glazing.

To garnish the cake, fit a 12 – 14-inch pastry bag with a #114 large leaf tip. Fill the bag with the reserved praline cream. Stating ½ inch from the outer edge of the cake, position the pastry tube at a 90 degree angle with the top almost touching the top of the cake. Apply pressure to the pastry bag, moving it slightly toward the center of the cake. As the buttercream flows on the cake, reverse the movement backward toward the edge of the cake and finish by pulling the bag again to the center. Stop applying pressure and press the bag downward, then quickly pull the tip up to break the flow of frosting. Repeat, making 12 leaves evenly spaced around the surface of the cake.

Make a second row of leaves on the top of the first row, moving the pastry bag about ¾ inch closer to the center. The leaves should overlap. Make a 3rd row, moving closer and closer to the center. Add a 4th row if you have the room. But, leave a 2-inch space in the center for a chopped filbert garnish. Refrigerate uncovered for 3-4 hours to allow the cake to set. Remove the cake from the refrigerator at least 3 hours before serving.

Leftover cake can be covered with foil and kept in the refrigerator for up to 5 days.

Tuesday, July 29, 2008

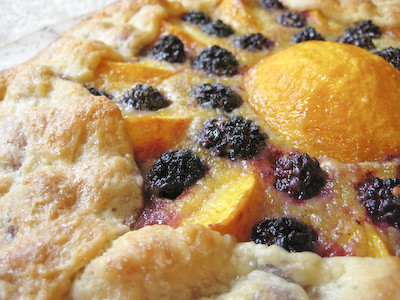
TWD: Blackberry Nectarine Galette


This week's Tuesdays with Dorie (TWD) recipe was chosen by Amy of Michelle in Colorado Springs: Summer Fruit Galette. Having successfully made my very first homemade pie crust for the Double Crusted Blueberry Pie a few weeks ago, I went into this week's recipe with a little less trepidation.

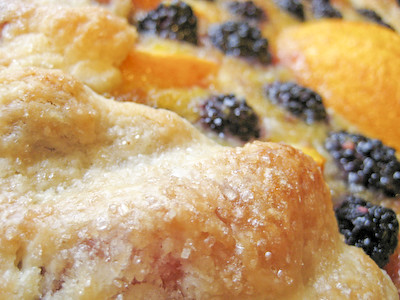
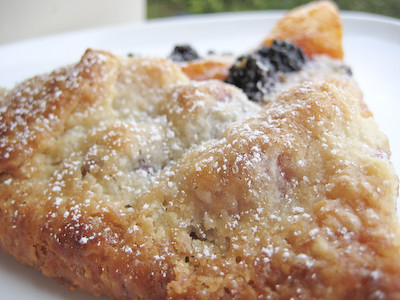
A Galette is basically a single crust pie without the pie dish. You roll out your pie dough, add the fruit filling, then fold the edges of the crust towards the center to hold the filling in. It's a very simple, rustic dessert.


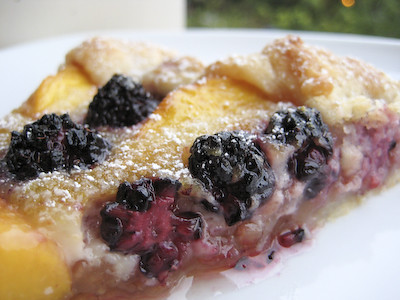
The beauty of this particular dessert is that you can fill this Galette with your favorite summer fruit, or whatever you have on hand. I decided to use blackberries and nectarines. Dorie suggests simply cutting the nectarines in half and placing them cut side down, but I didn't have enough nectarines to do this, so I simply used one half in the middle and then spread nectarine slices around it. I then filled in the gaps between the nectarine slices with blackberries. This ended up creating a sort of sunburst effect.


Dorie recommends two different elements to help soak up the fruit juices in this recipe: graham cracker crumbs and a custard drizzle. Instead of bread crumbs (what we used in the Blueberry Pie), graham cracker crumbs are spread along the bottom of this Galette to help absorb the fruit juices. Now I was a bit confused about the drizzle of custard that Dorie recommends for this Galette. At first, I had visions in my mind of a thick custard that was dolloped on top of the tart. Then I realized that I had misread the recipe instructions. It's basically an egg whisked together with some butter and sugar. Towards the end of baking, you drizzle it in between the nooks and crannies of the fruit - then stick it back in the oven to bake. I was initially worried that it would make the Galette terribly ugly, but while it did not enhance the appearance of the Galette, it did not make it look worse, in my opinion.


My absolute most favorite part of this Galette was the layer of ginger preserves at the bottom! I had never tried ginger preserves before, but they were fantastic with the fresh fruit! I used some Dundee Ginger Preserves I found at Central Market. I cringed a bit at the price ($8.00 for 16 ounces), but I'm so glad I did not opt for another type of preserve just to save money! I actually used 4 tablespoons of preserves instead of the 2-3 that Dorie recommends. It was the perfect complement to the fruit. What you will first notice when you bite into this Galette are the sweet and sour flavors from the fruit... then the sweet and spicy ginger hits your tongue, followed by the buttery and flaky pie crust. Mmmmm. Perfection.


I am not a huge fan of pies in general (except for apple crumb pie), but this has to be the best "pie" I have ever had. I will definitely be making this every summer. This recipe is really great for entertaining because you can make the pie dough ahead of time and freeze it. The actual assembly comes together in just minutes.


Thanks again to Michelle for choosing the Summer Fruit Galette. You challenged me to make my first Galette - and it was a success! Not only that, but I found another Dorie recipe that I am absolutely head over heels for! If you would like the recipe, you can find it here (with recipe tips here). Make sure you visit the TWD Blog Roll to see how everyone else enjoyed this rustic, summer treat.

Saturday, July 26, 2008

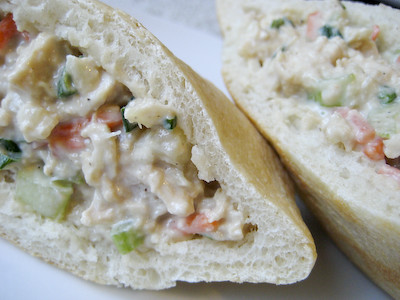
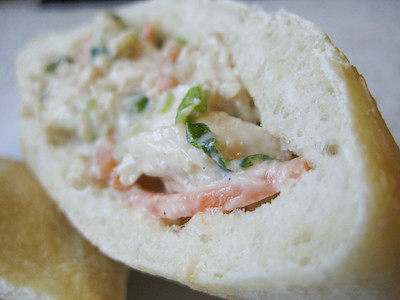
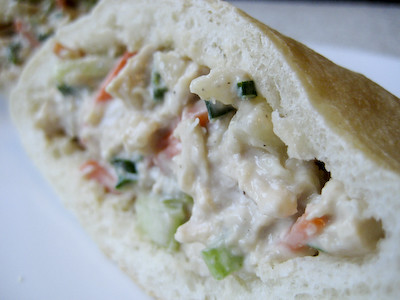
Pineapple Chicken Salad Pitas


Mayonnaise is like an avocado. People have very strong feelings about it. They either love it or they hate it. My husband won't eat anything with mayo on or in it, but I think that when used properly, mayo can be good in a dish. I recently posted about my homemade pita bread and promised to share with you what I chose to stuff them with. Instead of a traditional Greek filling, I decided to fill mine with chicken salad. I have always been a fan of chicken salad containing pineapple, so when I saw this recipe from Cooking Light, I knew I wanted to try it.


The Worcestershire sauce gave this chicken salad a bit more depth. I added some celery because I like my chicken salad to have a little crunch (and I don't like nuts). The only other thing I would probably change next time is to use canned pineapple tidbits instead of crushed pineapple - I prefer a chunkier chicken salad.


If you don't have any pita bread on hand, this would be great sandwiched between some toasted bread, or simply by itself with a fresh fruit plate.

Pineapple Chicken Salad Pitas
from Cooking Light

2 1/2 cups chopped poached or cooked chicken breast* (about 1 pound) (My 1 lb of chicken yielded about 2 1/4 cups, so you might want to use more chicken; save time by using store bought, precooked Rotisserie chicken)
1/2 cup matchstick-cut carrots
1/3 cup sliced almonds, toasted (I omitted these)
1/3 cup light mayonnaise
1/4 cup finely chopped green onions
1/4 cup finely chopped celery
1/4 cup plain fat-free yogurt
1 tablespoon Worcestershire sauce
1/2 teaspoon garlic powder
1/4 teaspoon salt
1/4 teaspoon black pepper
1 (8-ounce) can crushed pineapple in juice, drained
4 (6-inch) whole wheat pitas, each cut in half (I used my homemade pitas)
8 Romaine lettuce leaves (I forgot these)

* To poach your chicken, put the chicken breast halves in a large saucepan and add lightly salted water to cover. Bring to a boil over high heat, reduce the heat to low and simmer for 30 minutes. You can do this with frozen chicken breasts, too.


Combine first 11 ingredients in a large bowl, stirring well. Line each pita half with 1 lettuce leaf; fill each half with 1/3 cup chicken mixture.

Yield: 4 servings (serving size: 2 stuffed pita halves)

Thursday, July 24, 2008

Homemade Pita Bread


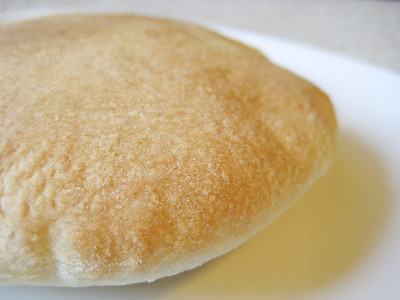
Never in a million years did I ever think I would make pita bread. From scratch. Ask me if I would ever make pita bread, before I started my blog, and I would have told you that you were crazy. But I've had a lot of firsts since starting my food blog. I'm quite proud of all the things I've tried my hand at... cinnamon rolls, layer cakes, buttercream, pie crust, brioche, doughnuts, etc.


So, when I went to the grocery store to pick up some pita bread and was informed by an employee that they no longer carry pita bread, I decided that instead of making a separate trip to another store, that I would just make some. From scratch.


I've seen pita bread on several blogs lately, and one recipe in particular caught my attention - Chelle's. She convinced me that I could easily make my own fluffy and soft pita bread. It was honestly so simple, I wondered why I had never made it before. The hardest thing about this was waiting for the dough to rise. This was yet another instance when I was glad we had a baking stone - the pitas baked up perfectly on it, and I did not have to worry about greasing a baking sheet.


These would be great with some garlic or roasted red pepper hummus. Or, you could cut them into little triangles and bake them a bit longer to make pita chips. For now, I leave you simply with the pita bread recipe... but stay tuned for my next post, when I tell you what I stuffed this wonderful pita bread with.

*Update: I'm submitting this to July's Bread Baking Day, created by Zorra and hosted by Aparna of My Diverse Kitchen. This month's theme is "small breads," or individual serving size breads. Be sure to check out the round up during the first week of August.

Homemade Pita Bread
from Brown Eyed Baker

3 cups flour
1 1/2 teaspoons salt
1 Tablespoon sugar or honey
1 packet yeast (2-1/4 tsp)
1 1/4 to 1 1/2 cups water, roughly at room temperature
2 tablespoons olive oil, vegetable oil, butter, or shortening

Mix the yeast in with the flour, salt, and sugar. Add the olive oil and 1 1/4 cup water and stir together with a wooden spoon. All of the ingredients should form a ball. If some of the flour will not stick to the ball, add more water.

Once all of the ingredients form a ball, place the ball on a work surface, such as a cutting board, and knead the dough for approximately 10 minutes. If you are using an electric mixer, mix it at low speed for 10 minutes. (I used my KitchenAid Mixer and dough hook at speed 2.)

When you are done kneading the dough, place it in a bowl that has been lightly coated with oil. Form a ball out of the dough (I had to continue adding flour, one tablespoon at a time, mixing/kneading until it came together like a ball - it was too sticky otherwise) and place it into the bowl, rolling the ball of dough around in the bowl so that it has a light coat of oil on all sides. Cover the bowl with plastic wrap or a damp kitchen towel and set aside to rise until it has doubled in size, approximately 90 minutes. (I always use my oven as a proofing box. I heat my oven to 175°F, turn it off, leave the door open for a few minutes to let some of the heat out, and then put the dough inside the oven to rise.)

When it has doubled in size, punch the dough down to release some of the trapped gases and divide it into 8 pieces. Roll each piece into a ball, cover the balls with a damp kitchen towel, and let them rest for 20 minutes. This step allows the dough to relax so that it’ll be easier to shape.

While the dough is resting, preheat the oven to 450 degrees. If you have a baking stone, put it in the oven to preheat as well. If you do not have a baking stone, turn a cookie sheet upside down and place it on the middle rack of the oven while you are preheating the oven. This will be the surface on which you bake your pitas.

After the dough has relaxed for 20 minutes, spread a light coating of flour on a work surface and place one of the balls of dough there. Sprinkle a little bit of flour on top of the dough and use a rolling pin or your hands to stretch and flatten the dough. You should be able to roll it out to between 1/8 and 1/4 inch thick - 6 inches in diameter. If the dough does not stretch sufficiently you can cover it with the damp towel and let it rest 5 to 10 minutes before trying again.

Place discs on a lightly greased baking sheet (I used my baking stone) and let rise, uncovered, until barely doubled in thickness, about 30-45 minutes.

Open the oven and place as many pitas as you can fit on the hot baking surface (I was able to bake 3 at a time on my baking stone.) They should be baked through and puffy after 3 minutes. If you want your pitas to be crispy and brown you can bake them for an additional 3 to 5 minutes, but it isn’t necessary.

Yield: 8 pitas

Tuesday, July 22, 2008

TWD: Cherry Rhubarb Cobbler


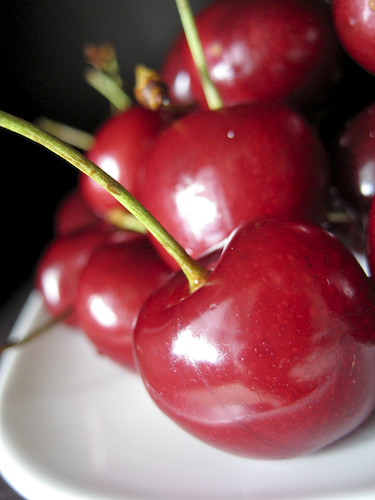
This week's Tuesdays with Dorie (TWD) recipe was chosen by Amanda of Like Sprinkles on a Cupcake: Cherry Rhubarb Cobbler. While I've certainly had my fair share of fresh cherries, I've actually never baked with them before.


I've actually never tasted or baked with rhubarb either. Most of the time, I've seen strawberries paired with rhubarb, so I was interested to see how Dorie's cherry and rhubarb pairing would turn out.


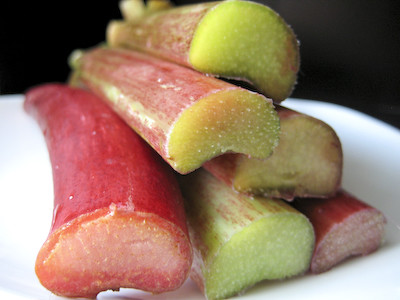
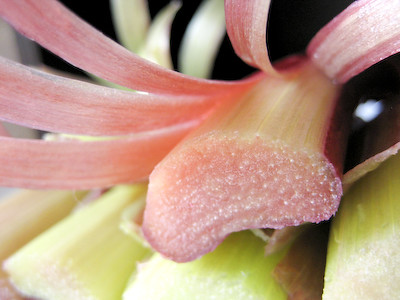
I'm not sure how much rhubarb normally costs, but I found it at Central Market (a grocery store similar to Whole Foods) and the 12 ounces required for this recipe was just under $3 (seemed a bit pricey). I've always known rhubarb to be the red-looking celery-like stalks, but never knew that their leaves are actually poisonous! While rhubarb is technically a vegetable, most of its uses make it seem more like a fruit. Some of the stalks I bought were reddish pink through and through, while others were red on the outside but green in the middle (not sure if that affects their taste?).


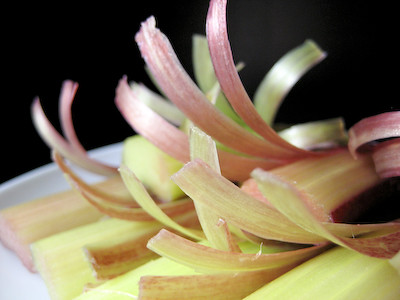
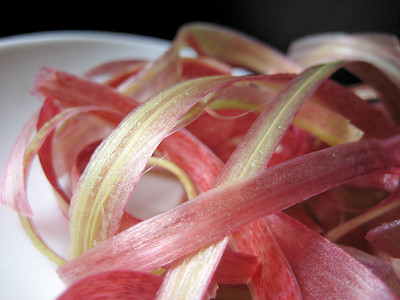
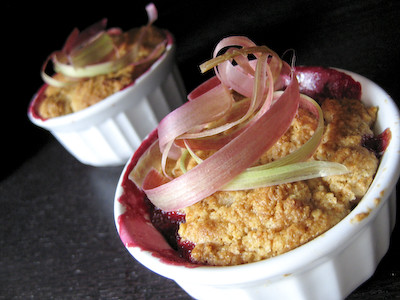
Just like celery, you trim the ends of rhubarb when preparing it for baking. Unlike celery, you have to peel away the stringy outside layer before chopping it up (at least that's what I gathered from various online sources). I used a vegetable peeler for this task, and could not help but notice how pretty this process looked as I was peeling the rhubarb.


When I finished all the peeling, it looked like I had a pretty plate full of ribbons. My husband saw it and commented on how I was beginning to go a little overboard with my food blogging, as he thought I had cut a bunch of ribbons for the cobbler 'photo shoot.' While I reassured him that it was simply the rhubarb peels, I really do wish that I could improve upon the plating of everything in my blog, but our tiny apartment just doesn't have the storage space for me to buy a bunch of cute dishes, back drops, and props! Some day... :)


Dorie's recipe is very simple. Trim, peel, and cut the rhubarb into 1-inch pieces.


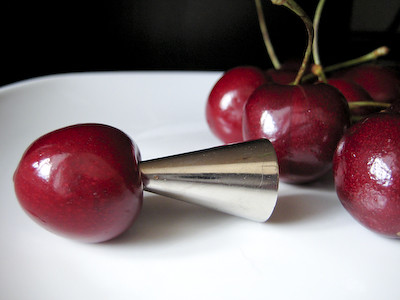
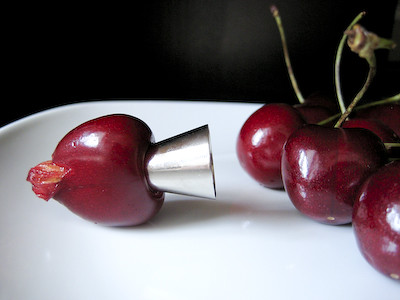
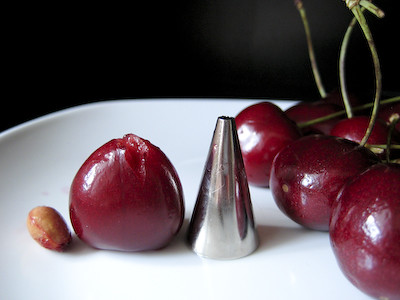
Pit and halve a pound of cherries, then mix the rhubarb and cherries together with some sugar, cornstarch, and ground ginger. Not sure how to pit cherries? No problem. You can use a decorating tip, or any long, rigid object (i.e. chopstick). Simply remove the stem from the cherry and hold it firmly in one hand while advancing the decorating tip through the insertion site of the stem.


Continue pushing through until the cherry seed pops out completely.


Voila! It's as simple as that.


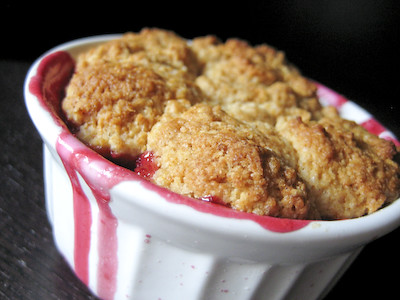
After you mix the filling together, the topping comes together in just minutes. Aside from pairing cherries with rhubarb in this recipe, Dorie also changes it up a bit with the cobbler's biscuit topping. She uses brown sugar and whole wheat flour with just a hint of ginger. You just pulse the dry ingredients together, then pulse in the butter, followed by the whole milk. I have to say that I enjoyed this cobbler topping much more than one from the Mixed Berry Cobbler. I could absolutely see myself using the cobbler topping recipe alone to make biscuits and enjoying them with a small pat of butter :)


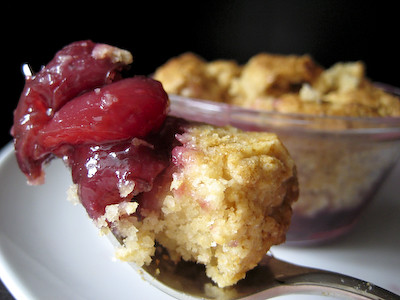
Since I was bringing this in to share with my co-workers, instead of one large cobbler, I decided to make eight individual mini cobblers. I only have three small oven safe bowls, so I used tea cups for the rest!


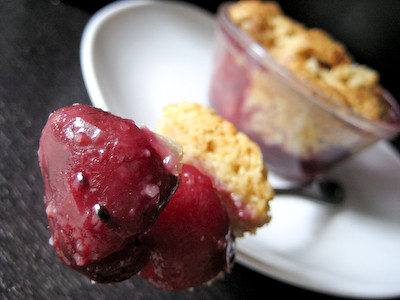
I really enjoyed this cobbler, although I think my favorite is still peach and blackberry cobbler. The rhubarb didn't have much texture to it, though it had quite a prominent flavor. It was extremely tart and was a nice contrast to the sweet cherries. I can see why Dorie would say that a plain cherry cobbler can be a bit bland otherwise. While I haven't quite fallen in love with rhubarb yet, I also don't see why so many people seem to hate it. I never realized how many people disliked rhubarb until this recipe was chosen!

I baked the mini cobblers for about 30 minutes, 5 minutes less than indicated for the full size version. I checked them at 25 minutes, and the topping was nice and golden brown at that point, but the fruit juices weren't bubbling away quite yet.


Thanks again to Amanda for choosing this cobbler. It was my first time baking with and trying rhubarb. Will I make this again? Probably not exactly as written. But I may have found my new favorite cobbler topping and I am eager to try it with my favorite peach and blackberry cobbler filling. If you would like the Cherry Rhubarb Cobbler recipe, you can find it here (with recipe tips here). Make sure you visit the TWD Blog Roll to see how everyone else enjoyed this sweet and oh so tart treat.

Saturday, July 19, 2008

Guacamole


Most people either love or hate avocados, there does not seem to be any in between. I love them and my husband hates them -- but that just means there's always more for me :) While avocados contain more fat than your typical fruit, they're not as bad as some people make them out to be. They are high in monounsaturated fatty acids, which can help to lower your cholesterol, and half of an avocado is equal to one serving of fruit (you should be eating 4-5 servings of fruit each day).

My husband thinks I'm weird, not only because I love avocados, but also because of how I like to eat them. When I was a kid, my mom would cut them half, pull the seed out, and put a heaping spoonful of brown sugar in the middle for me. I enjoyed the brown sugar more than anything else at the time, but as I got older, I began to also appreciate the richness and creaminess of the avocado complemented with the sweetness of the brown sugar. I don't know if this is just something my mom and her family grew up doing or if it's something that all Vietnamese people do... but regardless of where it comes from, I still love snacking on avocados this way.

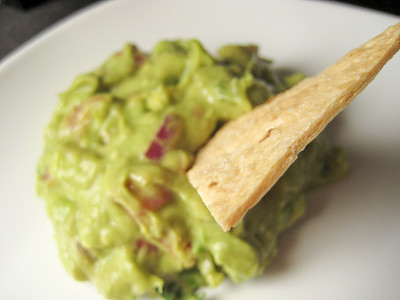
One of my favorite things to make with avocados is guacamole. There are probably hundreds of different recipes out there - I've made about four or five of them. Eventually, I learned a little bit of what I liked from each one and developed my own recipe. This recipe makes quite a bit (perfect for bringing to potlucks or parties) but it can also be easily halved. Everyone who has tried this loves it, and one friend even jokingly told me that it gets her "Mexican seal of approval." Ha!

I like to serve my guacamole with homemade tortilla chips. They are baked, not fried, because we all know I need to save the calories for all the other sweet treats I eat :)


The lime juice in the recipe not only adds great flavor, but it also helps decrease the browning that occurs over time secondary to oxidation. If you're not going to serve it immediately, another trick I learned (I don't remember where), is to throw one of the avocado seeds in while you're mixing it all together and leave it in there until ready to serve. I've only tried that once, but it worked like a charm.


Guacamole
from Good Eats 'n Sweet Treats

3/4 cup red onion, finely diced
1/3 cup chopped green onions
2 tomatoes, diced
6 avocados
2 garlic cloves, finely diced (optional)
1 tsp salt
2.5 limes, juiced
1-1 1/2 tsp chili paste (or 1 jalapeno, finely diced)
1/2 cup chopped fresh cilantro

Cut the avocados in half lengthwise around the pits. Twist in opposite directions to separate the halves. Using a spoon, scoop the avocado flesh out of each half. Throw away the pits and the skins. Cut the flesh from 1-2 avocados into small chunks and set them aside in a small bowl.

Add the remaining avocados and all the other ingredients into a large bowl. Using a fork, mix it all together and mash the avocados until well combined. Add the chunks of avocado and gently mix to combine. Taste the guacamole and add more salt, lime juice, or chili paste to taste.

If you are serving it later, press a piece of plastic wrap directly onto the surface of the guacamole and put it in the refrigerator.

Serve with homemade tortilla chips for dipping.

Yield: About 10 Servings.

Tuesday, July 15, 2008

TWD: Chocolate (Hazelnut) Pudding


This week's Tuesdays with Dorie (TWD) recipe was chosen by Melissa of It's Melissa's Kitchen: Chocolate Pudding. I've never made pudding before, but gather that Dorie's use of the food processor isn't typical of most pudding recipes. Dorie states that using the food processor is "unorthodox but highly effective." It gets rid of any lumps the pudding might otherwise have, and also incorporates air into the pudding, giving it a "slightly lighter and noticeably more velvety texture."


After this week's recipe was announced, Kim pointed out that Dorie had already posted the recipe online. When I went to Dorie's blog to check it out, I noticed that she also referred to a Gianduja, or chocolate and hazelnut, pudding that was adapted from her chocolate pudding recipe. I had some hazelnuts in my pantry, so I promptly decided that I was going to make a chocolate hazelnut pudding instead of the traditional chocolate pudding.


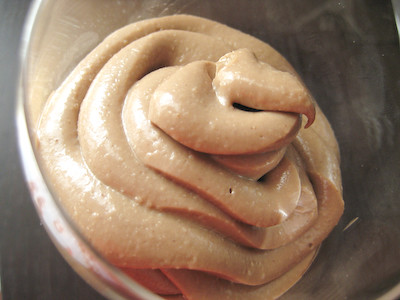
The recipe calls for grinding the hazelnuts in your food processor, boiling the hazelnut meal in whole milk, and then straining the mixture into the eggs. While I tried to grind the hazelnuts as finely as possible and used a very fine meshed sieve to strain the mixture, I still ended up with tiny bits of hazelnut in my pudding... that's why my pudding looks a bit lumpy in all the photos and not velvety smooth. Aesthetics aside, this pudding was very rich, chocolately, and delicious! I like to think the photo below looks like a chocolate colored rose... my husband, on the other hand, said it looked like poo! Ha!


The recipe was fairly straightforward, though I had to work in batches since I don't have a large food processor. Others who were without food processors noted that they were able to make this in their KitchenAid Mixer using the whire whip. The only problem I had with the recipe was towards the end when you're heating it all up and waiting for it to thicken. I did not see that Dorie's instructions were to heat it over medium heat and simply followed the instructions on the adapted recipe (below) and had it on medium-low heat. After 7 minutes, my pudding still hadn't thickened up so I turned it up to medium. Once it was on medium heat, it took about 6 minutes to thicken. The whole process was very similar to making the pastry cream (just with fewer yolks), where you stir and stir and stir until all of a sudden - bam! Like magic, it suddenly becomes thick and creamy.


This is an extremely rich dessert, and I could only eat a few spoonfuls at a time. The hazelnut flavor was lovely, though I'm not sure how pronounced (or subtle) it would be if you made it as written -- I also used a hazelnut chocolate instead of bittersweet chocolate to flavor it. Will I make this again? Probably not, just because I'd rather save the calories for other sweets. I find that the fat free store bought pudding is just as good; though I would certainly consider making this again if I wanted a simple indulgence.

Thanks again to Melissa for choosing this week's recipe. You challenged me to make my first homemade pudding. Make sure you visit the TWD Blog Roll to see how everyone else enjoyed this rich, chocolatey treat.

Gianduja Pudding
based on Dorie's recipe for Chocolate Pudding in
Baking: From My Home to Yours
adapted by Sara Dickerman as seen on the NY Times


1 ½ cups hazelnuts
6 tablespoons sugar
2 ½ cups whole milk
4 ounces bittersweet chocolate, chopped (I used Callebaut Gianduja chocolate)
2 tablespoons butter, cut into chunks
2 tablespoons unsweetened cocoa powder
2 tablespoons cornstarch
¼ teaspoon salt
1 large egg
2 large egg yolks
1 teaspoon Frangelico liqueur or vanilla
(I used vanilla)

Heat the oven to 300 degrees. Spread the hazelnuts on a baking sheet and toast them in the oven until golden brown, about 15 minutes. Immediately rub the hazelnuts between the folds of a clean kitchen towel to remove their skins (I simply rubbed them between my fingers - most came off easily but I did have to scrape a few stubborn ones with a paring knife), then transfer them to a food processor along with 2 tablespoons of the sugar. Pulse until finely chopped. Wipe the food processor clean.

In a medium saucepan, bring 2 ¼ cups of the milk and the nut mixture to a boil. Remove from heat and let stand for 5 minutes. Melt the chocolate and butter in a small saucepan and keep warm.

In the food processor, blend the cocoa powder, cornstarch and salt and transfer it to a bowl. Blend the egg, the yolks and the remaining 4 tablespoons of sugar for 1 minute. Add the remaining ¼ cup milk and pulse to blend, then add the cocoa mixture and pulse again. Leave the mixture in the food processor.

Strain the milk mixture through a fine-mesh sieve into a bowl, pressing firmly to extract the liquid. Discard the nuts. Wipe the saucepan clean.

With the food processor running, add the hot hazelnut milk in a thin, steady stream. Return the mixture to the saucepan, set over medium-low heat (I would recommend doing this at medium heat) and whisk without stopping, scraping the corners of the pan occasionally, until the pudding thickens, 5 to 7 minutes. (If the pudding clumps, do not panic. It will smooth out later.)

Transfer the pudding minus any scorched bits to the processor.

Pulse to blend. Add the melted chocolate and frangelico, and pulse again. Pour the pudding into a 1-quart dish, press a sheet of parchment (I used plastic wrap) on the pudding’s surface and refrigerate for at least 4 hours. Scoop into small bowls.

Yield: 4 to 6 Servings.

For recipe tips click here.