Saturday, November 29, 2008

Caramel Cake


This month's Daring Bakers Challenge was hosted by Dolores of Culinary Curiosity, Alex of Blondie and Brownie, and Jenny of Foray into Food: Caramel Cake. We also had an optional challenge this month in addition to the cake: Golden Vanilla Bean Caramels. I really wanted to make the caramels, but every time I went to World Market, they were out of Lyle's Golden Syrup. I still plan to make them, but won't be able to post about them today.
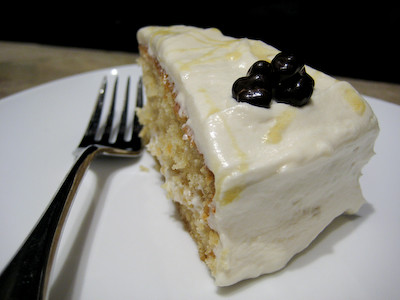

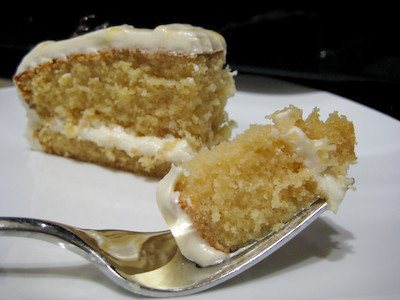
Caramel cake was actually the very first thing I blogged about over a year ago. That cake had a different kind of frosting, though. It was a thick, sugary, caramel frosting. This caramel cake has a browned butter frosting that is similar in consistency/texture to a cream cheese frosting. Having made browned butter before, I had no problems with this aspect of the recipe. I can imagine that those who had never made it before, probably had some difficulty, as the recipe gave the very vague instructions of "cook butter until brown." I've included more detailed instructions on how to do this below, for anyone interested in making this cake.

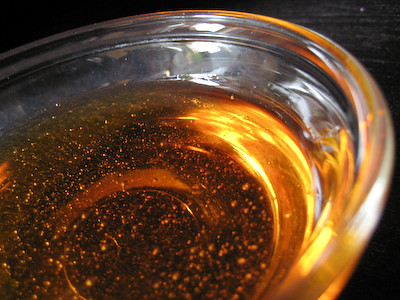
The tricky thing with caramel is that the darker you get it, the better the flavor. However, the longer you heat it, the higher the risk of burning it. I actually think I didn't cook my caramel long enough, because after I added the water to it, it changed from a deep amber to a lighter, caramel color. The consistency of my syrup was right - it was supposed to be similar to thick, maple syrup - but the flavor wasn't as prominent because I didn't let it caramelize enough.


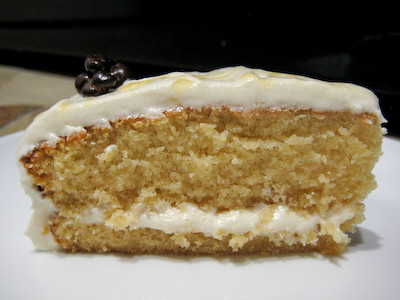
You'll have to excuse the fact that I cut my cake layers completely uneven - it sure looked even when I cut it, but somehow I ended up with one really thin layer and one really thick layer ;) I topped my cake with a drizzle of caramel syrup and some chocolate covered cacao nibs from TCHO chocolate. A lot of bakers complained about the cake being too sweet, and I partially agree. Without the sea salt, it would definitely be too sweet (and I always like things sweet). But the sea salt was a great contrast in flavor, not to mention texture.


The cake was very moist and had just a hint of caramel to it (the flavor would have been better if I had cooked the caramel syrup longer). I received many compliments on it. While I enjoyed this cake, I'm not sure if it is meant for everyone. It is very sweet, and I think many will probably consider it too sweet, even with the added sea salt.

If you decide to make this, be sure you read these tips here first.

Thanks Dolores, Alex, and Jenny for choosing one of my favorite flavors this month! I can't wait to try making the caramels. Make sure you visit the Daring Bakers Blogroll to see how hundreds of others fared with this sugary challenge!


*Recipe notes:
- Save time by starting the caramel syrup while you are letting the ingredients for the cake come to room temperature.
- You only need to make a half recipe of caramel syrup and that will be plenty for both the cake and the frosting.
- Leftover caramel syrup? Drizzle some over ice cream. Add some to your hot apple cider for some delicious caramel apple cider.
Or just lick it right from the spoon :)
- If you have leftover browned butter, it is delicious tossed with some spaghetti or angel hair pasta and some mizithra cheese (if you can't find mizithra, you can substitute freshly grated parmesan cheese).


Caramel Cake with Caramelized Butter Frosting
from Shuna Fish Lydon as seen on Bay Area Bites

10 tablespoons unsalted butter at room temperature
1 1/4 cups granulated sugar
1/2 teaspoon kosher salt
1/3 cup Caramel Syrup (see recipe below)
2 each eggs, at room temperature
splash vanilla extract
2 cups all-purpose flour
1/2 teaspoon baking powder
1 cup milk, at room temperature (I used skim)

Preheat oven to 350F

Butter one tall (2 – 2.5 inch deep) 9-inch cake pan. (I used a regular 9-inch pan. I would also recommend lining it with parchment - my cake stuck to the buttered pan quite a bit!)

In the bowl of a stand mixer fitted with a paddle attachment, cream butter until smooth. Add sugar and salt & cream until light and fluffy.

Slowly pour room temperature caramel syrup into bowl (add a little bit at a time, and wait until it is incorporated before adding more). Scrape down bowl and increase speed. Add eggs/vanilla extract a little at a time, mixing well after each addition. Scrape down bowl again, beat mixture until light and uniform.

Sift flour and baking powder.

Turn mixer to lowest speed, and add one third of the dry ingredients. When incorporated, add half of the milk, a little at a time. Add another third of the dry ingredients, then the other half of the milk (slowly - only a bit at a time) and finish with the dry ingredients. {This is called the dry, wet, dry, wet, dry method in cake making. It is often employed when there is a high proportion of liquid in the batter.}

Take off mixer and by hand, use a spatula to do a few last folds, making sure batter is uniform. Turn batter into prepared cake pan.

Place cake pan on cookie sheet or 1/2 sheet pan. Set first timer for 30 minutes, rotate pan and set timer for another 15-20 minutes. Your own oven will set the pace. Bake until sides pull away from the pan and skewer inserted in middle comes out clean. Cool cake completely before icing it.

Cake will keep for three days outside of the refrigerator.

CARAMEL SYRUP
(I halved this recipe)

2 cups sugar
1/2 cup water
1 cup water (for "stopping" the caramelization process)

In a small stainless steel saucepan, with tall sides, mix water and sugar until mixture feels like wet sand. Brush down any stray sugar crystals with wet pastry brush. Turn on heat to highest flame. Cook until smoking slightly: dark amber.

When color is achieved, very carefully pour in one cup of water. Caramel will jump and sputter about! It is very dangerous, so have long sleeves on and be prepared to step back. (I used a measuring cup and poured very slowly and from a very high distance. This worked well for me. You can also cover your saucepan with some aluminum foil and cut a small hole in the top and then pour the water through that. The foil will serve as a nice splatter guard.)

Whisk over medium heat until it has reduced slightly and feels sticky between two fingers. {Obviously wait for it to cool on a spoon before touching it.} (This took about 2-3 minutes.)

Note: For safety reasons, have ready a bowl of ice water to plunge your hands into if any caramel should land on your skin.

CARAMELIZED BUTTER FROSTING

12 tablespoons unsalted butter
1 pound confectioner’s sugar, sifted (I used 3 cups)
4-6 tablespoons heavy cream (I used 4 tbsp)
2 teaspoons vanilla extract
2-4 tablespoons caramel syrup (I used 4 tbsp)
Kosher or sea salt to taste (I used 1/2 tsp but would probably recommend 1 tsp)

Cook butter until brown. (For those who have never browned butter before, here's how...Place butter in a saucepan over medium heat. Bring butter to a slow boil (about 5 minutes). Once the butter begins to boil, stir constantly to prevent residue from sticking to the bottom of the pan. As the butter cooks, it will start to foam and rise. Continue stirring, otherwise the butter foam could overflow and catch fire. Once the butter stops foaming and rising (about 5 minutes), cook until amber in color (about 1 to 2 minutes). It will have a pleasant caramel aroma.)


Pour through a fine meshed sieve into a heatproof bowl (let it cool for a few minutes before pouring it through the sieve if you are using a plastic sieve - otherwise it will melt!), set aside to cool.

Pour cooled brown butter into mixer bowl.

In a stand mixer fitted with a paddle or whisk attachment, add confectioner's sugar a little at a time. When mixture looks too chunky to take any more, add a bit of cream and or caramel syrup. Repeat until mixture looks smooth and all confectioner's sugar has been incorporated. Add salt to taste.

Note: Caramelized butter frosting will keep in fridge for up to a month.
To smooth out from cold, microwave a bit, then mix with paddle attachment until smooth and light.

Thursday, November 27, 2008

Twofer One (TWD)


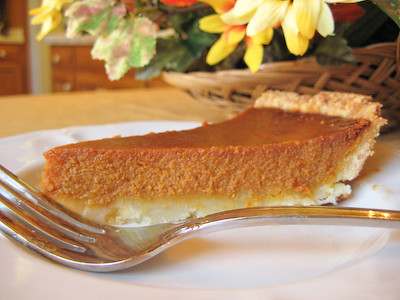
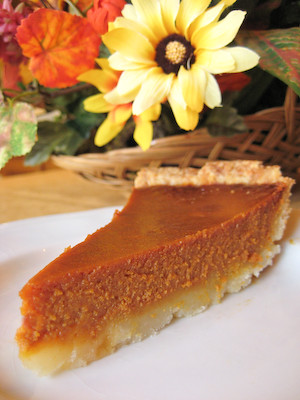
This week's Tuesdays with Dorie (TWD) recipe was chosen by Vibi of La casserole carrée: Thanksgiving Twofer Pie. As I was flipping through the book, I couldn't help but also notice the Caramel Pumpkin Pie that follows the Twofer Pie. I love caramel. So I decided to make both :) So in this week's TWD installment, you get twofer one ;)


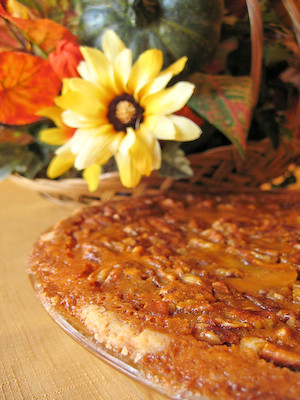
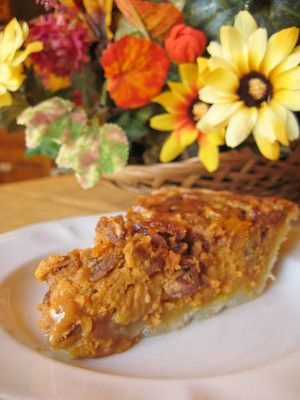
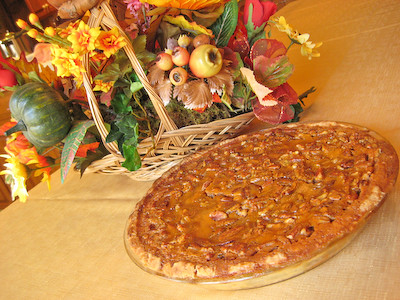
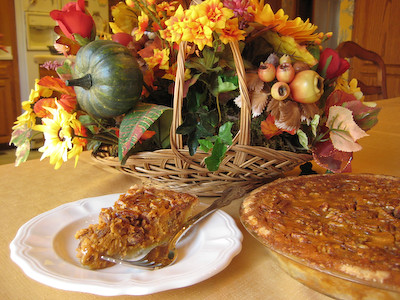
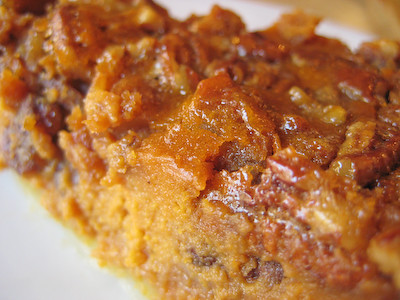
The Thanksgiving Twofer Pie is part pumpkin pie, part pecan pie. Dorie describes the two fillings as melding in the oven "into a combo-filling, creamy on the bottom, sweet and crunchy (but not typically pecan pie soft) on top."


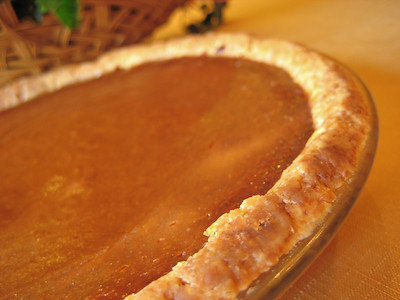
The only major problem I had with my pie was that there was too much filling. I used a standard 9-inch pie dish and I had to reserve about 1/4 cup of the filling, or else it would have spilled over while baking. I know some TWD bakers had problems with their crust browning too much, but I used my pie crust shield during the last 30 minutes of baking and it came out perfectly. I did encounter the same issue that many had in that I had to bake mine longer than the indicated time - I had to bake my pie for an additional 10 minutes. The key to knowing when it is done (aside from the knife test) is to wait until it is nice and puffed in the center.


I can't attest to the taste of this pie, because I didn't have any (I don't like nuts). Those who had a slice seemed to enjoy it though. Look at the wonderful caramelized, sugary crust that formed on the top of this pie...


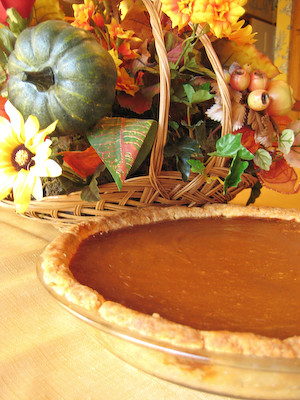
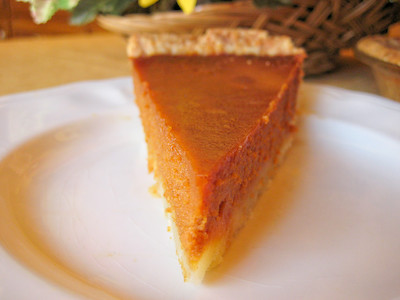
The Caramel Pumpkin Pie was very simple to make, but the caramel part can be tricky. The problem with caramel is that there's a very fine line between "deep amber, mahogany" and brown, black, and burnt.


Even though I've made caramel several times in the past, I still had to make this twice because I burned the first batch. The sugar started to caramelize and became smoky very quickly, and before I knew it, it was a very dark brown. I put a small bit on a spoon and tasted it, and it was bitter. So I dumped it out, rinsed the pan, and started over. The second time around, I was more careful with the sugar and was able to get it to just the right stage of caramelization.


The caramel added a nice flavor to the pumpkin pie. The rum was a nice addition as well, but if you don't have any on hand, you can just omit it. I really enjoyed this pie; I don't think I'll ever go back to making plain old pumpkin pie.


I had hoped to post this before Thanksgiving, so you could use these recipes, but unfortunately I had to work up until Wednesday evening and just couldn't get it in. There's no rule stating you can't have pumpkin after Thanksgiving, though, so if you're a pumpkin fan, you should give these a try.


Thanks Vibi, for choosing the Twofer Pie. It was perfect for Thanksgiving! You can find the recipe for the caramel pumpkin pie below. If you would like the recipe for the Thanksgiving Twofer Pie, you can find it here (with recipe tips here). Make sure you visit the TWD Blog Roll to see how everyone else enjoyed this unique Thanksgiving treat!

I hope everyone has a great Thanksgiving, full of holiday cheer, wonderful memories, and of course... lots of good food! :)

Caramel Pumpkin Pie
from Baking: From My Home to Yours, by Dorie Greenspan

1 9-inch single crust made with Good for Almost Everything Pie Dough, partially baked and cooled (recipe below)

1 cup sugar
3/4 cup heavy cream
2 tablespoons dark rum, cognac, or apple cider
2 tablespoons unsalted butter, cut into 4 pieces
1 cup canned pumpkin puree
1 1/4 teaspoons ground cinnamon
3/4 teaspoon ground ginger
pinch of freshly grated nutmeg
tiny pinch of ground allspice
pinch of salt
1 1/2 teaspoons pure vanilla extract
2 large eggs

Lightly sweetened whipped cream, for serving


Getting Ready:
Center a rack in the oven and preheat the oven to 350 degrees F. Place the pie plate on a baking sheet lined with parchment or a silicone mat.

Sprinkle 1/2 cup of the sugar evenly over the bottom of a large nonstick skillet. Place the skillet over medium-high heat and staying close by, cook until the sugar melts and starts to color. Once you see a little color, gently swirl the skillet so that the sugar colors evenly. Cook the sugar, without stirring, until it turns deep amber--almost mahogany. The sugar will bubble up and foam and soon it will start to smoke. It is very dramatic, and it might make you think you've gone too far, but you want a dark (though not burned black) color; the darker the sugar, the fuller the flavor. When the bubble shave gone from foamy to big and fat, you will probably have reached the right color. To check the color, drop a bit of the caramelized sugar on a white plate.

Lower the heat to medium, stand back and pour the cream into the skillet. The sugar will bubble and hiss and, if the cream was cold, it may even clump. Just continue to cook, stirring, and it will even out. Add the rum (or cider) and butter and cook just until the caramel is smooth. Pour the caramel into a heatproof pitcher or bowl and cool it for about 15 minutes.

Working with a whisk in a large bowl, beat the pumpkin to break it up and smooth it. Add the remaining 1/2 cup sugar and beat to blend. Whisk in the spices, salt, vanilla and eggs, beating until the mixture is smooth. Whisk in the caramel. Rap the bowl against the counter a few times to de-bubble the filling, then pour the filing into the crust.

Bake for 45 to 50 minutes, or until the filling is puffed and set--tap the pan gently and the filling won't jiggle. A thin knife inserted into the center of the pie will come out clean--it also leave a gash in the filling, but you'll be covering it with whipped cream.

Transfer the pie to a rack and cool to room temperature, or cool and refrigerate. When you are ready to serve, spread the lightly whipped cream over the top of the pie. If you'd like a dressier look, whip the cream until it is firm, put it into a piping bag fitted with a start tip and pipe rosettes over the surface of the pie. Alternatively, you can pipe the cream in a lattice pattern.

Playing Around:
Streuseled Caramel Pumpkin Pie

Pecan Streusel

To add a little crunch to this dessert, bake the pie for 10 minutes, then scatter chunks of pecan streusel over the top and finish baking.

2 tablespoons all-purpose flour
2 tablespoons brown sugar
2 tablespoons chopped pecans
2 tablespoons cold butter

Mix until crumbly. Refrigerate until ready to use.

Good for Almost Everything Pie Dough
For a 9 inch Single Crust

1-1/2 cups all purpose flour
2 tbsp sugar
3/4 tsp salt
1 ½ sticks (10 tbsp) very cold unsalted butter, cut into tbsp size pieces
2-1/2 tbsp very cold vegetable shortening, cut into 4 pieces
About 1/4 cup ice water

Put the flour, sugar, and salt in a food processor fitted with a metal blade, pulse just to combine the ingredients. Drop in the butter and shortening and pulse only until the butter and shortening are cut into the flour. Don’t overdo the mixing- what you’re aiming for is to have some pieces the size of fat green peas and others the size of barley. Pulsing the machine on and off, gradually add about 3 tablespoons of the water- add a little water and pulse once, add some more water, pulse again and keep going that way. Then use a few long pulses to get the water into the flour. If, after a dozen or so pulses, the dough doesn’t look evenly moistened or form soft curds, pulse in as much of the remaining water as necessary, or even a few drops more, to get a dough that will stick together when pinched. Big pieces of butter are fine. Scrape the dough out of the bowl and onto a work surface.

Divide the dough in half. Gather each half into a ball, flatten each ball into a disk and wrap each half in plastic. Refrigerate the dough for at least 1 hour before rolling (if your ingredients were very cold and you worked quickly, though, you might be able to roll the dough immediately: the dough should be as cold as if it had just come out of the fridge).

To Roll Out the Dough:

Have a buttered 9 inch pie plate at hand.

You can roll the dough out onto a floured surface or between sheets of wax paper or plastic wrap or in a rolling slipcover. If you’re working on a counter, turn the dough over frequently and keep the counter floured. If you are rolling between paper, plastic or in a slipcover, make sure to turn the dough over often and to life the paper, plastic, or cover frequently so that it doesn’t roll into the dough and form creases.

If you’ve got time, slide the rolled out dough into the fridge for about 20 minutes to rest and firm up.

Friday, November 21, 2008

Sweet and Savory Bites


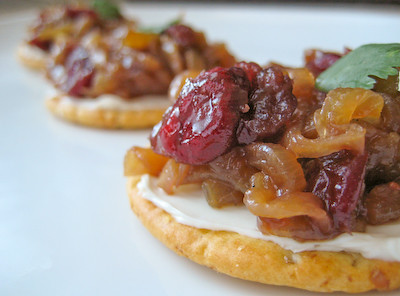
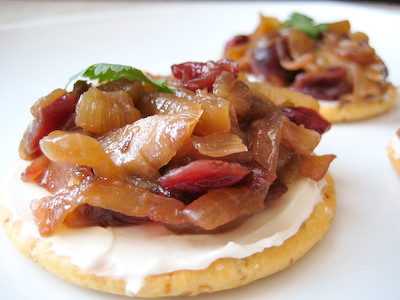
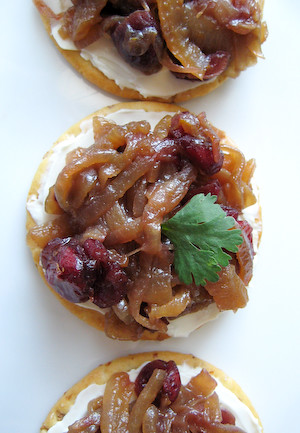
I've been really busy lately, so this post is going to be short and sweet. These Caramelized Onion-Cranberry-Cream Cheese Bites make wonderful appetizers. The great thing about these is that you can make everything ahead of time, and then just assemble right before serving.

If you really want to caramelize your onions, you'll need to cook them at lower heat for about an hour. In a pinch, the 15-18 minute sauté at medium heat will do, though.

If you enjoy caramelized onions, you'll have to try these this holiday season!


Caramelized Onion-Cranberry-Cream Cheese Bites
from Southern Living

1 tablespoon butter
2 cups thinly sliced sweet onions
1/4 cup balsamic vinegar (I used Garlic & Pepper Balsamic Vinegar)
1/2 cup fresh or frozen cranberries (thawed), coarsely chopped (I used dried cranberries)
1 tablespoon sugar
1/2 teaspoon salt
1/2 teaspoon grated orange rind
16 whole grain crackers
1/3-less-fat cream cheese (I used fat free)
Garnish: fresh cilantro or parsley leaves


Melt butter in a large skillet over medium heat; add onions, and sauté 15 to 18 minutes or until golden and tender. Stir in vinegar, cranberries, sugar, salt, and orange rind; cook, stirring occasionally, 2 to 4 minutes or until liquid is reduced to about 2 Tbsp.

Spread 16 whole grain crackers each with 1-1/2 tsp. 1/3-less-fat cream cheese; top each with 1 Tbsp. Caramelized Onion-Cranberry Compote. Garnish with fresh cilantro or parsley leaves.

Yield: 16 servings (serving size: 1 cracker)


Tuesday, November 18, 2008

Arborio Rice Pudding (TWD)


This week's Tuesdays with Dorie (TWD) recipe was chosen by Isabelle of Les gourmandises d’Isa: Arborio Rice Pudding. I've never had rice pudding before, and was curious to see how one made with arborio rice would taste. Arborio rice is an Italian medium-grain rice most commonly used to make risotti due to its high starch content.


I didn't have any whole milk on hand, so I had to use skim milk and half & half instead. I wasn't sure how to make this substitution, so I did a little research and found this information from the USDA on the Cook's Illustrated Bulletin Board:

Skim milk has no fat.
1% milk has 2.5 grams of fat per cup
2% milk had 5 grams of fat per cup
Whole Milk [3.2%] has 8 grams of fat per cup.
Half & Half has 28 grams of fat per cup or 1.75 grams per tablespoon
Whipping Cream has 88 grams of fat per cup or 5.5 grams per tablespoon

To make whole milk out of skim milk and Half & Half: Use 2 ounces of half and half and six ounces of skim milk to make one cup.

To make whole milk out of 1% milk and Half & Half: Use 3 Tablespoons of half and half and the balance 1% milk to make one cup. (This means put the 3 tbsp of half & half into the measuring cup, then fill the rest with 1% milk until you get 1 full cup.)

To make whole milk out of skim milk and heavy cream: Use 1½ Tablespoons of heavy cream and the balance skim milk to make one cup. (This means put the 1.5 tbsp of heavy cream into the measuring cup, then fill the rest with skim milk until you get 1 full cup.)

To make whole milk out of 1% milk and Whipping Cream: Use 1 Tablespoon of heavy cream and the balance 1% milk to make one cup. (This means put the 1 tbsp of heavy cream into the measuring cup, then fill the rest with 1% milk until you get 1 full cup.)

Fat content in dairy products cover a range of acceptable percentages and while these substitutions are not precise to the gram, they use easy-to-measure quantities that come within 1 gram of the fat content of whole milk.


The recipe was pretty straight forward, though I think those who have never cooked with arborio rice were at a slight disadvantage. Arborio rice is able to soak up an incredible amount of liquid. Dorie says to cook the rice for 30 minutes until 80-90% of the liquid is absorbed. After 30 minutes, many had found that there was still a considerable amount of liquid left in the saucepan. Those who have cooked with arborio rice in the past, simply continued to cook it until most of the liquid was absorbed. Those who have not, did not continue to cook it - and ended up with rice soup instead of rice pudding. It didn't help that there was a typo in the cookbook. As Dorie posted, the rice needs to cook for 55 minutes, almost double the amount of time indicated in the cookbook.


I think in a recipe like this, it's more important to base "doneness" on how the pudding looks, rather than any particular time point. When cooking arborio rice, it's important to cook it low and slow, but at the same time, it will never get to where you want it to get if the heat is too low. I cooked my pudding at medium low heat instead of low heat, and probably a little closer to medium actually. You need to make sure that there is slight bubbling of your liquid at all times, but don't turn the heat up so high that it becomes a full boil. Also make sure that you stir fairly frequently, to prevent what's at the bottom of the saucepan from burning.


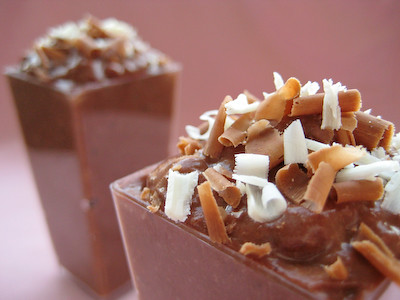
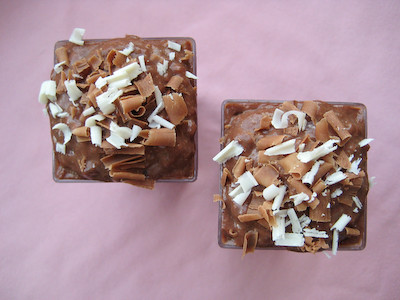
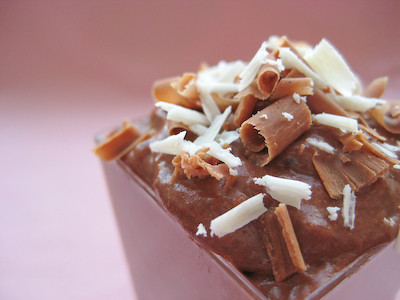
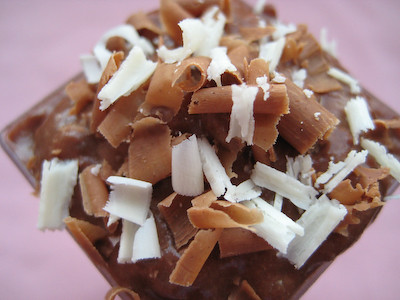
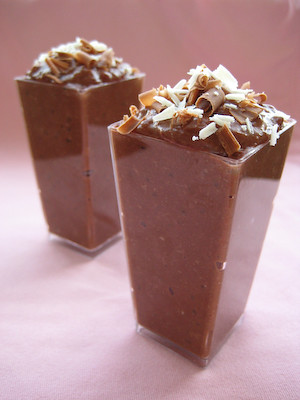
I chose to make a chocolate flavored Arborio Rice Pudding because I figured my husband, being a big chocolate lover, might be more inclined to like it (he isn't a fan of rice pudding in general). The pudding turned out nice and creamy, and plenty chocolatey. Unfortunately, I was unable to convert my husband into a rice pudding fan, even with my chocolate version. I'm not too sure I'm a big fan of it myself, either. I just didn't really care for the texture.


Thanks Isabelle, for choosing Arborio Rice Pudding. I never would have tried it on my own were it not for TWD. If you would like the recipe, you can find it here. Make sure you visit the TWD Blog Roll to see how everyone else enjoyed this creamy treat.

*Recipe notes:
- Some TWD Bakers doubled the amount of rice in this recipe. I did not find this necessary... 1/4 cup of arborio rice doesn't seem like much, but it soaks up a ton of liquid and expands when cooked so it ends up being 4 servings, just as Dorie promises.
- I used semisweet chocolate chips in this recipe instead of chopping up a block of chocolate.
- Make sure you follow the tips above, to keep the heat at just the right level to achieve the perfect pudding.
- If you can't find arborio rice at your grocery store, look for "risotto rice" - they are one and the same.
- What to do with the rest of the arborio rice you've bought? Make some risotto! Try this Shrimp and Goat Cheese Risotto or Lemon Risotto.
- For more recipe tips, click here.

Sunday, November 16, 2008

Cupcake Pops


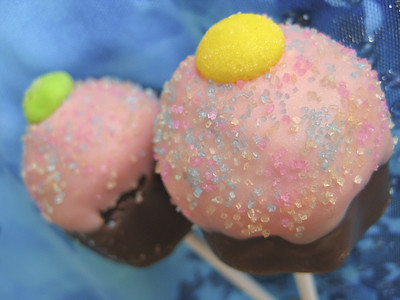
When I first saw these adorable little cupcake pops on Bakerella's blog, I thought they were cute, but figured they were also way too complicated to make. Turns out they're pretty easy to make, just a little time consuming. I found it best to divide the recipe up into a two day process.


You can save time by using a boxed cake mix and store bought cream cheese frosting, but I decided to make everything from scratch because well, everything is better when you make it from scratch :)


The recipe is actually rather simple. Crumble your baked cake into bits and then mix in some cream cheese frosting. Roll the cake into balls, then refrigerate until firm.


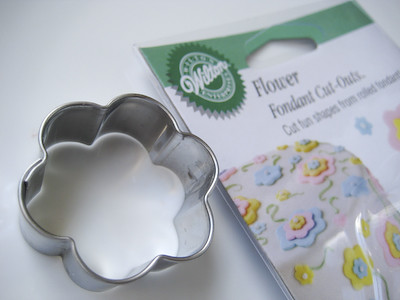
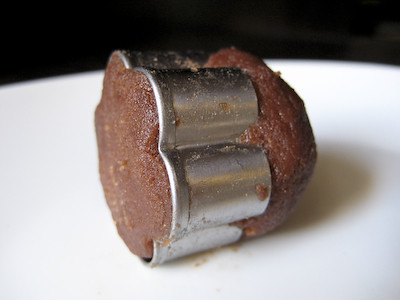
Initially, I thought a cookie cutter mold like this one would best, because it has more ridges and most resembles a true cupcake liner. I'm not sure if it was because the chocolate cake I baked was extremely moist, but I found it very difficult to mold the cake with that cookie cutter. The cake would just stick to all the ridges and would not come out in any recognizable shape. Instead, I found that this one was much easier to use:


It comes in a set of three, with the medium sized one being the one I ended up using. It's 1-1/2 inches in diameter, as opposed to 1-1/4 inches (the ideal size). If you're like me and you aren't able to find the 1-1/4 inch cookie cutter, the 1-1/2 inch one works just fine. You'll just have to roll your cake balls a little larger. I like to be precise in the kitchen (read: OCD), so I actually weighed out my cake before rolling it into balls. If you have the 1-1/4" cookie cutter, you'll want to weigh out 1 ounce of cake. If you're using the 1-1/2 inch cookie cutter, you'll weigh out 1-1/8 ounces of cake.


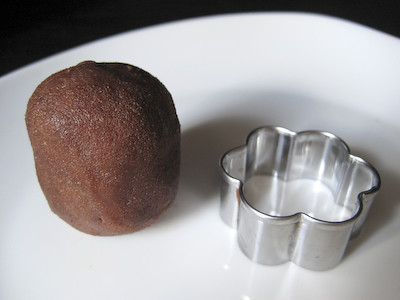
After the balls have firmed up in the refrigerator (or freezer), you shape them into a more oblong shape. I actually found that I needed to freeze the balls before molding them - they were too soft and difficult to work with when they were only in the refrigerator, even overnight. Again, I'm not sure if this was because I was working with an extremely moist cake, or if everyone else has had a similar experience.


After reshaping the cake, you mold it in the cookie cutter and then push it out from the bottom up in order to form the bottom of the cupcake.


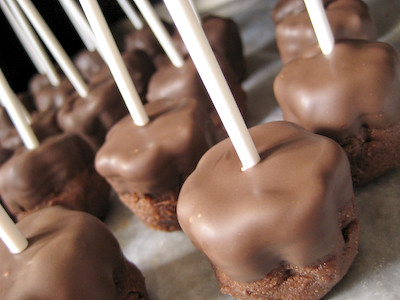
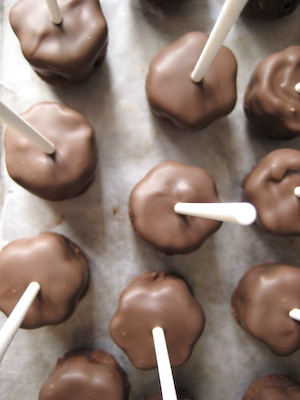
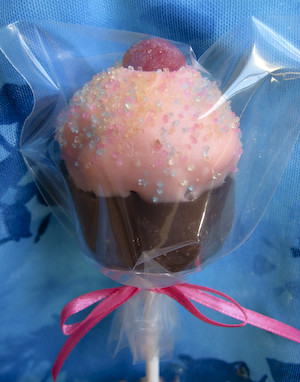
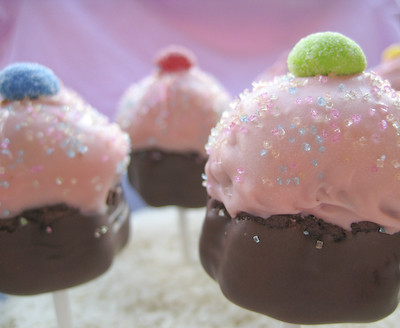
After a quick chill in the freezer, the cake is ready to be dipped. The bottoms are dipped in chocolate bark, and then the tops are dipped in melted pink candy melts. You're supposed to hold the little cupcakes by hand and dip them in the chocolate bark, then insert the lollipop sticks into the bottoms, but I found this very difficult to do. A trick I discovered to make this much easier was to use a wooden skewer to dip them in the chocolate. I would insert the wooden skewer into the top of the cupcake, then dip the bottom of the cupcake, shake off the excess chocolate, and then insert the lollipop stick. Once the lollipop stick was firmly in place, I removed the skewer, patched up the hole where the skewer was with a gentle nudge of my finger on the surrounding cake, and then placed the lollipops on some wax paper to set.


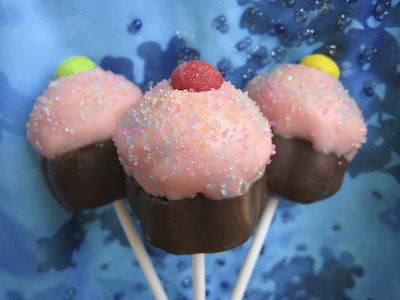
After the bottoms have been dipped in chocolate bark, you simply dip the tops of the cupcakes in pink candy melts. Then you top the cupcakes with M&M's and sprinkles. You're supposed to stick the lollipops into a styrofoam block while they set, but I didn't really want to buy one just for this purpose. I saw that others had used egg cartons, but I had no such luck with that. Instead, you can use a large bowl of sugar or rice to stand them up while they are setting, like this:

These really are the cutest baked creation I have seen in a while. Like I said at the beginning of the post, I never thought I would make these. I recently found myself needing something special to send to a good friend, though, so I took the opportunity to try my hand at them. I was pleasantly surprised to learn how easy they are to make. These are great to bring to get togethers, especially something like a birthday party or baby shower. They're even cuter when you wrap them up and tie them with a ribbon.


I found that while Bakerella's post was very detailed in some regards (lots of photos, information on cookie cutter sizes, etc.), it was lacking in other areas. Her post doesn't specify several things, like the size of the lollipop sticks you need for this, or the dimensions of the treat bags. I used lollipop sticks that were 10cm in length and treat bags that were 3" x 4" (7.6cm x 10.2cm). The ribbon I used was 1/8" (3mm) wide. If you cut it into strips that are about 9 inches long, it's the perfect length to to tie around your treat bag and make a small bow. Most of the items required to make these can be found at your local craft store. I was able to find everything at Michael's. The only thing I did not pick up from there was the chocolate bark, which I purchased from the grocery store.


These are sure to be a crowd pleaser. Not only are they adorable, but they taste good too. They're also the perfect size for those who are worried about portion control (though when it comes to sweets, why worry about portion control?). While I used a chocolate cake, you can use whichever type of cake you're craving. You could also take these to a whole new level by shaping frozen cheesecake pops like this! (Maybe I'll try that next time?!)

Cupcake Pops and Cupcake Bites
from Bakerella
(Video Instructions from the Martha Stewart Show)

1 13x9 baked cake (from a box cake mix or from scratch … any flavor) (I made a Cocoa Buttermilk Cake - recipe below)
1 container store bought cream cheese frosting (or about 2 cups equivalent from scratch) (I made some from scratch - recipe below - will use only 1-3/4 cup next time so the cake isn't so moist/sticky)
1 flower shaped cookie cutter (1.25" wide x 0.75" tall) (I use one that was 1.5" in diameter)
1 package chocolate bark (I only used 14 ounces chocolate bark from a 24 ounce package)
1 package pink candy melts or white chocolate bark (I used a 12 ounce package)
bowls for dipping
wax paper
aluminum foil
lollipop sticks (I used 55 sticks, 10cm in length)
sprinkles, m&ms or something similar for top of cupcake (I used colored sugar crystals and sour skittles - would recommend M&M's instead since they are chocolate flavored - the sour skittle was too much of a contrast in flavors)
small plastic treat bags (I used 3x4" bags) and ribbon (I used 1/8" wide ribbon) if making the Cupcake Pops
candy cups and truffle boxes to individually package the Cupcake Bites
styrofoam block

Bake a cake from a mix or from scratch and cool completely.

Crumble cake into a fine consistency into a large bowl.

TIP: If the texture is too coarse, you can run it through a food processor.

Add can of cream cheese frosting or homemade frosting and blend together using the back of a large spoon. Blend thoroughly.

Roll mixture into 1.25" - 1.5" size balls and lay on wax paper covered cookie sheet. You may want to periodically rinse and dry your hands off in between.

Cover with aluminum foil or plastic wrap and chill in refrigerator for several hours.

TIP: You can speed this up by placing in the freezer for about 15 minutes. (I found that the only way I could work with them was by placing them in the freezer. No amount of refrigeration was sufficient.)

Remove. Begin to shape into cupcakes using a small flower-shaped cookie cutter. Take the chilled ball and roll it into more of an oval and then slide into cookie cutter.


Push it into cutter until about half fills the cutter and the rest sticks out of the top in the shape of a mound.


Then push the shaped cupcake carefully out of the cookie cutter from the bottom. Set right side up on a wax paper covered cookie sheet. Continue with remaining balls.

Once shaped, cover and return to freezer. (5-10 minutes)

TIP: You can leave them covered in the refrigerator overnight if you want to do the dipping on the following day.

While cupcake shapes are chilling, begin to heat up your chocolate bark.
Brown chocolate bark for the bottoms. Pink or white chocolate for the tops.

Follow the instructions on the package for melting. Most recommend heating for 30 second intervals at a time and stirring in between. You can also do the double boiler method.

When you are ready to dip, remove from freezer and set up another wax paper covered cookie sheet.

Take the cupcake shaped mixture and dip the bottoms into the melted chocolate - just to the point where the mounded shape starts. (I found this was easier if you insert a wooden skewer into the tops first.) Remove from chocolate, turn upside down and wiggle so that the excess starts to slide down slightly. Then lay on the wax paper upside down. If you want them to be lollipops, then go ahead and insert the lollipop sticks while the chocolate is still wet. (After inserting the lollipop stick, remove the skewer and then cover up the hole on the top of the cupcake by pinching the cake a bit.) Continue with rest of the cupcakes. You can also leave some without the sticks. They’re just as cute as Cupcake Bites.


TIP: Dip end of your lollipop stick in the melted chocolate before inserting into chocolate bottoms. Not sure if this helps a lot, but it couldn't hurt. (I skipped this step and they turned out fine.)

DON'T - get water in the chocolate. Make sure your hands are completely dry. Water will cause the chocolate to separate and mess up all your hard work.

Dry completely. (15-20 minutes)

Once dry, dip the tops of the cupcakes in the pink or white chocolate. You may need to move it around a little to cover all the exposed areas.

TIP: Let the pink chocolate sit for a few minutes after heating to thicken. This will help it from dripping down the sides of the cupcake.

Remove from the pink/white chocolate and turn right side up. You may need to hold and rotate it if there is any excess so that it doesn’t drip down too far.

TIP: You can use a toothpick to help cover any areas the melted chocolate didn't cover.

For the Cupcake Bites - just turn right side up and rest on the wax paper. Then go ahead and put an M&M on the top and add sprinkles while wet.

For the lollipops, continue holding and place an M&M on the top and add sprinkles. Let them dry in a styrofoam block that you have already poked holes into.

When completely dry, cover the lollipops with small plastic treat bags and tie with a ribbon. (I used treat bags that were 3" x 4" and strips of ribbon that were 1/8" wide and 9" long.)


For the Cupcake Bites, place in a candy cup and package in small candy truffle boxes to present individually.

Makes about 50. (I was able to make about 55 with the 1-1/2" cookie cutter.)

You can store these in an airtight container and they will last for several days. You can also store them in the refrigerator if you would like them cold.

Cocoa-Buttermilk Cake
adapted from Baking: From My Home to Yours, by Dorie Greenspan

2 cups all purpose flour
½ cup unsweetened cocoa powder
½ teaspoon baking powder
½ teaspoon baking soda
½ teaspoon salt
2 sticks (8 ounces) unsalted butter, room temperature
1-½ cups granulated sugar
2 large eggs
2 large egg yolks
1 teaspoon pure vanilla extract
1 cup buttermilk (I use SACO buttermilk cultures from Walmart - it has a much longer shelf life than fresh buttermilk)
4 ounces bittersweet chocolate, melted and cooled (optional) (I used semisweet chocolate)

Center a rack in the oven and preheat the oven to 350 degrees F. Butter a 13-x-9 inch pan, dust the insides with flour, tap out the excess and line the bottom with parchment or wax paper. Put the pan on a baking sheet.

To Make the Cake:
Whisk together the flour, cocoa, baking powder, baking soda and salt.

Working with a stand mixer, preferably fitted with a paddle attachment, or with a hand mixer in a large bowl, beat the butter on medium speed until soft and creamy. Add the sugar and beat for about 2 minutes, until it is thoroughly blended into the butter. Add the eggs one at a time, then the yolks one by one, beating for 1 minute after each addition and scraping down the sides and bottom of the bowl as needed. Beat in the vanilla. Reduce the mixer speed to low and add the dry ingredients alternately with the buttermilk; add the dry ingredients in 3 portions and the buttermilk in 2 (begin and end with the dry ingredients); mix only until each new batch is blended into the batter. Scrape down the bowl and, if you want, add the melted chocolate, folding it in with a rubber spatula. Pour the batter into the cake pan.

Bake for 35 minutes, or until the cakes feel springy to the touch and starts to pull away from the sides of the pans (I also used the toothpick test). Transfer the cake to a rack and cool completely.

Cream Cheese Frosting
from Baking: From My Home to Yours, by Dorie Greenspan

8 ounces cream cheese, at room temperature
1 stick (8 tablespoons) unsalted butter, at room temperature
1 pound (3-¾ cups) confectioners' sugar, sifted (the frosting will be lumpy if you don't sift it)
1/2 tsp pure vanilla extract

Working with a stand mixer, preferably fitted with a paddle attachment or with a hand mixer in a large bowl, beat the cream cheese and butter together until smooth and creamy. Gradually add the sugar and continue to beat until the frosting is velvety smooth. Beat in the vanilla extract.

Yield: 2 cups

Tuesday, November 11, 2008

Kugelhopf (TWD)


This week's Tuesdays with Dorie (TWD) recipe was chosen by Yolanda of The All-Purpose Girl: Kugelhopf. I had never heard of Kugelhopf before. It's part bread, part cake. Dorie explains that it is similar to brioche, but not as rich because there's less butter in it. What's left out of the dough, however, is made up for in the end - as the cake is soaked with melted butter and sprinkled with sugar after it's baked.


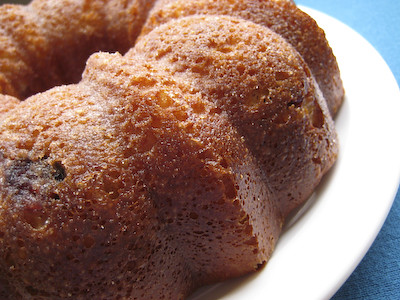
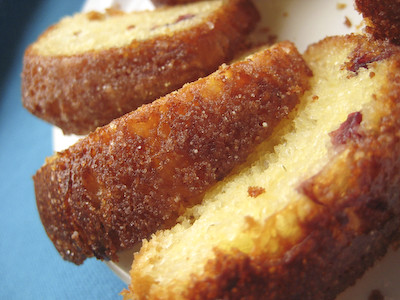
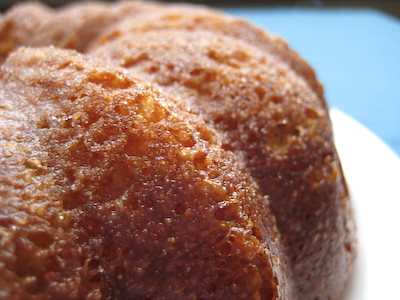
Apparently, there are special Kugelhopf pans available. They're called turk's heads or turbans, due to their slender shape and curves. I don't have room for another pan in my kitchen, so I used my Bundt pan instead. I have a 10-15 cup Bundt pan while this recipe calls for an 8-9 cup pan. Consequently, my Kugelhopf ended up more short and squat and not so much slender and curvy ;)


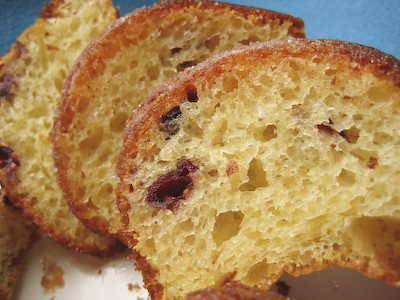
I have a 6 quart KitchenAid stand mixer, so my dough hook had some difficulty mixing the dough thoroughly. So I used the paddle attachment initially to mix everything up, then switched to the dough hook for the last ten minute knead. Instead of raisins, I used orange flavored cranberries from Trader Joe's, just because that's what I had on hand.


The dough was incredibly sticky to work with. When it came time to flop the dough to deflate it, it wasn't like the brioche dough we had previously made - it stuck all over my fingers.


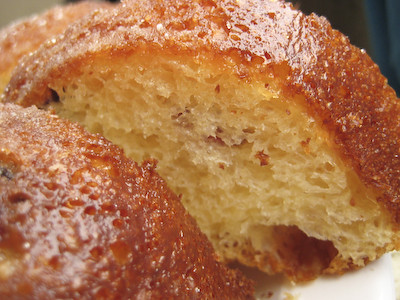
If you're going to make this recipe, make sure you allow plenty of time. The dough needs to rise for at least 1.5 hours (mine took 2 hours to double in size), then you need to deflate it every 30 minutes for 2 hours. Then, it requires a final rest in the refrigerator overnight, followed by 2-3 more hours of rising at room temperature in the pan. Look at all those nice little bubbles that rose up...


The Kugelhopf was just okay, but not great in my opinion. (My husband actually said, "Honey, I love you, but that just isn't good.") I think I was expecting something sweeter, and this had a very mild, buttery flavor. Soaking it in butter and drizzling sugar over it definitely made it better - it would have been drab otherwise. Perhaps I would have liked it better with (gasp) more butter? :) The dried fruit was very good in it, but there wasn't nearly enough - I would recommend doubling the amount.


Thanks Yolanda, for choosing this week's recipe. It was an interesting experience making and tasting Kugelhopf for the first time. When it comes to such a long, drawn out process, however, I think I would much rather have brioche (or cinnamon rolls) than Kugelhopf, so I probably won't be making this again. If you would like the recipe, you can find it here. Make sure you visit the TWD Blog Roll to see what everyone else thought of this buttery treat.

*Recipe notes:
- I would recommend doubling the amount of dried fruit in this.
- I used skim milk instead of whole milk.
- I used salted butter and cut the amount of salt in the recipe in half.
- I also used salted butter to soak the cake - the salty taste of the butter combined with the drizzled sugar was fantastic!
- For more recipe tips, click here.