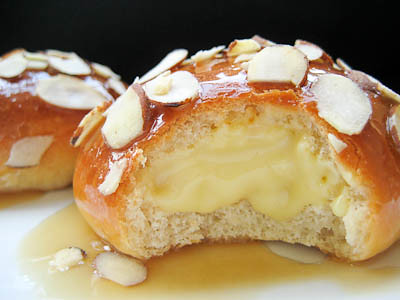
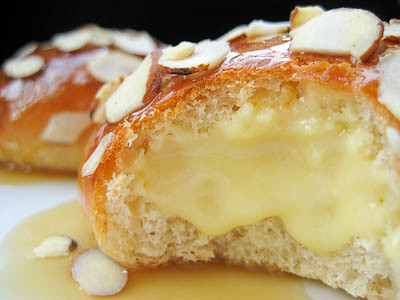
This week's Sweet Melissa Sundays (SMS) recipe was my pick! After pouring through the pages of this cookbook, I finally decided that I wanted to make the Bee Stings. These are Melissa's version of baked doughnuts - they're "sweet and tender brioche-style buns filled with pastry cream and then dipped in honey caramel and sprinkled with toasted almonds."
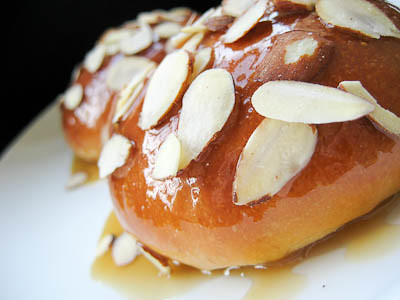
This is definitely a recipe that you'll have to plan ahead for. The dough needs 2-3 hours to rise after being kneaded, then it needs to be refrigerated overnight. When I read through the recipe, I was concerned because I have never seen a yeast dough recipe where there is only an exact amount of flour. Typically, the amount of flour you need to add will vary based on how much moisture is present in your kitchen, the flour, etc. I found that I had to add quite a bit more flour before my dough was no longer sticking to the sides of the bowl. I lost track of how much I added, but it was at least 1/4 cup more. The amount you'll need to add will be different, but in general if you add one tablespoon at a time, you won't over do it. As with most brioche doughs, it helps if you have a stand mixer, but it's not absolutely required. You just have to be ready to get a really good workout if you don't have one.

Aside from requiring extra flour, I had no problems with the dough. My dough took about 3 hours to double in volume, but that's partly because I didn't use "rapid rise" yeast. I also use my oven as a proofing box. I'll preheat it for a minute or two to get it warm, then turn the oven off and place my dough inside to rise. This guarantees that whether it's summer or winter, my dough will always rise nicely.
I found that my buns were golden brown after a short 19 minutes in the oven (11 minutes early) - so be sure to keep an eye on your buns to prevent them from burning!

While the dough was simple enough, I had major issues with the pastry cream. It's not that I've never made pastry cream before. I am used to making Dorie’s pastry cream and this one took forever to thicken up. At first, I thought it was because the water in my double boiler was just at a simmer (the recipe says not to boil it). After patiently whisking for over 20 minutes, however, I increased the heat to get the water to a boil… I then whisked for probably another 40 minutes until it started to thicken just slightly. It never got extremely thick like Dorie’s, but I gave up and stuck it in the fridge. After chilling overnight, it was thicker, but not nearly as thick as most pastry creams – not sure if this is Melissa’s intention. It reminds me of the cream you would find in a cream-filled doughnut, so perhaps this was her intention.
The honey caramel glaze is very simple to make. The honey adds a very nice flavor to the traditional flavor of caramel.
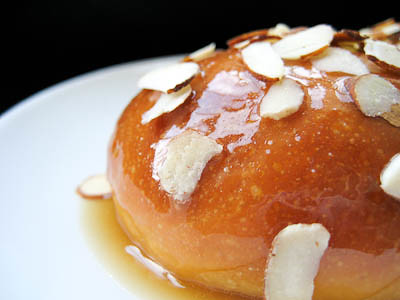
So how did these taste? They were good, but not quite what I had imagined when reading the recipe. The dough was sweet but wasn't quite as delicate as I had imagined. (This may have been my fault because I kneaded the dough much longer than the recipe indicated, while adding all the additional flour.) The pastry cream, in my opinion, was just okay. I much prefer Dorie’s pastry cream and will probably use that recipe instead the next time I make these. The honey caramel glaze was my favorite component of this recipe and tasted better than I had anticipated. Overall, I was glad I tried these, and while they're not my new favorite pastry, I could see myself making these again if I had a free weekend.
Make sure you visit the SMS Blogroll to see what everyone else thought about these sticky little treats!
Bee Stings
from The Sweet Melissa Baking Book
1/3 cup whole milk
1 large egg, at room temperature
1/3 cup sour cream, at room temperature
1 tsp pure vanilla extract
2 ¼ cups + 2 tbsp all-purpose flour
2 ¼ tsp (1 package) active dry yeast
1 tsp kosher salt
½ cup sugar
5 tbsp unsalted butter, softened
1/3 cup sliced blanched almonds, toasted, for garnish (Mine were not blanched, and then I forgot to toast them)
Vanilla Bean Pastry Cream, recipe follows
Honey Caramel Glaze, recipe follows
Line two cookie sheets with parchment or aluminum foil.
In the bowl of an electric mixer fitted with the whip attachment, combine the milk, egg, sour cream, vanilla and half of the flour. Mix on medium speed until it is a sticky paste.
Change the mixer attachment to the dough hook. Add the remaining flour, yeast, salt and sugar and mix on low speed to combine. Add the butter in pieces and beat on medium speed for 10-15 minutes until the dough forms a ball and is no longer sticking to the sides of the bowl. (If your dough is still very sticky, add more flour, one tablespoon at a time, until it is no longer sticking to the sides of the bowl. I had to add at least an extra 1/4 cup.)
*Edit: Please check out the tips at Pink Stripes - Wendy figured out how to make these without adding the extra flour, resulting is a lighter, not so dense bee sting!
Place the dough in a lightly greased bowl and cover is with plastic wrap. Set aside in a warm place to rise until doubled in volume, 2 to 3 hours.
When the dough has doubled, punch it down and turn it out onto a work surface. Divide it into 12 even pieces, each weighing about 2 ounces. (Due to the extra flour I added, mine were about 2.5 ounces each.)
Roll the dough into balls and place them 2 ½ inches apart on the prepared sheets (6 on each pan). Spray lightly with nonstick vegetable cooking spray and cover with plastic wrap (or lightly butter one side of the plastic wrap). Refrigerate overnight.
When you are ready for the final rise, remove the buns from the refrigerator. Bring about 3 quarts of water to a boil. Place an empty roasting pan large enough to hold the water on the bottom of your cold oven. Pour the boiling water into the pan.
Remove the plastic wrap from the buns. Position a rack in the top and bottom thirds of your oven. Place the cookie sheets on the racks in the oven (do not turn the oven on!)and shut the oven door. The steam of the water will help the buns in their final rise. The buns will just about double in size in about 40 minutes. (If your fridge is on a super-cold setting, your buns may take a little longer to rise. If they need more time, just boil some more water and refill the roasting pan.) When the buns have doubled in volume, remove them (and the roasting pan filled with water) from the oven.
Preheat the oven to 350 degrees.
Bake for 30 minutes, or until golden brown. (Watch them carefully - mine were done at just 19 minutes!)
Remove to a wire rack to cool completely before filling.
Honey Caramel Glaze:
1/3 cup firmly packed light brown sugar
3 tbsp heavy cream
3 tbsp clover honey
2 tbsp cold unsalted butter, cut into 1/2-inch pieces
1/4 tsp fresh lemon juice
In a small saucepan over medium heat, bring the brown sugar, cream, honey and butter to a boil. Cook for 30 seconds more, then remove the pan from the heat.
Stir in the lemon juice and let cool slightly.
Vanilla Bean Pastry Cream:
1 cup whole milk
¼ cup sugar
1/2 vanilla bean, split, or ¾ tsp pure vanilla extract
3 large egg yolks
2 tbsp cornstarch
2 tbsp cold unsalted butter
Fill a medium saucepan with 3 inches of water and bring to a simmer. Set a bowl over the top, but make sure that the bottom of the bowl does not touch the water. (Remove the bowl and use it for the egg yolk mixture.)
In a separate saucepan, stir together the milk, half of the sugar, and the vanilla seeds and pod and heat to scalding, or until the milk is steaming and tiny bubbles are forming around the edges. Do not boil. (At this point you'll also want to strain the hot milk to remove the vanilla bean.) If using vanilla extract, add it at the end of the recipe after the butter.
In the reserved bowl, whisk together the egg yolks and the remaining half of sugar until pale yellow. Whisk in the cornstarch. Little by little, whisk the hot milk into the egg mixture.
Place the bowl in the top of the double boiler, over simmering, not boiling, water. Cook, constantly whisking, until thick, about 5 minutes. (I had to increase the heat and whisk for much longer than 5 minutes.)
Remove from the heat and whisk in the butter and vanilla extract, if using. Lay a piece of plastic wrap on the surface of the custard (to prevent a skin from forming) and refrigerate in an airtight container for up to 4 days. Whisk until smooth before using.
To Complete the Buns:
Poke a hole through the side of each bun, and hollow it out a bit. I find it easiest to do this with the pointy end of a stick thermometer or a metal skewer (a chopstick works great too!). Poke a hole large enough for an Ateco #801 1/4-inch round pastry tip to fit into. Once the stick is inside the bun, wiggle it from side to side, making room for the cream. Be careful not to poke through the other side - you don't want any of that cream coming out!
Whisk the pastry cream until smooth. Put it into the pastry bag fitted with the tip. Fill each bun with as much cream as you can without it spilling out. You should be able to fit at least 2 tablespoons into each bun.
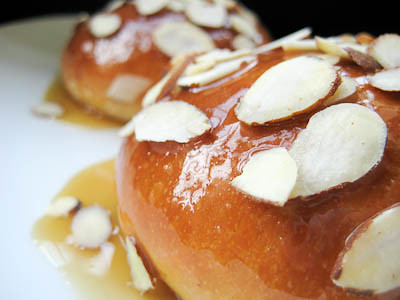
Holding the filled bun upside down, dip the top of each bun into the honey caramel, (flip them back over) and then sprinkle with the almonds. Repeat with the remaining buns. Bee Stings are best eaten as soon a they are made, but stay yummy all day.
Tip: Freeze the buns! Once you form the dough into buns, you can place them in the freezer uncovered on the sheet before they start to rise again. Once they are frozen, cover with plastic wrap. They will keep frozen for up to 1 week. When you are ready to bake, take them from the freezer, and let them thaw unwrapped at room temperature. Proceed with the final rising before baking.
Yield: 12 Buns


Jaime, your beestings look awesome! What a great choice. I'm sorry that I was lazy and sat this one out. I'm actually getting a stand mixer pretty soon, so I promise to go back and make this recipe. (Oh, and I have to say, even though your pastry cream didn't get super thick, it looks fabulous in the brioche puffs.)
ReplyDeleteoh these ook so good. Here ts morning and I m dreaming about one of these for breakfast. Pity they take so long to make. I think the pastry cream consistency is good for the buns :)
ReplyDeleteThey sure look perfect, all sticky and delicious!
ReplyDeleteYour Bee Stings look beautiful! Sorry I couldn't bake along with you this week; I'm visiting my parents and felt bad taking over their kitchen for such a huge amount of time. But I'll play catch-up when I get home. And, your DB strudel looks tasty too; another challenge I wasn't going to attempt in someone else's kitchen!
ReplyDeleteThose look so amazingly good! Vanilla cream filling, honey caramel glaze...mmm... Can I come over for breakfast?
ReplyDeleteYours looks delicious. I had a lot of the same problems with the dough. I ended up heating the milk and the butter and it worked. It also cooked really fast and looked burnt but with the glaze they were still good.
ReplyDeleteThanks for choosing.
I've never heard of Bee Stings, oh how gorgeous! These would definetly be worth the trouble!!! I love the picture of the filled bun, be still my heart.
ReplyDeleteThese are beautiful! I would love one (or two!) right now!!
ReplyDeleteThese look delicious! I've been wanting to make them for a while now.
ReplyDeleteAs you know I had to bail after my pastry cream failed, but these look exactly like I imagined them and they are gorgeous! I still want to try again sometime.
ReplyDeleteYour bee stings look terrific Jaime - just like the ones in Melissa's book!! Thanks for a fun pick this week!
ReplyDeleteBeautiful, Jamie!! :) Thanks so much for this week's pick - they were so yummy!!
ReplyDeleteYours turned out great, Jaime. I love the picture of the inside of the bun. The color of the buns is great too, nice and golden brown. I will be baking mine later today. Thanks for choosing this recipe. It had some challenges but hey, it's another great baking/learning experience.
ReplyDeleteWow! Those look fantastic! So gooey & yummy. Well done!
ReplyDeleteYours look so gorgeous! I'm glad you didn't have trouble with the dough part - I was the opposite - very little problems with the pastry cream, but serious issues with the dough! I think I need more practice with yeast. Thanks for picking this recipe, it was fun!
ReplyDeleteWOW! Is the first word that comes to mind when I saw your beautiful Bee Stings. I'm sorry that I wasn't able to participate this week, but I'm looking forward to tackling this recipe at a later date. I hope that mine turn out as good as yours.
ReplyDeleteThese look superb! Love it!
ReplyDeleteWow! They look perfect. great job!
ReplyDeleteI made these but I haven't posted yet. I ran into a few issues (distracted baker related, not due to the recipe) but they were still delicious. I'll make them again, when I am not surrounded by lots of children and interruptions.
ReplyDeleteYours look absolutely perfect!
These look so good! They sound very time consuming, but look like they are well worth it!
ReplyDeleteThese look and sound fabulous! I think you made a great choice!
ReplyDeleteThis recipe is the one that I most want to try from the Sweet Melissa baking book! After seeing how amazing they look, I want to try even more!
ReplyDeleteGreat pick! Your bee stings look perfect! I'm a little jealous
ReplyDeleteOh, these look fantastic! Mine are doing their first rise right now, so they won't be posted by the end of the day, but I'll get them up tomorrow. I had to add a lot of extra flour, too, we'll see how they turn out! Great pick, thanks!
ReplyDeleteLooks very tempting, Jaime. Unfortunately, I skipped this week because I'm trying to be better with my eating. I'm sorry I didn't bake along with you, but they look wonderful.
ReplyDeleteThey look amazing! You're amazing! I'm going to take another stab at this in the near future.
ReplyDeleteWOW! Jaime... what can I say? This is soooo mouthwatering, you have succeeded at the VERY hard task of making me actually want to learn how to bake... to make those!!!
ReplyDeleteOH! HOW SO YUMMY LOOKING! The best I've seen.
Beautiful Bee Stings! How did you get all that pastry cream in? I appreciated your comments on the P&Q section, they were a huge help for me.
ReplyDeleteThis is one bee sting I would LOVE! Looks so good!
ReplyDeleteWow- a work of art! You should be awarded just for getting that filling in there so perfectly- I don't know if I dare! :)
ReplyDeleteUnbelievable delicious. I am so tempted!
ReplyDeleteGORGEOUS!
ReplyDeletewow! your bee stings look incredible!!! yummy :P
ReplyDeletei was so sad to not participate this week ): i do not have my kitchen aid mixer with attachments here in italy (i thought the recipe might be quite difficult without it!)
oh jaime! never again will i associate bee stings with pain and agony, but with drool and deliciousness instead. :) what an amazing creation! the next time i'm motivated to work hard in the kitchen, you'd better believe i'll attempt to make these. awesome.
ReplyDeleteThey look GORGEOUS...and I love the name! :)
ReplyDeleteI'm with you on this recipe = glad to try it, but probably won't bother again.
ReplyDeleteAnd good to know the pastry cream isn't anything to get excited about, either.
Great choice, though!
Oh, boy those look wonderful. Love the photos especially the ones that show the cream! Sorry they weren't quite as good as you had hoped but they REALLY do look good!
ReplyDelete~ingrid
Your bee stings look fantastic! These were a big hit once I got them right. I'm glad I tried again.
ReplyDeleteWow what great looking bee stings. Im so bummed I had to miss this one. Life was super crazy last week.
ReplyDeleteNice looking Stings, too bad they didn't pass the taste test. I passed on this one, just not enough time this weekend, but a great pick, I will do a rewind on this one.
ReplyDeleteWow an hour of whisking! Yikes. I've really been wanting to make these but now that you say they weren't super awesome I'm not sure. They do look absolutely stunning though!
ReplyDeleteJaime, I am SUPER jealous of your bee stings! Mine flopped... yours are absolutely gorgeous.
ReplyDeleteYum! I love bee stings, and yours look delicious. I have just bought the SMS book, and notice that there are no pictures, so it is great to see what some of the recipes look like through SMS.
ReplyDeleteThat is one gorgeous picture! Sorry they didn't taste as good as they looked.
ReplyDeleteDid you by chance take a picture of the inside? Would love to see what the texture looked like. Thanks!!
ReplyDeleteYou'd certainly never be able to tell you had trouble with the cream, it looks fantastic!
ReplyDeleteKatie xox
Wow, your buns looks perfect. I am sorry I wasn't able to make these I was in Hawaii, and am just too shy to make food for strangers and we couldn't eat it all. But I will do a rewind because they look so good. Glad yours turned out great.
ReplyDeleteThese buns look AMAZING. I'm upset I didn't get a chance to do these. Your buns look exactly like the ones at Sweet Melissa. Great job Jamie.
ReplyDeleteI may not be the world's biggest almond fan but these actually look really good!
ReplyDelete