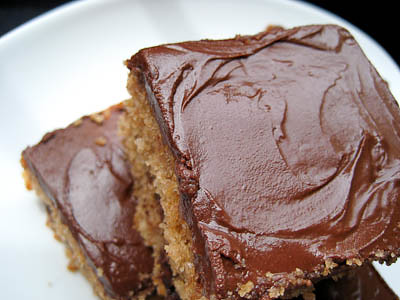
Tuesday, June 30, 2009

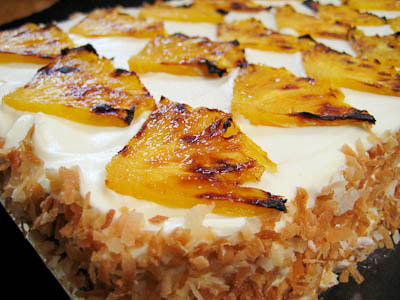
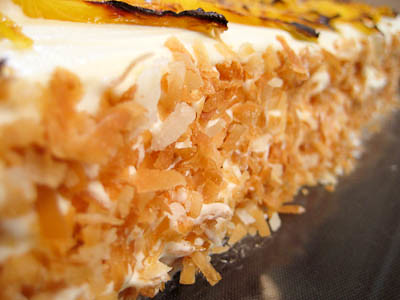
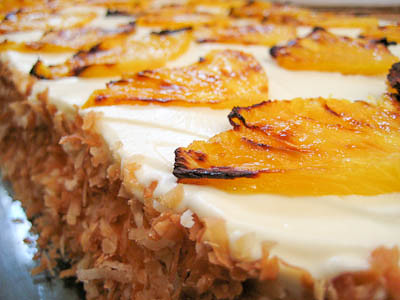
Perfect Party Cake and Coconut-Roasted Pineapple Dacquoise (TWD)


This week's Tuesdays with Dorie (TWD) recipe was chosen by Carol of mix, mix... stir, stir: Perfect Party Cake. I actually made this cake last year as part of one of The Daring Bakers' challenges. The first time I made it, I frosted it with white chocolate whipped cream because I don't particularly care for buttercream frosting. I made it again at the end of last year for my mother-in-law's birthday party and used Dorie's buttercream recipe and loved it. It was not until I tried this buttercream recipe that I realized not all buttercreams are created equal. So if you make this cake, I urge you to try it with the buttercream because it is delicious. You can read more about my experiences with this cake and see more photos of it here. This would be a perfect cake for a Fourth of July celebration, topped with blueberries and raspberries!


I'm sorry Carol, but I did not have time to make this cake again. I barely got the June Daring Bakers' challenge posted at the last minute this weekend, and then had some catching up to do as well. Last week, Andrea of Andrea in the Kitchen chose the Coconut-Roasted Pineapple Dacquoise (pronounced da-kwaz). I did not have a chance to make it due to the passing of my grandmother, but promised I would get to it soon.

I have wanted to make Coconut-Roasted Pineapple Dacquoise from the moment I got the cookbook. There is a lovely picture of it in the book that just jumps out at you. I grew up in southern California, only thirty minutes from the beach. During the summer, we'd always stop at Thrifty's on the way home from the beach for some ice cream. One of my favorite ice cream flavors there was pineapple coconut. So I knew that with roasted pineapple, coconut, and white chocolate ganache, this was going to be one really great dessert.


The recipe was fairly straightforward, though extremely time consuming. First, there's the coconut almond meringue layer made with ground almonds, coconut and egg whites. Though it can be made one day in advance, it takes three hours to fully bake.


The white chocolate ganache is made with white chocolate and heavy cream. You boil the heavy cream, then pour it over the white chocolate, and mix until the chocolate is completely melted. Then the ganache needs to be refrigerated for three hours before it is whipped up for the final dessert.


The roasted pineapple is probably the quickest part of this recipe, though cutting and slicing the pineapple does take some time. Simply quarter your pineapple, slice it into 1/8-inch thick pieces, sprinkle with some confectioners' sugar and place it under the broiler. After a quick 8 minutes in the oven, you've got some delicious, roasted pineapple.


Aside from the three hour bake time required for the meringue and the three hour refrigeration time for the ganache, after the dessert is assembled, it needs to chill in the refrigerator for at least four hours! So needless to say, if you're going to make this, plan ahead.


I had already read about how many people loved this dessert last week so I was excited to take my first bite. It absolutely lived up to all the hype I had heard about it. There is just something so great about pineapple and coconut together. It was a bit sweet, so if you don't like overly sweet desserts I would recommend using slightly sweetened whipped cream between each layer of meringue instead of the ganache.

Thanks Andrea, for a great pick. Though a bit late, I am so glad that I finally got to make this. If you would like the recipe, you can find it here. If you visit the TWD Blogroll, you'll see how much everyone else enjoyed this tropical treat!

* Recipes notes:
- While the recipe calls for a 4.25 pound pineapple, I bought a 2 pound pineapple and had just enough.
- I ended up with quite a bit of leftover white chocolate ganache (about 3 cups), so next time I make this I will make 1/2 of the ganache recipe.
- While some complained the ganache was too sweet and recommended using regular whipped cream in between each layer instead, I found the ganache to be just fine. I actually thought the pineapple was a bit too sweet and would probably omit the dusting of confectioners' sugar next time - I'm sure the natural sugars in the pineapple would be sufficient.
- Don't want such a big dessert? Or prefer something easier to serve at a get together? Consider making cute little individual servings like Vibi did here.
- For more tips, click here.

Sunday, June 28, 2009

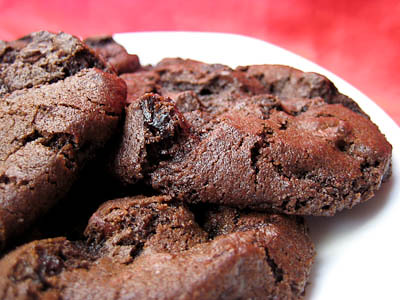
Double Dark Chocolate Cherry Cookies (SMS)


This week's Sweet Melissa Sundays (SMS) recipe was chosen by Megan of My Baking Adventures: Double Dark Chocolate Cherry Cookies. I'm not exactly sure why they're considered double dark chocolate, as the chocolate chips used in the recipe are semisweet, not dark/bittersweet. These are basically chocolate chocolate chip cookies with dried cherries.

These cookies were about as easy to make as any other cookie. There is quite a bit of refrigeration time required for them, however, so be sure to plan ahead.


I'm typically not a fan of chocolate based cookies (with the exception of chocolate malted whopper drops and world peace cookies) but enjoyed these quite a bit. I actually don't think that I would have liked these cookies without the cherries - they add a really great flavor to them. I loved the cherries so much that next time I think I would add 1/2 cup instead of 1/3 cup.

Thanks Megan, for choosing this recipe - I loved it! If you would like the recipe, you can find it here. Make sure you visit the SMS Blogroll to see what everyone else thought about these chocolatey treats.


* Recipe tips:
- I would recommend adding 1/2 cup of dried cherries to the dough.
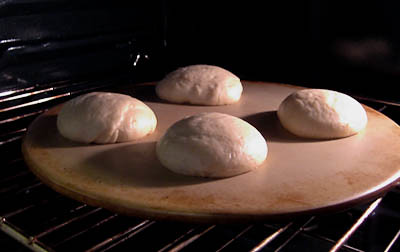
- I baked my cookies on a baking stone and they were done after exactly 15 minutes. I let them cool on the baking stone for about 5 minutes before removing them to a rack to cool.
- For more tips, click here.

Saturday, June 27, 2009

Bakewell Tart


The June Daring Bakers' challenge was hosted by Jasmine of Confessions of a Cardamom Addict and Annemarie of Ambrosia and Nectar. They chose a Traditional (UK) Bakewell Tart... er... pudding that was inspired by a rich baking history dating back to the 1800's in England.


Like many regional dishes there’s no “one way” to make a Bakewell Tart…er…Pudding, but most of today’s versions fall within one of two types. The first is the “pudding” where a layer of jam is covered by an almondy pastry cream and baked in puff pastry. The second is the “tart” where a rich shortcrust pastry holds jam and an almondy sponge cake-like filling. The version the Daring Bakers made this month was a combination of the two: a sweet almond-flavoured shortcrust pastry, frangipane and jam.

This recipe was among the simpler and less time consuming recipes that the Daring Bakers has made. It's really something that anyone could make. I usually use a food processor to make my crusts, but the hosts challenged us to make this one by hand so that's what I did. The crust did turn out flaky and not too tough, but I'll probably continue to use a food processor in the future - it's so much easier :)

I don't have a 9-inch tart pan so I made two smaller tarts. I made one with strawberry-guava jam and the other one with passion fruit jelly. I probably should not have used the jelly (it turned out a bit runny), but I ran out of jam. I really loved the frangipane almond filling - the flavor was very fragrant. The jam complemented the frangipane well. The recipe calls for 1/2 cup to 1 cup of jam - I made one tart with the smaller amount and the other tart with the larger amount. I definitely liked the one with more jam in it, but I'm sure it just depends on your personal preference.
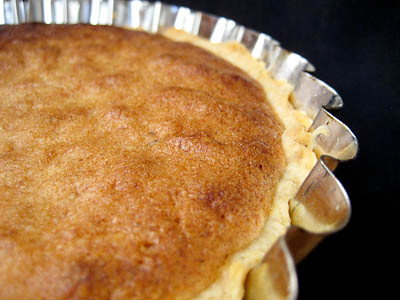
One problem I had was with the top of the tart browning too quickly. I covered it with foil after I caught on to this, but it was already a bit too late and it had browned a bit too much. Next time, I'll cover it with foil after about 15 minutes.
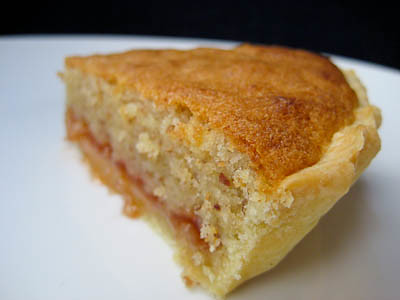


Thanks to Jasmine and Annemarie for introducing me to this lovely dessert! I enjoyed it and would definitely make it again. Make sure you visit the Daring Bakers' Blogroll to see thousands of other tarts!

Bakewell Tart History and Lore

Flan-like desserts that combine either sweet egg custard over candied fruit or feature spiced ground almonds in a pastry shell have Mediaeval roots. The term “Bakewell pudding” was first penned in 1826 by Meg Dods; 20 years later Eliza Acton published a recipe that featured a baked rich egg custard overtop 2cm of jam and noted,

“This pudding is famous not only in Derbyshire, but in several of our northern counties where it is usually served on all holiday occasions.”

By the latter half of the 1800s, the egg custard evolved into a frangipane-like filling; since then the quantity of jam decreased while the almond filling increased.

This tart, like many of the world's great foods has its own mythic beginnings…or several mythic beginnings. Legend has it in 1820 (or was it in the 1860s?) Mrs. Greaves, landlady of The White Horse Inn in Bakewell, Derbyshire (England), asked her cook to produce a pudding for her guests. Either her instructions could have been clearer or he should have paid better attention to what she said because what he made was not what she asked for. The cook spread the jam on top of the frangipane mixture rather than the other way around. Or maybe instead of a sweet rich shortcrust pastry case to hold the jam for a strawberry tart, he made a regular pastry and mixed the eggs and sugar separately and poured that over the jam—it depends upon which legend you follow.

Regardless of what the venerable Mrs. Greaves’ cook did or didn’t do, lore has it that her guests loved it and an ensuing pastry-clad industry was born. The town of Bakewell has since played host to many a sweet tooth in hopes of tasting the tart in its natural setting.

Bakewell tarts are a classic English dessert, abounding in supermarket baking sections and in ready-made, mass-produced forms, some sporting a thick sugary icing and glazed cherry on top for decorative effect.

Enjoy it with a cup of tea or coffee or just eat it sneaky slice by sneaky slice until, to your chagrin, you realise the whole tart has somehow disappeared despite you never having pulled out a plate, fork or napkin with which to eat it.


Bakewell Tart...er...pudding

Makes one 23cm (9” tart)
Prep time: less than 10 minutes (plus time for the individual elements)
Resting time: 15 minutes
Baking time: 30 minutes
Equipment needed: 23cm (9”) tart pan or pie tin (preferably with ridged edges), rolling pin

One quantity sweet shortcrust pastry (recipe follows)
Bench flour
250ml (1cup (8 US fl. oz)) jam or curd, warmed for spreadability
One quantity frangipane (recipe follows)
One handful blanched, flaked almonds (I omitted these)
Assembling the tart
Place the chilled dough disc on a lightly floured surface. If it's overly cold, you will need to let it become acclimatised for about 15 minutes before you roll it out. Flour the rolling pin and roll the pastry to 5mm (1/4”) thickness, by rolling in one direction only (start from the centre and roll away from you), and turning the disc a quarter turn after each roll. When the pastry is to the desired size and thickness, transfer it to the tart pan, press in and trim the excess dough. Patch any holes, fissures or tears with trimmed bits. Chill in the freezer for 15 minutes.

Preheat oven to 200C/400F.

Remove shell from freezer, spread as even a layer as you can of jam onto the pastry base. Top with frangipane, spreading to cover the entire surface of the tart. Smooth the top and pop into the oven for 30 minutes. Five minutes before the tart is done, the top will be poofy and brownish. Remove from oven and strew flaked almonds on top and return to the heat for the last five minutes of baking.

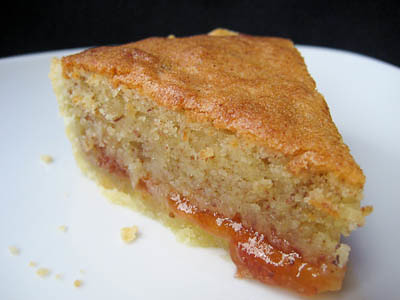
The finished tart will have a golden crust and the frangipane will be tanned, poofy and a bit spongy-looking. (Make sure it doesn't jiggle too much - if it does, it's not fully cooked yet.) Remove from the oven and cool on the counter. Serve warm, with crème fraîche, whipped cream or custard sauce if you wish.

When you slice into the tart, the almond paste will be firm, but slightly squidgy and the crust should be crisp but not tough.

Jasmine’s notes:
• If you cannot have nuts, you can try substituting Victoria sponge for the frangipane. It's a pretty popular popular cake, so you shouldn't have any troubles finding one in one of your cookbooks or through a Google search. That said, our dear Natalie at Gluten a Go Go has sourced some recipes and linked to them in the related alt.db thread.
• You can use whichever jam you wish, but if you choose something with a lot of seeds, such as raspberry or blackberry, you should sieve them out.
• The jam quantity can be anywhere from 60ml (1/4 cup) to 250ml (1cup), depending upon how “damp” and strongly flavoured your preserves are. I made it with the lesser quantity of home made strawberry jam, while Annemarie made it with the greater quantity of cherry jam; we both had fabulous results. If in doubt, just split the difference and spread 150ml (2/3cup) on the crust.
Annemarie’s notes:
• The excess shortcrust can be rolled out and cut into cookie-shapes (heck, it’s pretty darned close to a shortbread dough).

Sweet Shortcrust Pastry

Prep time: 15-20 minutes
Resting time: 30 minutes (minimum)
Equipment needed: bowls, box grater, cling film

225g (8oz) all purpose flour
30g (1oz) sugar
2.5ml (½ tsp) salt
110g (4oz) unsalted butter, cold (frozen is better)
2 (2) egg yolks
2.5ml (½ tsp) almond extract (optional)
15-30ml (1-2 Tbsp) cold water

Sift together flour, sugar and salt. Grate butter into the flour mixture, using the large hole-side of a box grater. Using your finger tips only, and working very quickly, rub the fat into the flour until the mixture resembles bread crumbs. Set aside.

Lightly beat the egg yolks with the almond extract (if using) and quickly mix into the flour mixture. Keep mixing while dribbling in the water, only adding enough to form a cohesive and slightly sticky dough.

Form the dough into a disc, wrap in cling and refrigerate for at least 30 minutes

Jasmine’s notes:
• I make this using vanilla salt and vanilla sugar.
• If you wish, you can substitute the seeds of one vanilla bean, one teaspoon of vanilla paste or one teaspoon of vanilla extract for the almond extract

Frangipane

Prep time: 10-15 minutes
Equipment needed: bowls, hand mixer, rubber spatula

125g (4.5oz) unsalted butter, softened
125g (4.5oz) icing sugar
3 (3) eggs
2.5ml (½ tsp) almond extract
125g (4.5oz) ground almonds
30g (1oz) all purpose flour

Cream butter and sugar together for about a minute or until the mixture is primrose in colour and very fluffy. Scrape down the side of the bowl and add the eggs, one at a time, beating well after each addition. The batter may appear to curdle. In the words of Douglas Adams: Don’t panic. Really. It’ll be fine. After all three are in, pour in the almond extract and mix for about another 30 seconds and scrape down the sides again. With the beaters on, spoon in the ground nuts and the flour. Mix well. The mixture will be soft, keep its slightly curdled look (mostly from the almonds) and retain its pallid yellow colour.

Annemarie’s notes:
• Add another five minutes or more if you're grinding your own almonds or if you're mixing by hand (Heaven help you).
Tuesday, June 23, 2009

In Memory Of

For those who have come here looking for this week's installment of Tuesdays with Dorie (TWD), I will be posting later this week, probably over the weekend. I haven't had a chance to make the Coconut-Roasted Pineapple Dacquoise yet because I had to fly home to California for my grandmother's funeral.

Photobucket
1918-2009

So instead, I dedicate this post to my grandmother - mother of ten, grandmother of 33, and great-grandmother to 9.5 children (if you count our little bun in the oven). She is probably the person responsible for my sweet tooth, and may have been the person who taught me to say "candy." ;) She made everything from scratch, and taught my mom to be the amazing cook and baker that she is today. I can only hope to someday be half as skilled in the kitchen. We take comfort in knowing that she is no longer suffering and is in a better place.

Tuesday, June 16, 2009

Honey-Peach Ice Cream (TWD)


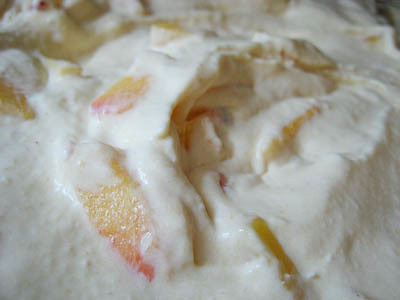
This week's Tuesdays with Dorie (TWD) recipe was chosen by Tommi of Brown Interior: Honey-Peach Ice Cream. This was the perfect recipe to start off the summer!

I love ice cream. I pretty much love all kinds of ice cream... from plain vanilla to rich and creamy chocolate to fruit-based flavors. So I was excited to see this recipe picked. It was a bit time consuming to peel and dice all the peaches, but otherwise this didn't take too long. This recipe gave me the perfect opportunity to test out the Boos cutting board I received from KaTom Restaurant Supply. It's a good, solid cutting board. The size is a bit small, but it is large enough to handle most tasks. Since I only use it for non-meat items like fruits and veggies, it does the job just fine.


If you don't have an ice cream maker (you should really invest in one, though!), no worries. You can learn how to make ice cream without an ice cream maker here. Though time consuming, it's a very simple method that yields wonderful results.


The honey flavor in this ice cream was lovely, and complemented the peaches well. If you don't have peaches (or don't like them), you can substitute other fruits such as nectarines or plums. I actually found that the bits of peaches became too hard/frozen after the ice cream was done, so the next time I make this, I will definitely dice them into even smaller pieces. Thanks Tommi, for a great pick. If you would like the recipe, you can find it here. Make sure you visit the TWD Blogroll to see what everyone else thought about this cool, summery treat.

* Recipes notes:
- Dice your peaches into super teeny tiny pieces to avoid biting into large chunks of icey fruit in the ice cream.
- No whole milk? No problem. Learn how to make your own whole milk from skim/1%/2% milk and heavy cream or half & half here.
- For more tips, click here.

Tuesday, June 9, 2009

No Parisian Apple Tartlets Here...


This week's Tuesdays with Dorie (TWD) recipe was chosen by Jessica of My Baking Heart: Parisian Apple Tartlet.

You might be thinking those look nothing like apple tartlets in the photo and that's because they're not. I was originally going to announce that we have a bun in the oven once I hit my second trimester, but then things were so busy I never got around to it. We just found out the gender yesterday, so I thought I'd finally announce that we're expecting a little baby girl! My estimated delivery date is November 11, just two days after my own birthday, so I'll be getting a wonderful birthday gift this year :)

My apologies to Jessica, but I was unable to bake along this week. I was really looking forward to making this because I love baked apples, but we're in the middle of a move and my kitchen has been packed up! I'll be back next week, though, with the Honey Peach Ice Cream. Make sure you visit the TWD Blogroll to see how everyone else enjoyed the tartlets.

Tuesday, June 2, 2009

Cinnamon Squares (TWD)


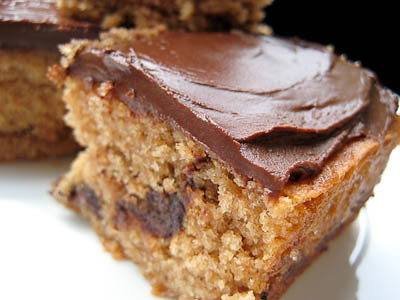
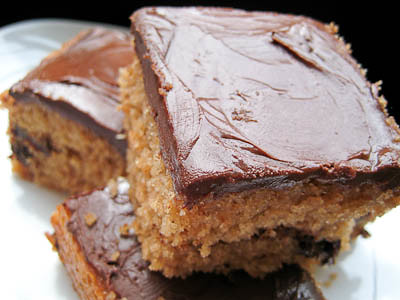
This week's Tuesdays with Dorie (TWD) recipe was chosen by Tracey of Tracey's Culinary Adventures: Cinnamon Squares. It's made by sandwiching a layer of cinnamon, sugar, espresso powder, and chocolate chips in between two layers of cinnamon cake. Top it all off with a layer of chocolate frosting and you've got Dorie's Cinnamon Squares.


These are actually really simple to throw together; no stand mixer required. Simply mix the dry ingredients together, add the liquid ingredients, and then stir in the melted butter at the end. It takes much more patience to wait for the cake to cook and cool than it does to make it.


Let me just say that these are well worth the wait. For such a low fuss dessert, these cinnamon squares pack quite a bit of punch when it comes to flavor. The cinnamon flavor was prominent, but not overbearing, and the coffee flavor complemented it perfectly. We paired these with some Ben & Jerry's Coffee Heath Bar Crunch Ice Cream for a heavenly dessert!


Thanks Tracey, for choosing this recipe. I will definitely be making these again. If you would like the recipe, you can find it here. Make sure you visit the TWD Blogroll to see what everyone else thought about these cinnamon-y treats.

* Recipes notes:
- I used semisweet chocolate chips instead of bittersweet chocolate. I also used the regular sized chips instead of mini's so my chocolate layer was a bit thicker.
- My cinnamon squares were done baking 5 minutes early, at 30 minutes.
This was likely due to the fact that I baked mine is a 9-inch square pan instead of an 8-inch pan, resulting in thinner squares.
- These can be frozen for up to 2 months, but it's best to put the cake in the freezer unwrapped and then, when the frosting is firm, to wrap it airtight; defrost, still wrapped, overnight in the refrigerator.
- For more tips, click here.