Tuesday, July 28, 2009

Vanilla Ice Cream (TWD)


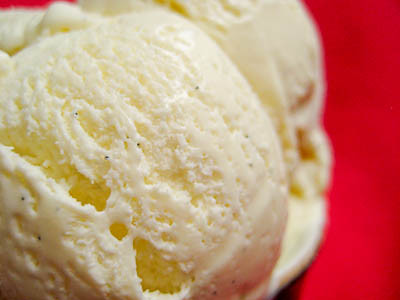
This week's Tuesdays with Dorie (TWD) recipe was chosen by Lynne of Cafe LynnyLu: Vanilla Ice Cream. What a perfect pick for summer! It's your basic custard ice cream recipe, flavored with either a vanilla bean or some vanilla extract. For those who have never had homemade vanilla ice cream before, I promise you won't be disappointed.


I used to not make much ice cream because it was always such a pain to buy whole milk. The small containers are just as expensive as a whole gallon of milk, and if I bought anything bigger, it would go bad before I could use it all. Since discovering how to make whole milk from regular milk and half & half/heavy cream, I've been making a lot more ice cream :) It's so convenient because we always have milk and half & half on hand.


The smell of this custard before it was frozen was so fragrant, I could tell it was going to be good ice cream. We recently made Brown Sugar Vanilla Ice Cream for Sweet Melissa Sundays and I was anxious to see how Dorie's vanilla ice cream would compare to Melissa's.

Dorie's ice cream was rich and creamy, perfect by itself or drenched in some hot fudge or caramel sauce. Using vanilla beans in place of vanilla extract definitely gave the ice cream a fuller flavor. I have to say that in this case, though, the Brown Sugar Vanilla Ice Cream I made a few weeks ago was better. The brown sugar flavor was very subtle, but still made it extra special. I encourage you to try both recipes for yourself and see!


Thanks Lynne, for picking this recipe. If you would like the recipe, you can find it here. Check out the TWD Blogroll, and see how everyone else enjoyed this cool, summer treat!

* Recipes notes:
- For tips, click here.

Monday, July 27, 2009

Chocolate Covered Marshmallow Cookies (DB)


The July Daring Bakers' challenge was hosted by Nicole at Sweet Tooth. She chose Chocolate Covered Marshmallow Cookies and Milan Cookies from pastry chef Gale Gand of the Food Network. I was really excited to see cookies as the challenge, especially ones that involved making our own marshmallows! My favorite Pepperidge Farm Cookies are the Orange Milan Cookies, too.

Sadly, I ended up running out of time and didn't get a chance to make the Orange Milan Cookies, but I did make the Chocolate Covered Marshmallow Cookies. I was really nervous about making the homemade marshmallows... just something about it always had me worried that I would end up with a solid chunk of mess instead of fluffy white clouds of sweetness.
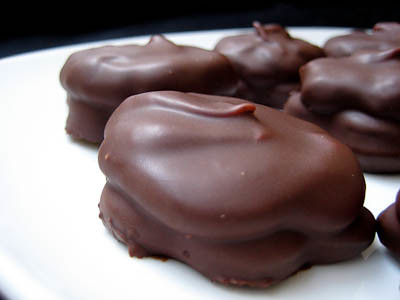

I am happy to report that I overcame my fear of marshmallows and the recipe was completed without a hitch! I was thrilled with the results and so surprised by how easy the marshmallows were to make. The only problem I had was with how quickly the marshmallows started to set. The recipe states that you should allow 2-3 hours for the marshmallows to set before dipping the cookies in the chocolate, so I thought I would have plenty of time to pipe my marshmallows onto the cookies. Unfortunately, that wasn't the case. I think they started to set after about 10-15 minutes... good thing was, that I found giving them another whir in the mixer bought me a little more time.


I don't have any round cookie cutters, so I used my flower-shaped cookie cutters that I got when I made the cupcake pops. I thought they would look cute, but in the end I think the regular round cookies probably would have looked better. I was able to get about 60 (1-1/2") cookies from the recipe, but only had enough marshmallow to pipe onto about 40 cookies, so I would recommend making an extra half batch of marshmallow if you try this recipe.


Everyone who tried these loved them, but I felt that these cookies were good, but not great. I think what would make them great would be a layer of soft caramel sandwiched between the cookie and marshmallow layer. So if I make these again, I will definitely do that. That said, they are fairly time consuming to make, so I'm not sure if I'll be doing that anyway. Still, these were fun to make and would be great to bring to a get together.

Thanks to Nicole of Sweet Tooth for hosting this month's challenge. I finally got to tackle the task of making homemade marshmallows and now I know how easy it is! Make sure you check out the Daring Bakers' Blogroll to see how everyone else enjoyed these cookies.

Mallows (Chocolate Covered Marshmallow Cookies)
Recipe courtesy Gale Gand


Prep Time: 10 min
Inactive Prep Time: 5 min
Cook Time: 10 min
Serves: about 2 dozen cookies (I got 5 dozen 1.5-inch cookies from a single batch)

• 3 cups (375grams/13.23oz) all purpose flour
• 1/2 cup (112.5grams/3.97oz) white sugar
• 1/2 teaspoon salt
• 3/4 teaspoon baking powder
• 3/8 teaspoon baking soda
• 1/2 teaspoon ground cinnamon
• 12 tablespoons (170grams/ 6 oz) unsalted butter, softened
• 3 eggs, whisked together
• Homemade marshmallows, recipe follows (I would recommend making 1.5x the recipe)
• Chocolate glaze, recipe follows

1. In a mixer with the paddle attachment, blend the dry ingredients.
2. On low speed, add the butter and mix until sandy.
3. Add the eggs and mix until combine.
4. Form the dough into a disk, wrap with clingfilm or parchment and refrigerate at least 1 hour and up to 3 days.
5. When ready to bake, grease a cookie sheet or line it with parchment paper or a silicon mat.
6. Preheat the oven to 375 degrees F.
7. Roll out the dough to 1/8-inch thickness, on a lightly floured surface. Use a 1 to 1 1/2 inches cookie cutter to cut out small rounds of dough.
8. Transfer to the prepared pan and bake for 10 minutes or until light golden brown. Let cool to room temperature.
9. Pipe a “kiss” of marshmallow onto each cookie. Let set at room temperature for 2 hours.
10. Line a cookie sheet with parchment or silicon mat.
11. One at a time, gently drop the marshmallow-topped cookies into the hot chocolate glaze.
12. Lift out with a fork and let excess chocolate drip back into the bowl.
13. Place on the prepared pan and let set at room temperature until the coating is firm, about 1 to 2 hours.

Note: if you don’t want to make your own marshmallows, you can cut a large marshmallow in half and place on the cookie base. Heat in a preheated 350-degree oven to slump the marshmallow slightly, it will expand and brown a little. Let cool, then proceed with the chocolate dipping.

Homemade marshmallows:
• 1/4 cup water
• 1/4 cup light corn syrup
• 3/4 cup (168.76 grams/5.95oz) sugar
• 1 tablespoon powdered gelatin
• 2 tablespoons cold water
• 2 egg whites , room temperature
• 1/4 teaspoon pure vanilla extract

1. In a saucepan, combine the water, corn syrup, and sugar, bring to a boil until “soft-ball” stage, or 235 degrees on a candy thermometer.
2. Sprinkle the gelatin over the cold water and let dissolve.
3. Remove the syrup from the heat, add the gelatin, and mix.
4. Whip the whites until soft peaks form and pour the syrup into the whites.
5. Add the vanilla and continue whipping until stiff.
6. Transfer to a pastry bag.

Chocolate glaze:
• 12 ounces semisweet chocolate
• 2 ounces cocoa butter or vegetable oil

1. Melt the 2 ingredients together in the top of a double boiler or a bowl set over barely simmering water.

Tuesday, July 21, 2009

Raspberry and Blueberry Blanc Manger (TWD)


This week's Tuesdays with Dorie (TWD) recipe was chosen by Susan of Sticky, Gooey, Creamy, Chewy: Raspberry Blanc-Manger. I've been wanting to try this dessert since I got Baking bcause there is a stunning photo of it in the book. It's a dessert made with milk, cream and sugar, thickened with gelatin, and flavored with ground almonds. Dorie describes it as a sister to panna cotta. While I've never had this dessert before, I do know that I like panna cotta, so I was eager to taste it.


This was essentially a no bake dessert, which was nice since it is so hot right now! It's a simple recipe - just mix some milk, sugar, and ground almonds and bring it to a boil. Add the gelatin to the hot almond milk mixture, then cool it in an ice bath. Once it is cool, you simply fold in some whipped cream and berries and pour it into a mold. I actually did not even heat the almond milk mixture on the stove, I used the microwave!

You are supposed to pour this into an 8 x 2 inch round pan, but my 8 inch round pan isn't quite 2 inches high so I poured most of it into the pan, and then put the rest in two little mini tart pans. It ended up working out well because I sent the large one with work with my husband and then still had the two mini servings for myself :)


I made mine with a combination of blueberries and raspberries. The raspberries were fresh, but the blueberries were frozen. To avoid a blue streaky dessert, I simply defrosted the blueberries ahead of time, and drained all excess liquids. I decorated garnished the top with fresh raspberries and some blueberry coulis.

I had no problems unmolding this dessert. After dunking the round pan in some hot water, it easily unmolded onto a plate. The tartlets I had to get creative with. I simply warmed the edges of my mini tart pans with towel soaked in some hot water (they have a removable bottom so I didn't want to dunk them in hot water and have it leak in). With the removable bottom made it easy to invert and unmold it onto a plate.


This was a really good dessert. It would be great for entertaining because it's so simple to make, yet would impress most guests. It was creamy without being too heavy. The texture wasn't completely smooth due to the ground almonds that flavored it, but that did not bother me. I have to say that I prefer the completely smooth texture of panna cotta over the blanc manger, however.


Thanks Susan, for picking this recipe. If you would like the recipe, you can find it here. If you visit the TWD Blogroll, you'll see how much everyone else enjoyed this creamy treat!

(I'm also submitting this to the Click Bi-Colour July Event hosted by Jugalbandi.)

* Recipes notes:
- I used whole almonds and ground them in my food processor. It didn't affect the color of my dessert too much, but if you want it as white as possible then I would recommend blanching and peeling your almonds first. Just toss them in boiling water until they start floating to the top, then rinse with cold water. The peels should come right off if you do that.
- You can use whatever molds you would like for this dessert. For individual servings, consider using small ramekins or small tart pans.
- For more tips, click here.

Sunday, July 19, 2009

Butterscotch Cashew Bars (SMS)


My apologies to Melissa of Lulu the Baker who chose the Whole Orange Poppy Seed Cake for this week's installment of Sweet Melissa Sundays (SMS). It looked fabulous, but I didn't end up having time to make this cake. I definitely plan on trying it later. Make sure you visit Lulu the Baker to check out the cake.
Instead, I am doing a rewind recipe from June, chosen by Pamela of Cookies with Boys: Butterscotch Cashew Bars. Start with a shortbread cookie base, then top with gooey butterscotch caramel and cashews and you've got one sweet treat!


I'm really weird when it comes to nuts. In general, I do not like them. In certain things, however, I will eat them (and actually enjoy them!). Take brownies for instance - I do not like nuts in my brownies. Or pecan pie - I do not like the pecans in pecan pie. Nor do I like the almonds in a mud pie or Jamoca Almond Fudge ice cream. Give me something like a snickers bar, though, packed with peanuts, and I will eat it. And although Almond Roca is toffee dipped in chocolate and rolled in almond bits, I still love it. I guess I'm a little weird like that :) Oddly enough, when I read this recipe, I somehow knew that despite my dislike of nuts, that I would like these bars.


These were a breeze to make, and while the butterscotch flavor was there, it wasn't quite as prominent as I had expected it to be. I think that was a good thing, though, because any stronger and the butterscotch flavor would have been too overpowering.


I refrigerated these to help them set, and had no problems cutting them into squares. The butterscotch caramel held together with nice, clean cut edges when it was right out of the fridge, but after coming to room temperature, it started to drip down the sides of each square. Not a problem at all, though a bit messy.

If you want a real treat, I think you could refrigerate these until firm, cut them into really small pieces, and then dip them in some chocolate for some pretty tasty chocolates. Overall, I really enjoyed these and would definitely make them again. If you like nuts and caramel, then you'll like these. If you would like the recipe, you can find it here.

Tuesday, July 14, 2009

Brioche Peach Tart (TWD)


This week's Tuesdays with Dorie (TWD) recipe was chosen by Denise of Chez Us: Brioche Plum Tart. I love anything with fruit in it, so I was looking forward to trying this recipe. It's not your traditional "tart" in that the shell is made of brioche.

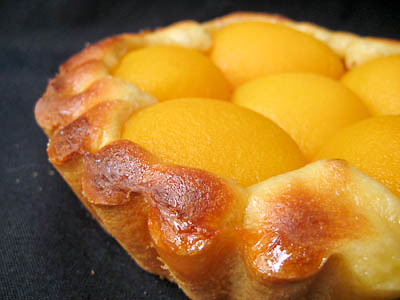
The brioche was simple to make, though a bit sticky to work with. It was easier to work with after being refrigerated overnight, but it was still a bit sticky (though manageable) when I was molding it into my tart pans. I made two smaller tarts instead of one large one. If you don't have a tart pan, I think a regular pie pan or springform pan would work well (it just won't have the beautiful fluted edges).


There weren't a lot of plums available at my grocery store (and they were expensive), so I decided to go with peaches instead. I made one tart with the peaches sliced and fanned out, and the other one with peach halves placed cut side down. I sprinkled sugar on top, but omitted the nuts from the topping.


The brioche browned much quicker than I anticipated, so the edges of my tart are a bit darker than I would have liked. I had some juices from peaches drip over the sides of the tart, leading to some messy clean up in the oven, so I would recommend placing some foil under your tart to catch the drippings. Otherwise, everything went rather smoothly.


I wasn't quite sure what to expect with this tart. It was actually not very sweet at all. It was more like a slightly sweetened bread with fruit and jam. I thought it was just ok, but my husband liked it a lot. It would be great for breakfast or an afternoon tea, but I wouldn't serve it for dessert since it is not very sweet.


Thanks Denise, for picking this recipe. If you would like the recipe, you can find it here. If you visit the TWD Blogroll, you'll see how much everyone else enjoyed this great afternoon treat!

* Recipes notes:
- Cover your tart with a foil tent early, as this one tends to brown very quickly in the oven!
- If you don't have the same kind of jam as you do fruit for this recipe, don't worry about it. The jam flavor is subtle and any complementary jam would work.
- Don't forget to place some foil under your tarts to catch any juices that bubble over!
- For more tips, click here.

Tuesday, July 7, 2009

Tribute to Katherine Hepburn Brownies (TWD)


This week's Tuesdays with Dorie (TWD) recipe was chosen by my wonderful friend Lisa of Surviving Oz: Tribute to Katherine Hepburn Brownies. Although Lisa is not a member of TWD, she had the honor of choosing this week's recipes because she won our recent logo contest. If you look at my blog sidebar, you'll see the newly redesigned TWD logo! Isn't it cute? Even Dorie loves it.

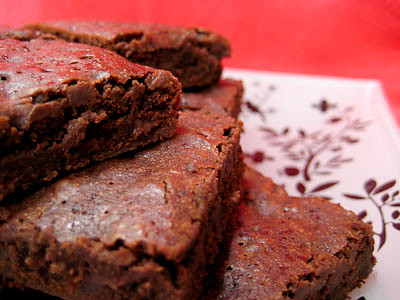
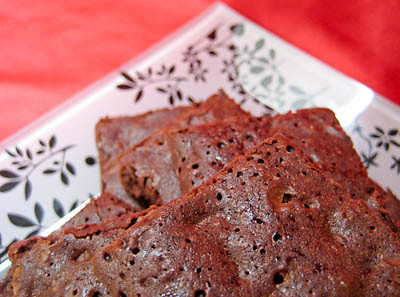
These brownies are Dorie's tribute to Miss Hepburn's well loved brownies, which include very little flour compared to most brownie recipes. Dorie spruces them up a bit with the addition of cinnamon, coffee, and chopped chocolate.

I baked my brownies in a 9-inch square pan (instead of 8-inch) so these already thin brownies became even thinner. Consequently, my brownies were completely done after 30 minutes in the oven. Others seemed to have issues with their brownies being under-baked after 30 minutes, but that was likely due to the brownies being thicker in the 8-inch pan, so if you're using the 8-inch pan make sure you leave the brownies in the oven for a few extra minutes.


While these brownies were simple to make, I wasn't the biggest fan. My husband loved them, but the coffee flavor was a bit too strong for me. (Keep in mind I don't drink coffee anyway.) I'm not sure if that's because I substituted instant coffee granules for espresso powder, but I've done this in the past without any problems. Usually, the coffee just brings out a better flavor to the chocolate, but in this case it seems that the coffee flavor was in the forefront (which is fine as long as you like coffee). I'm sure that most people would love these brownies, as they were all gobbled up by my husband's co-workers. Me? My favorite brownies are still the Chipster-Topped Brownies we made back in May.


Thanks Lisa, for choosing this recipe. There are just as many variations in brownie recipes as there are chocolate chip cookies, and I enjoyed trying another brownie recipe. If you would like the recipe, you can find it here. Make sure you visit the TWD Blogroll to see what everyone else thought about these chocolately treats.

* Recipes notes:
- I used a 9-inch square pan and still baked mine for the full 30 minutes and the brownies were not overdone. If you are baking in an 8-inch pan, bake for about 35 minutes.
- I omitted the nuts from this recipe - sorry, don't like them.
- I also used semisweet chocolate chips in place of chopped bittersweet chocolate - not a fan of bittersweet chocolate.
- Wrapped well, these brownies will keep in your freezer for 2 months.
- For more tips, click here.

Sunday, July 5, 2009

Bananas Foster over Brown Sugar Vanilla Ice Cream (SMS)


This week's Sweet Melissa Sundays (SMS) recipe was chosen by Karen of Karen's Cookies Cakes & More: Brown Sugar Vanilla Ice Cream with Hot Fudge Sauce or Butterscotch Sauce. I've always heard about how homemade vanilla ice cream is so much better than store-bought vanilla ice cream, so I was excited to try this recipe. Throw in the brown sugar component and it makes it sound all that more interesting.

This recipe is actually a custard ice cream, with the addition of eggs that makes it richer and creamier than regular ice cream. This was probably about the easiest custard recipe I've made so far because it doesn't require tempering the eggs by adding a hot milk/cream mixture slowly to an egg/sugar mixture. All you do is mix all the ingredients together in a bowl, set it over a double boiler, and the stir until it reaches 180F.


I actually had trouble getting my custard to reach 180F, and noticed that in Dorie's ice cream recipes (like the burnt sugar ice cream) she only recommends heating the mixture to 170-180F. So after I mine reached 170F, I went ahead and stopped cooking it and started chilling it. This didn't seem to affect the outcome at all. Although the recipe states that you need an ice cream maker, you actually don't - I made ice cream last year without an ice cream maker using this method.


This is a rich and creamy vanilla ice cream. The brown sugar does lend some extra depth to the flavor but is not overly noticeable. I think most people wouldn't even notice the brown sugar in it.

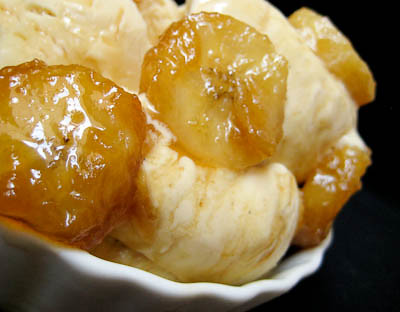
Instead of serving this with the hot fudge sauce or butterscotch sauce recipes in the book, I decided to make my favorite ice cream accompaniment - Bananas Foster! It was the perfect way to serve this brown sugar vanilla ice cream. Bananas Foster is so easy to make and so delicious (I've included the recipe below). Usually bananas foster is made by flambéeing bananas, but I usually skip the fire show and it seems to taste just as good. I also omit butter from the recipe to save a few calories (every bit counts right? ha!).


Thanks Karen, for choosing this recipe - I loved it! If you would like the recipe, you can find it here. Make sure you visit the SMS Blogroll to see what everyone else thought about this creamy summertime treat.

* Recipe tips:
- Carnation makes a non-fat skim milk powder that you can usually find at your grocery store. If you can't find any skim milk powder, just omit it from the recipe.
- Don't have a candy thermometer? I recommend this digital thermometer which is great because it works a low temperatures for checking meat, but also reads high enough to double as a candy thermometer.
- Save those leftover egg whites for later so you can make something yummy like the Coconut-Roasted Pineapple Dacquoise! Freeze your egg whites, as discussed here.
- As long as your mixture gets above 170F, it should be safe for consumption.
- For more tips, click here.


Bananas Foster Ice Cream
from Good Eats 'n Sweet Treats

1/3-1/2 cup loosely packed brown sugar (depends on how much gooey brown sugar syrup you want!)
1 tbsp dark rum
1 ripe banana, cut into 1/4" slices


Add the brown sugar and rum to a saute pan and cook over medium heat. Once the sugar starts to dissolve in the rum, add the banana slices. Continue cooking for about one minute, then flip the banana slices over and cook for another minute until bananas are cooked through.

Let cool for a few minutes, then serve over your favorite vanilla ice cream.

Yield: 1-2 Servings