Thursday, October 28, 2010

Baked Yeast "Doughnuts" with Caramel Glaze (DB)


The October 2010 Daring Bakers’ challenge was hosted by Lori of Butter Me Up. Lori chose to challenge DBers to make doughnuts. She used several sources for her recipes including Alton Brown, Nancy Silverton, Kate Neumann and Epicurious.

We were actually supposed to post these doughnuts yesterday, but somehow the entire month got away from me and I did not get around to making these until today! I am so glad I checked the Daring Bakers' forums before embarking on this challenge because Audax had posted the most helpful information/tips! I was especially glad to see that Alton's yeast doughnut recipe could be adapted to the oven instead of the fryer.  Not that I am afraid of frying things, but rather because we try to avoid eating fried foods as much as possible.
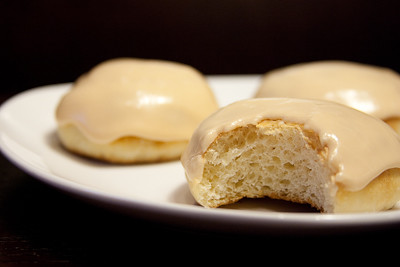

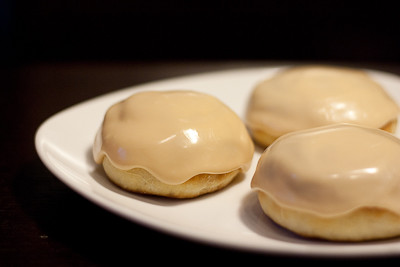
This recipe was simple and not very time consuming at all (if you don't count the time it takes for the dough to rise). I always use my oven as a proofing box (by turning it on to preheat for a few seconds and then turning it off), so my dough easily doubled in size in one hour.  I halved the recipe and ended up with plenty of doughnuts! Since I was baking these and not frying them, I didn't cut holes in the middle.  I made smaller doughnuts, so they were done baking in only 8 minutes (at 425F).  One of my favorite kinds of doughnuts is a maple glazed doughnut, but I did not have any maple syrup so I decided to glaze my doughnuts with a caramel icing.

Thanks Lori, for hosting this month's challenge.  These doughnuts were delicious and I had fun making them.  You'll find the recipe for the doughnuts, as well as Audax's tips, and the caramel glaze recipe below.

Make sure you check out the Daring Bakers' Blogroll to see how everyone else enjoyed these deep fried (or in my case - baked) treats.

Yeast Doughnuts
from Alton Brown

Preparation time:
Hands on prep time - 25 minutes
Rising time - 1.5 hours total
Cooking time - 12 minutes

Yield: 20 to 25 doughnuts; 20 to 25 doughnut holes, depending on size

Ingredients
Milk 1.5 cup / 360 ml
Vegetable Shortening 1/3 cup / 80 ml / 70 gm / 2.5 oz (can substitute butter, margarine or lard)
Active Dry Yeast 4.5 teaspoon (2 pkgs.) / 22.5 ml / 14 gm / ½ oz
Warm Water 1/3 cup / 80 ml (95°F to 105°F / 35°C to 41°C)
Eggs, Large, beaten 2
White Granulated Sugar ¼ cup / 60 ml / 55 gm / 2 oz
Table Salt 1.5 teaspoon / 7.5 ml / 9 gm / 1/3 oz
Nutmeg, grated 1 tsp. / 5 ml / 6 gm / ¼ oz
All Purpose Flour 4 2/3 cup / 1,120 ml / 650 gm / 23 oz + extra for dusting surface
Canola Oil DEPENDS on size of vessel you are frying in – you want THREE (3) inches of oil (can substitute any flavorless oil used for frying)

Directions:

1. Place the milk in a medium saucepan and heat over medium heat just until warm enough to melt the shortening. (Make sure the shortening is melted so that it incorporates well into the batter.)
2. Place the shortening in a bowl and pour warmed milk over. Set aside.
3. In a small bowl, sprinkle the yeast over the warm water and let dissolve for 5 minutes. It should get foamy. After 5 minutes, pour the yeast mixture into the large bowl of a stand mixer and add the milk and shortening mixture, first making sure the milk and shortening mixture has cooled to lukewarm.
4. Add the eggs, sugar, salt, nutmeg, and half of the flour. Using the paddle attachment of your mixer (if you have one), combine the ingredients on low speed until flour is incorporated and then turn the speed up to medium and beat until well combined.
5. Add the remaining flour, combining on low speed at first, and then increase the speed to medium and beat well.
6. Change to the dough hook attachment of the mixer and beat on medium speed until the dough pulls away from the bowl and becomes smooth, approximately 3 to 4 minutes (for me this only took about two minutes). If you do not have a dough hook/stand mixer – knead until the dough is smooth and not sticky.
7. Transfer to a well-oiled bowl, cover, and let rise for 1 hour or until doubled in size.
8. On a well-floured surface, roll out dough to 3/8-inch (9 mm)thick. (Make sure the surface really is well-floured otherwise your doughnuts will stick to the counter).
9. Cut out dough using a 2 1/2-inch (65 mm) doughnut cutter or pastry ring or drinking glass and using a 7/8-inch (22 mm) ring for the center whole. Set on floured baking sheet, cover lightly with a tea towel, and let rise for 30 minutes.
10. Preheat the oil in a deep fryer or Dutch oven to 365 °F/185°C.
11. Gently place the doughnuts into the oil, 3 to 4 at a time. Cook for 1 minute per side or until golden brown (my doughnuts only took about 30 seconds on each side at this temperature).
12. Transfer to a cooling rack placed in baking pan. Allow to cool for 15 to 20 minutes prior to glazing, if desired.

Tips from Audax:
This recipe (the first challenge recipe) produces absolutely and utterly the best doughnuts I have ever had; the interiors of the doughnuts are soft, fluffy and airy (light as a feather) and the crusts are thin and crisp. The doughnuts are mildly sweet and with a coating of icing (powdered) sugar they are perfect. An absolutely marvellous recipe! It is best to think of the dough as an artisan (high-hydration) bread dough i.e. very soft and sticky. Work it gently and try to keep as much air in the dough when you are handling it. I have a lot of experience working with high-hydration (high ratio of water to flour) soft and sticky doughs so I had no problems with this recipe. If you feel the initial dough mixture is too sticky and soft don't add flour just let the dough rise; during this time the water will hydrate (wet) the flour and the dough will become less sticky and firmer (it will always be a soft dough) and the gluten will develop. Only add flour after the first rising (and only on the counter and the cutting tools you are using).

A few comments on this recipe
1. I used butter since I hate the fat-sticking-to-the-roof-of-my-mouth-feel that shortening produces and also vegetable shortening is impossible to find in Australia.
2. It is best to weigh the flour if possible 23 oz or 650 gm or 4⅔ cups (of settled flour straight from the bag do not fluff up the flour first just measure the cup volume straight from the bag I checked 4⅔ cups of flour does equal 650 grams/23 oz) this amount produces a sticky batter-like cake-dough, very unlike normal bread-dough, this is how it is meant to be. Resist the temptation of adding more flour to make the dough like normal-bread-dough it is meant to be very sticky and like a very thick cake-batter the dough will become less sticky during the first rising. So please resist the urge to "correct" the recipe’s measurements. Just do what the recipe says and you won't be disappointed. As the dough (sticky batter) rises, the water absorbs into the flour and the final mixture will become more like a normal soft dough.
3. The dough is very yellow (as compared to normal bread dough) mainly due to the use of butter and eggs.
4. You should “pour” the soft dough into the rising bowl. And let it rise the dough will become less sticky and more firm but it will be soft dough. And it rises a lot so use a large bowl. The dough might take up to 2 hours (even longer) to double in size; rising time depends on: how much kneading you did, temperature and humidity:- so don't worry too much if nothing happens after an hour just wait it will happen.
5. You can keep the (first-rise) dough in the refrigerator up to four days before you roll it out and second-rise and deep-fry it.
6. I only needed a tiny amount of flour (about 1 tablespoon) on the counter to 'pat' out the soft dough to 3/8 inch (9mm) thick to do the cutting of the doughnut shapes. I lightly floured the cutting tools so they wouldn't stick to the soft dough.
7. I used a small piping connector to cut out the inner 'hole' of the doughnut.
8. I had no trouble lifting the cut-out and risen doughnuts from the counter into the hot oil. I used my lightly-floured fingers and hands to lift the risen doughnuts no problems.
9. Cooking the doughnuts only took about 30 seconds each side I used a thermometer to check the oil temperature. If you do not have a thermometer you can test the temperature by placing a small piece of white bread in the oil it should brown in about 60 seconds. If the oil is too cold the doughnuts will absorb the cooking oil and will became very greasy and if the oil is too hot the outside of the doughnut will cook too quickly while the inside will still be doughy.
10. I used rice bran oil which has a very high smoke point 490°F/254°C and has a very mild (almost flavourless) taste, I particularly dislike canola oil for deep-frying since it has a fishy/strange taste and odour to it, though I do use a combination of canola oil and olive oil for most of my shallow frying.
11. If you like your doughnuts sweet increase the sugar to ½ cup.
Special notes if you are making the dough by hand (not using a machine to mix the dough)
1. I have made high-hydration doughs many hundred's of times so I have a lot of experience with them.
2. The dough will be to sticky to knead by hand without adding a lot of extra flour and it will be very messy so if you are making the dough by hand, just roughly combine the dough ingredients using a plastic scraper (see first picture below) or wooden spoon. No need to knead too much; a longer resting/rising time is equivalent to kneading that is if you only roughly knead for one minute or so and let the dough rise for a longer time this is equivalent to kneading for a longer time. I only roughly combined the dough ingredients for a minute with a plastic scraper and let the dough rise for about 1½ hour (½ hour longer than the stated time in the recipe) which made the final dough silky and allowed the gluten to develop to maximum hydration.
3. The initial dough will look wet, very soft, sticky and not-combined but after rising/resting it will combine into a fully-hydrated (i.e. the gluten well-developed) mass.
4. Don't worry too much about the look and feel of the dough on initial mixing, only really look and feel the dough after the first rising (if you only roughly mixed the dough at the beginning the rising time will be longer than the stated time in the given recipe but the dough will come together with full gluten development) then flour the counter and cutting tools use the minimum extra flour to help you cut, shape and re-rise the doughnuts so they can be deep-fried.


If you're using a mixing machine just follow the instructions given in the recipe. 

Caramel Glaze
from Good Eats 'n Sweet Treats

1 cup confectioner's sugar
1 tbsp homemade caramel sauce
1 tbsp milk + a few extra drops

Add all of the ingredients together in a small bowl and stir to combine.  If you need your glaze to be slightly thicker, add a little more confectioner's sugar.  If you'd like it to be thinner, add a little more milk until you reach your desired consistency.

Tuesday, October 26, 2010

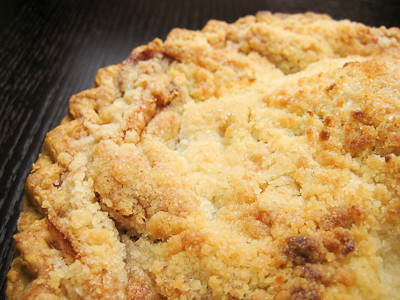
Apple Crumb Pie


This week's Tuesdays with Dorie (TWD) recipe was chosen by Emily of Sandmuffin: All-American, All-Delicious Apple Pie.  I'm sorry to report that I did not bake along this week.  We just got back from a week long trip out of state and I've spent the last two days trying to get settled back in before going back to work today.  I've done one very big thing since returning, however... I went to a cooking class and got to meet Dorie on Sunday! I hope to be able to write up a blog post about that soon.  For now, I'm pulling something from my archives to share with you that would only seem appropriate given this week's recipe.  So, instead of sharing Dorie's All-American Apple Pie with you, I'll be sharing my all time favorite apple pie recipe with you instead.


I always find it curious when I hear people say that they do not like baked fruit because I love baked apple anything. Now, there are some things that I like more than others, but I universally like anything with baked apple in it.

One of my favorite classics is apple pie. I've never been a very big fan of the double crusted apple pie.  Now a dutch apple pie or apple crumb pie, I could not live without. Growing up, we’d always spend Thanksgiving weekend at a family church retreat. The location of the camp varied, but often times it would be in the same general area and sometimes we’d go to the same place from time to time. One year, we went to a camp that was near Julian, in southern California.  They are known for their apple pies and let me tell you, for the longest time, I would say that they had THE best apple pies hands down. I would look forward to Thanksgiving and ask my parents if the yearly retreat was going to be anywhere near Julian because I wanted to get my apple pie fix. We’d pick up a few pies for immediate consumption and then a few more to freeze for later. Only thing that kept us from getting more pies was our limited freezer space :)


Well, fast forward to about seven years ago when I met my husband. I can’t remember exactly when I first had it, but his mother made me an apple crumb pie that took me straight back to my youth. It was just like the pies I had tasted from Juliann, except (dare I say) better. His mom would tell me stories about how she would make a pie for the family and how my husband would eat the entire pie himself before anyone else had been able to have some… so if he is ever around, she always makes two pies, one for him and one for the rest of the family! Well, we are like two peas in a pod because I could just as easily eat an entire pie on my own within 24 hours as well. In fact, when we went to visit them this last week, there were two freshly baked pies sitting on the counter for us as soon as we walked in the door! :)


Of course after tasting her pie, I promptly asked his mom for the recipe and started making these pies at home shortly thereafter. It took a few times for me to get the recipe down (figuring out my oven temperature and how to long to bake it to avoid mushy apples), but I am proud to say that my husband now thinks that I am better at making this pie than his own mother :) Now that’s the ultimate compliment!

So, if you love apple pie, then you must try this recipe. In my humble opinion, it is hands down better than any other apple pie or apple crisp recipe you’ll ever try.

Apple Crumb Pie
from my mother-in-law, Joan P.

9-inch unbaked pie crust
6 cups pared, sliced apples (5-7 tart apples - Granny Smith work best)
1 cup sugar, divided
1 tsp cinnamon
3/4 cup flour
1/3 cup butter

Thaw your pie crust as directed on the package and place it in your favorite pie pan.  Place the sliced apples in the unbaked pastry shell. Combine ½ cup of sugar with the cinnamon; sprinkle over the apples.

Combine the remaining ½ cup of sugar with the flour; cut in the butter until crumbly (you can do this with a pastry blender or with two knives). Sprinkle the crumb mixture over the apples.

Bake at 400F for 40 minutes or until apples are tender. Cool completely before serving.

Note: baking time is for a metal pie tin, if using a pyrex pie pan the time may vary... just bake until the crumble mixture is a nice golden brown and the apples are tender (you may need to either use a pie crust shield or cover the edges of the pie crust in foil to prevent them from burning)

This recipe has been submitted to the Monthly Mingle for the "Fruit in Baking" theme.

Sunday, October 24, 2010

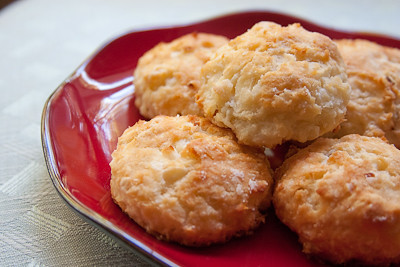
Birthday Wishes and Saint-Germain-des-Prés Onion Biscuits


Today is a very special day.  Do you know what today is? It's Dorie Greenspan's birthday!!! That's right, the author of Baking: From My Home to Yours and Around My French Table: More Than 300 Recipes from My Home to Yours is celebrating her birthday today.  What's more, she is spending part of the day with me! Well, truth be told she is not spending it with just little ole me.  She is teaching a cooking class at Central Market here in Dallas, to help promote the release of her new book, Around My French Table: More Than 300 Recipes from My Home to Yours.  I can't wait to finally meet her!

Back in January of 2008 I came across a group of three bakers - Laurie and two other bloggers, who had decided to bake one recipe a week out of Baking: From My Home to Yours.  Laurie called it Tuesdays with Dorie (TWD) because each week everyone posted their results on Tuesday.  I had just purchased the book myself, and thought it would be the perfect way to motivate myself to actually use a cookbook.  So I joined the group and now, nearly 3 years later, there are hundreds of others baking along.  It only seemed natural, then, that with the release of her most recent book, French Fridays with Dorie (FFwD) was born.

So, in honor of Dorie's birthday and the new blogging event French Fridays with Dorie, a few of us decided to get together and throw Dorie a "Surprise Birthday Party" using recipes from Around My French Table.

After looking through the book, I decided to bring an appetizer to the party.  There were several that caught my attention, but one in particular stood out - Saint-Germain-des-Prés Onion Biscuits.  Named for her neighborhood in Paris, Dorie considers these her "house specialty" when she is entertaining.  These biscuits, like any other biscuits, were quick and easy.  They are all-American baking powder biscuits filled with butter-sautéed onions.   I forgot that you're not supposed to twist the biscuit cutters when you're cutting you're biscuits, so mine did not rise very well :(

Still, these biscuits were delicious.  They had a great onion flavor without being too overwhelmingly onion-y (though I don't think there really is such a thing!).  I think these would be great if you added some cheddar to them as well.  Next time, I may try adding caramelized onions instead, too.

I will definitely be making these again.  I also think I'll be following Dorie's lead and make a batch to freeze and bake "on demand." Once the dough is cut, you can put the unbaked biscuits on a lined baking sheet, slide the sheet into the freezer and, once the rounds are solid, just pack them airtight. That way you can simply slide the frozen biscuits into the oven and bake them on a moment's notice.

If you'd like the recipe, you can find it below.  You'll have to get a copy of Around My French Table for most of the other recipes from this blogging event, but since this one can easily be found on Amazon I've posted it below. Make sure you visit Holly's blog, Phe.MOM.enon, to see what everyone else cooked up for Dorie's birthday.

While you're here, if you haven't already entered, check out the giveaway I'm doing here.

And of course a very big Happy Birthday to Dorie! I'm looking forward to meeting you this afternoon!!!!!!!

Saint-Germain-des-Prés Onion Biscuits
from Around My French Table: More Than 300 Recipes from My Home to Yours by Dorie Greenspan


6-1/2 tablespoons cold unsalted butter
1 small onion, peeled, trimmed, and finely diced (about 1/2 cup) (I found this to be just 1/2 of a small onion!)
2 cups all-purpose flour
1 tablespoon baking powder
2 teaspoons sugar
1/2 teaspoon salt
3/4 cup cold whole milk

Center a rack in the oven and preheat the oven to 425 degrees F. Have a biscuit or deep cookie cutter, one that’s between 1 and 2 inches in diameter, at hand.

Put 1/2 tablespoon of the butter in a small skillet or saucepan and cut the remaining 6 tablespoons butter into 12 pieces.

Set the pan over low heat, melt the butter, and add the onion. Cook, stirring, just until it softens, about 3 minutes. Pull the pan from the heat.

Put the flour, baking powder, sugar, and salt into a mixing bowl and whisk the ingredients to combine. Drop the butter pieces into the bowl and, using your fingers, rub the butter into the flour mixture until you’ve got a bowl full of flour-covered pieces, some small and flakey and some the size of peas.

Scatter the cooked onions over the mixture, then pour over the cold milk and, using a fork, toss and turn everything together until you’ve got a soft dough. If there are some dry bits at the bottom of the bowl, reach in and knead the dough gently a couple of times.

Lightly dust a work surface with flour, turn the dough out, and dust the top of the dough very lightly with flour. Pat the dough down gently with your hands (or roll it out with a pin) until it is about 1/2 inch thick. It doesn’t have to been an even square or round; it doesn't even have to be an even 1/2 inch thick. Just do the best you can and do it quickly.

Dip the biscuit cutter into the flour bin and cut out as many biscuits as you can--cutting the biscuits as close to one another as possible – and transfer the biscuits to the baking sheet, leaving a little space between each one. Gather the scraps of dough together, pat them down, and cut as many more biscuits as you can; put these on the lined baking sheet, too. (You can make the biscuits to this point, freeze them on the baking sheet and then, when they're solid, pack them airtight and freeze them for up to 2 months. Bake them without defrosting--just add a couple of minutes to the baking time.)

Alternatively (and perhaps more economically), you can pat or roll out the dough, then, using a long knife, cut square biscuits, making each biscuit about 1- to 1-1/2 inches on a side.

Bake the biscuits for 15 to 18 minutes, or until they are puffed and lightly browned.

Serving: 
Biscuits are always best right out of the oven or still warm. However, these are also good at room temperature--the deep onion flavor is enough to compensate for whatever is lost, namely some fluffiness, when the biscuit cools.

Storing:
While unbaked biscuits can be frozen for up to 2 months and baked straight from the freezer, once the biscuits are baked, they're best eaten quickly.

Tuesday, October 19, 2010

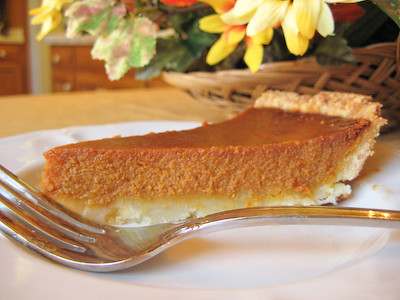
Caramel Pumpkin Pie & A Giveaway

This week's Tuesdays with Dorie (TWD) recipe was chosen by Janell of Mortensen Family Memoirs: Caramel Pumpkin Pie. I was about to say that I made this one last year, but when I looked back, it was actually two years ago! Where does the time go?

This is my favorite pumpkin pie recipe.  I love the caramel undertone.  If you're looking for a pumpkin pie recipe for this Thanksgiving, then look no further.

Now on to the giveaway... if you've recently had a baby or know someone who is expecting, you'll be interested in this one.  Just click here to find out more and to enter to win.

Sunday, October 17, 2010

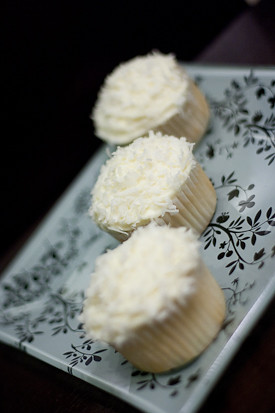
Fluffy Coconut Cake with Guava Filling (SMS)

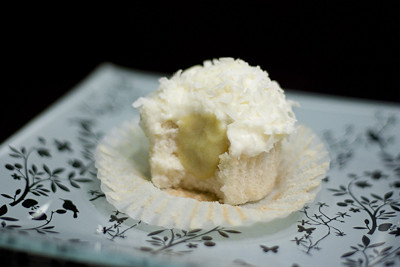
This week's Sweet Melissa Sundays (SMS) recipe was chosen by Karen of Karen’s Cookies Cakes & More: Fluffy Coconut Cake with Passion Fruit Filling. I didn't feel like trying to make a fancy layer cake, so I opted for the cupcake version instead. And, because I couldn't get my hands on any passion fruit juice, I made a guava filling for my cupcakes. I think the other option for a lemon filling would be great with these cupcakes, too.

I kind of feel like the name "Fluffy Coconut Cake" is a misnomer because there is not one bit of coconut in this cake! It is just a basic cake that is topped with coconut cream cheese frosting. Nevertheless, these cupcakes were delicious... and I think the real star of this recipe is the coconut cream cheese frosting. The guava filling was interesting and paired well with the coconut, but I think the cupcakes were good without any filling at all, too. If you're looking for a recipe to use up all those extra egg whites you have in your freezer (like I always do after making ice cream!), this is a great one to make.


Thank you, Karen, for hosting this week. If you'd like the recipe, you can find it here. Make sure you check out the Sweet Melissa Sundays Blog Roll to see how everyone else enjoyed this coconut-y treat!

* Recipe notes:
- I made a full recipe and was able to make 34 cupcakes from it.
- I baked my cupcakes for about 18-19 minutes before they were done.

Tuesday, October 12, 2010

Fold-Over Pear Torte (TWD)

This week's Tuesdays with Dorie (TWD) recipe was chosen by Cakelaw of Laws of the Kitchen: Fold-Over Pear Torte.  It is basically a pie crust filled with diced pears and chopped dried apricots, surrounded by a creamy custard filling.  (There's supposed to be some chopped nuts in there, too, but I omitted those.)  Dorie says this is the perfect "fall-into-winter dessert" because of the pears.
I have to admit that time got away from me and I cheated by using a premade pie crust.  Otherwise, this recipe was simple and straightforward.  I only used about 2/3 of the custard I made, because I used a 9-inch springform pan and Dorie warns you not to overfill the torte.  The custard does puff up in the oven, so make sure you leave at least one-half inch between the cream and the pie crust when you are filling it!


The end result is definitely a very rustic (and not so photogenic) torte! I found this torte to be good, but not great.  There wasn't anything that I disliked about it, there just wasn't any "wow" factor that makes me want to make this one again.... which is fine because there are so many other things I still want to try :)

Thanks cakelaw, for hosting this week.  If you would like the recipe, you can find it here. Make sure you check out the TWD Blogroll, to see how everyone else enjoyed this fall-into-winter treat! As a reminder, if you'd like to meet Dorie during her current book tour, see if she will be visiting your city here.  If you'd like to join us at her cooking class here in Dallas on October 24th, sign up here.

* Recipe notes:
- I covered my torte loosely with a foil tent after 40 minutes to prevent it from over browning.
- For more recipe tips, click here

Friday, October 8, 2010

Mojito Chicken Revisited


A while back, I was sent a sample of black garlic from Marx Foods.  Since I knew nothing about black garlic previously, the information I found on their website about it was helpful:

Black garlic is a unique ingredient that has been used in Korean, Thai, and Japanese food for some time... it is essentially conventional garlic that has been carefully high-heat fermented for a month, until the cloves soften and turn dark black... it is sweet (but not cloying) with a more mild garlic aftertaste, but there are nuances that people describe as molasses, balsamic, licorice or tamarind-like flavors. It is considered to be a high umami ingredient. Black garlic is considered healthier than plain garlic because it contains twice as many antioxidants.

I wracked my brain for weeks, trying to figure out what dish to try this black garlic in.  I finally settled upon this Mojito Chicken that I made a while back.  I'll be honest with you... I was a little hesitant to taste this dish after I made it! You see, I'm not always the most adventurous eater and when I hear about something like black garlic that is fermented, I have no idea what it's going to taste like and that's a little scary!

You know what? I had no reason to be scared... the black garlic was an excellent addition to this dish.  I do not think that anyone eating this would ask what was in it (as if they tasted something funny).  Rather, it enhanced all the existing flavors.  It really is a difficult flavor profile to describe - slightly sweet but also a bit savory at the same time.  I think it's one of those foods that you just have to taste for yourself.

A big thanks to Marx Foods for the black garlic! You should check out their store - they used to market to professional chefs, but now they are selling the same quality ingredients that were previously only available to professional chefs to home cooks like you and me!

Tuesday, October 5, 2010

Double Apple Bundt Cake (TWD)

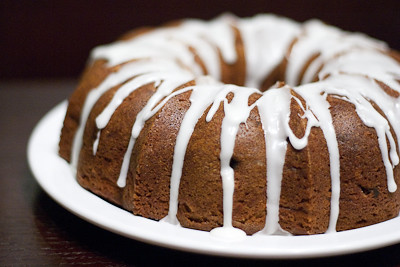
This week's Tuesdays with Dorie (TWD) recipe was chosen by Lynne of Honey Muffin: Double Apple Bundt Cake. I already said last week that I love baked apples.... so I was pleased to see yet another apple recipe picked for this week! With the weather finally cooling down here (into the 80's - ha!) and all these apple recipes, it is finally beginning to feel like fall!
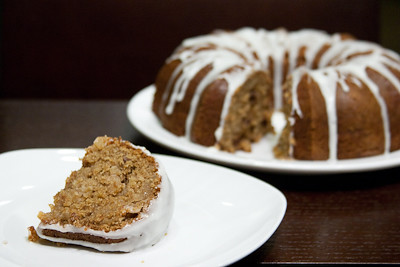
This is another quick and easy recipe, with the exception of the time it takes to grate the apples. Truthfully, that still only took me about 15 minutes, so it really wasn't bad at all (and I did not have a grater so I sliced them into slivers). 

I made a few slight changes to the recipe. I doubled the cinnamon because 1/2 teaspoon seemed like so little.  I omitted the nuts, but did add the raisins.  I think dried cranberries would be wonderful in this cake, too. Instead of 1-1/2 cups of white sugar, I used 1 cup white sugar and 1/2 cup brown sugar.   I'd like to use all brown sugar next time to see how it tastes, and top the cake with a caramel sauce instead, because I love this apple cake with caramel sauce and Dorie's recipe seems much "healthier" (relatively speaking).

Wow was this cake good! So moist and full of apple flavor. I think the apple butter gave it that extra little something that just made it special and set it apart from other apple cakes.  The lemon icing on top is a nice, tart contrast to the sweetness of the cake.  I just finished baking this cake this evening and I'm not sure if it will even last 24 hours!


Thanks Lynne, for hosting this week.  I will definitely be making this one again and again! If you would like the recipe, you can find it here. Make sure you check out the TWD Blogroll, to see how everyone else enjoyed this fall treat! As a reminder, if you'd like to meet Dorie during her current book tour, see if she will be visiting your city here.  If you'd like to join us at her cooking class here in Dallas on October 24th, sign up here.

* Recipe notes:
- I used 1 teaspoon of cinnamon instead of 1/2.
- I used 1 cup of white sugar and 1/2 cup of brown sugar.
- I used Gala apples which were perfect in this recipe.
- I baked my cake for a total of 60 minutes, 5 minutes longer than indicated.
- Wrapped well, this cake will keep for 4 days at room temperature or 2 months in the freezer.
- For more recipe tips, click here