Tuesday, December 27, 2011

French Country Bread (DB)


Our Daring Bakers' Host for December 2011 was Jessica of My Recipe Project and she showed us how fun it is to create Sour Dough bread in our own kitchens! She provided us with Sour Dough recipes from Bread Matters by Andrew Whitley as well as delicious recipes to use our Sour Dough bread in from Tonia George’s Things on Toast and Canteen’s Great British Food!

Sourdough is made without adding any yeast or leavening, by fermenting your own sourdough ‘starter’. The natural yeasts in the flour do the work of making a lovely loaf of bread – we just facilitate that process. Sourdough is basically bread as your great-, great- grandmother knew it, before the days of Chorleywood (i.e. factory-made, steamed, sliced, additive-filled) bread and packaged yeast. It takes time, but not too much active work. 

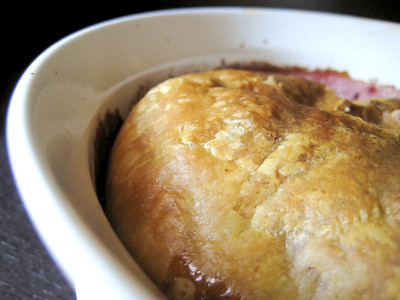
I have to say that while I had a lot of fun with this recipe, it was a colossal fail!  I've never made a starter before, and watching this one develop and bubble up was really cool.  Unfortunately, I let my dough proof too long (didn't realize that would be an issue), and while I ended up with what looks like a beautiful loaf, it was extremely dense and didn't quite develop the crumb I was hoping it would.  I was hoping to get a good picture of the cut loaf, but since I failed to successfully get a good crumb, I didn't photograph the inside of the loaf :(

The great thing about this recipe, though, is that you're left with a starter that you can keep on using... so I look forward to trying this recipe again! :) Thanks Jessica, for hosting this month's challenge.  Make sure you check out the Daring Bakers' Blogroll to see how everyone else rose to the challenge.

French Country Bread
Servings: 1 large loaf plus extra wheat starter for further baking
Wheat Starter - Day 1:

Ingredients
4 1/2 tablespoons (70 ml) (40 gm/1 ½ oz) stoneground breadmaking whole-wheat or graham flour
3 tablespoons (45 ml) water
Total scant ½ cup (115 ml) (3 oz/85 gm)

Directions:
1. In a Tupperware or plastic container, mix the flour and water into a paste.
2. Set the lid on top gently, cover with a plastic bag, to prevent messes in case it grows more than expected!
3. Set somewhere warm (around 86 F if possible). I sometimes put mine on a windowsill near a radiator, but even if it’s not that warm, you’ll still get a starter going – it might just take longer.

Wheat Starter - Day 2:


Ingredients
4 1/2 tablespoons (70 ml) (40 gm/1 ½ oz) stoneground breadmaking whole-wheat or graham flour
3 tablespoons (45 ml) water
scant 1/2 cup (115 ml) (3 oz/85 gm) starter from Day 1
Total scant cup (230 ml) (6 oz/170 gm)

Directions:
1. Stir the flour and water into the mixture from Day 1, cover, and return to its warm place.
Wheat Starter - Day 3:

Ingredients
4 1/2 tablespoons (70 ml) (40 gm/1 ½ oz) stoneground breadmaking whole-wheat or graham flour
4 teaspoons (20 ml) water
scant 1 cup (230 ml) (6 oz/170 gm) starter from Day 2
Total 1⅓ cup (320 ml) (230 gm/8-1/10 oz)

Directions:
1. Stir the flour and water into the mixture from Day 2, cover, and return to its warm place.
Wheat Starter - Day 4:

Ingredients
3/4 cup plus 1½ tablespoons (205 ml) (120 gm/4 ¼ oz) unbleached all-purpose flour
1/2 cup less 4 teaspoons (100 ml) water
1⅓ cup (320 ml) (230 gm/8 oz) starter from Day 3
Total scant 2⅔ cup (625 ml) (440 gm/15½ oz)

Directions:
1. Stir the flour and water into the mixture from Day 3, cover, and return to its warm place. At this point it should be bubbling and smell yeasty. If not, repeat this process for a further day or so until it is!

French Country Bread
Stage 1: Refreshing the leaven

Ingredients
1 cup less 1 tablespoon (225 ml) (160 gm/5 ⅔ oz) wheat Leaven Starter
6 tablespoons less 1 teaspoon (85 ml) (50 gm/1¾ oz) stoneground bread making whole-wheat or graham flour
1 cup plus 2 teaspoons (250 ml) (150 gm/5 ⅓ oz) unbleached all purpose flour
1/2 cup (120 ml) water
Production Leaven Total 2¾ cups plus 4 teaspoons (680 ml) (480 gm /1 lb 1 oz)

Directions:
1. Mix everything into a sloppy dough. It may be fairly stiff at this stage. Cover and set aside for 4 hours, until bubbling and expanded slightly.

French Country Bread
Stage 2: Making the final dough

Ingredients
3/4 cup less 1 teaspoon (175 ml) (100 gm/3 ½ oz) stoneground breadmaking whole-wheat or graham flour, plus more for dusting
2 cups plus 2 tablespoons (510 ml) (300gm/10 ½ oz) unbleached all-purpose flour
1¼ teaspoons (7½ ml) (7 gm/¼ oz) sea salt or ⅔ teaspoon (3⅓ ml) (3 gm/⅛ oz) table salt
1 ¼ cups (300 ml) water
1 ¾ cups (425 ml) (300 gm/10 ½ oz) production leaven – this should leave some (1 cup) for your next loaf.
Total 6 cups less 2 tablespoons 1415 ml (1007 gm/35 ½ oz/2 lb 3½ oz)

Directions:
1. Mix the dough with all the ingredients except the production leaven. It will be a soft dough.
2. Knead on an UNFLOURED surface for about 8-10 minutes, getting the tips of your fingers wet if you need to. You can use dough scrapers to stretch and fold the dough at this stage, or air knead if you prefer. Basically, you want to stretch the dough and fold it over itself repeatedly until you have a smoother, more elastic dough.
See my demonstration here: http://www.youtube.com/watch?v=OqS3raEGdwk
3. Smooth your dough into a circle, then scoop your production leaven into the centre. You want to fold the edges of the dough up to incorporate the leaven, but this might be a messy process. Knead for a couple minutes until the leaven is fully incorporated in the dough. See my demonstration here: http://www.youtube.com/watch?v=UPO97R4iO4U
4. Spread some water on a clean bit of your work surface and lay the dough on top. Cover with an upturned bowl, lining the rim of the bowl with a bit of water. Leave for an hour, so that the gluten can develop and the yeasts can begin to aerate the dough.
5. Once your dough has rested, you can begin to stretch and fold it. Using wet hands and a dough scraper, stretch the dough away from you as far as you can without breaking it and fold it back in on itself. Repeat this in each direction, to the right, towards you, and to the left. This will help create a more ‘vertical’ dough, ready for proofing. See my demonstration here: http://www.youtube.com/watch?v=rDoJRCMfclE
6. Heavily flour a banneton/proofing basket with whole wheat flour and rest your dough, seam side up, in the basket. Put the basket in a large plastic bag, inflate it, and seal it. Set aside somewhere warm for 3-5 hours, or until it has expanded a fair bit. It is ready to bake when the dough responds to a gently poke by slowly pressing back to shape.
7. Preheat the oven to hot 425°F/220°C/gas mark 7. Line a baking sheet with parchment, then carefully invert the dough onto the sheet. I like to put the baking sheet on top of the basket, then gently flip it over so as to disturb the dough as little as possible. Make 2-3 cuts on top of the loaf and bake for 40-50 minutes, reducing the temperature to moderately hot 400°F/200°C/gas mark 6 after 10 minutes.
8. Cool on a cooling rack.

Notes:
• Good bread starts with good flour. Beyond trying to find good quality, local (organic if possible) flour, Whitley recommends finding out three things: how was it milled? (stoneground ideally, to retain more nutrients); how much of the original grain is left in the flour (ideally 95-100 % for bread making); and lastly, how much protein is in the flour? (the more protein, the more gluten, leading to a more stretchy dough – ‘strong’ or ‘bread’ flour indicates a higher level of protein).
• Normal tap water is fine in most cases, unless you live in a municipality that heavily chlorinates the water. Chlorine will kill almost all bacteria, including your yeast, so you’ll want to use filtered water if you can. Whitley says that leaving water in a pitcher overnight can rid most of the chlorine.
• If you clean your kitchen with anti-bacterial products or harsh cleaners, try not to do it before baking and make sure your bowls are clean but have no chemical residue left on them! Many a bread has been deflated by an overly-sterilised kitchen.
• All of these recipes call for sea salt because it retains a higher level of minerals and has a stronger salt taste, meaning you can use less of it. Never add salt directly to your starter – it will kill the yeast, so use the following method: dissolve your starter in water, stir your salt through your flour, then mix the wet with the dry ingredients.
• When greasing pans for baking, try to use hard fats like butter because oil can drip down the pans and lead to a fried bottom on your loaf!
• When working with the dough, you might feel inclined to heavily flour your work surface or your hands. Resist this urge! Sourdough is meant to be wet and sticky – this helps to give the bread a nice crumb once it has baked. I work most doughs with my hands, but sometimes use a dough scraper to help lift and fold the dough. When I need to pick up or shape a loaf, I find damp hands work better than floured ones!
• If you don’t have dough scrapers, old bank cards/credit cards work just as well! But wash them thoroughly first.
• Try to work with your hands to make these recipes – mixing and kneading the dough by hand means you’ll get a better sense of how your dough should feel! We learn by doing!
• Remember, a lot of these timings are guidelines – pay attention as, depending on temperature and your starter, you may need more or less time to proof your dough. You want a dough that resists poking a bit (if you poke it, the hole will disappear) but not one that quivers all over and seems really fragile.
• Cutting the top of your loaf before it goes in the oven helps it to expand or split at those points. This means you don’t end up with funny outgrowths from your bread! You want to be quick, gentle, and use a very sharp blade – see the video at the end for tips.
• Notes on scheduling: For the Rye loaf, and all the other starters, I find it helpful to start the process on a Monday, so that come Friday/Saturday you are ready to bake. I refresh my starter (Stage 1) the night before baking, then do Stage 2 in the morning. For the French Country Bread, I refresh the starter in the morning, make the final dough at lunchtime, and bake at dinner time. For the Rice Sourdough, I soak the flaxseeds on a Friday morning, refresh my starter on Saturday morning, the prep the final dough at lunchtime, ready to bake at dinner.
• I would set the difficulty level of these recipes as: Rye – Easy!, French Country Bread – Med-Hard!, Rice Sourdough – Easy!
• Once you’ve finished baking, you’ll have some leftover starter. Keep this in a Tupperware container, as this is what you will use to start your next loaf (and so on…)! Some of the best starters are hundreds of years old – and they get better with time. If you bake daily, you can keep your starter at room temperature. If you bake weekly, I’d keep it in the fridge. You can also freeze starter if you bake very infrequently, but I find it does fine in the fridge so long as you feed it at least once a month. Simply refresh your starter according to the recipe – or with equal parts by weight of flour and water – and let it come back to life at room temperature.
• You might notice that your starter starts to smell a bit like acetone – this is completely normal. It may develop a grey liquid on top, which you can either pour off or stir back into the starter. When I refresh mine, I discard half of the original starter and add in fresh flour and water for the yeast to feed on.
• Sometimes, very rarely, a starter might get moldy. This is often due to being left at room temperature without feeding. If there is a lot of mold throughout the starter, I would discard it. But the odd bit is not always a problem. It is nearly impossible to kill a starter, unless you get salt or chemical products in it – so don’t fret! Often it is just a matter of feeding it over a few days and nursing it back to life.

Sunday, December 25, 2011

Merry Christmas!


I hope everyone has had a sweet holiday with their family and friends.  We've certainly enjoyed visiting with our family and celebrating Christmas with our precious little 2 year old.  She had lots of fun opening presents (hers and everyone elses!) while exclaiming, "rip it!" as she tore through all the wrapping paper :)  I can only imagine how next year will be even more fun!

And, for those who entered the Peeled Snacks giveaway, I'm happy to announce that Denise L. is the winner.  I have emailed Denise and if I do not receive a reply within 48 hours, I will choose an alternate winner.  Congrats Denise, and Merry Christmas!

Monday, December 19, 2011

$0.99 Brie

Right now at Target, you'll find President Brie Cheese (8 oz) for $3.49.  Use the $2.50 off coupon found here (you’ll need to share this offer with 3 friends) and get it for just $0.99!

If you're doing any holiday entertaining this year, this delicious Baked Brie is sure to please all your guests! :)

Tuesday, December 13, 2011

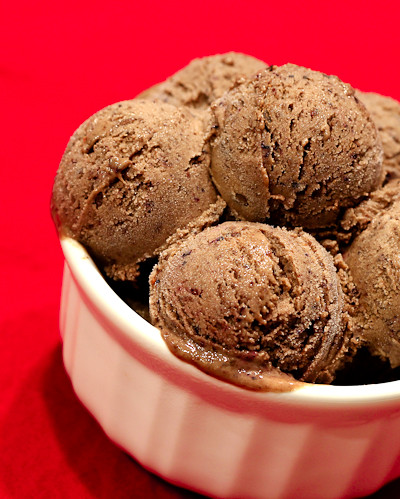
Unbelievably Good Chocolate Blueberry Pomegranate Ice Cream (TWD)


This week's Tuesdays with Dorie (TWD) recipe was chosen by Laurie (founder of TWD!) of Slush: Unbelievably Good Chocolate Blueberry Ice Cream.

I would never to think to make chocolate blueberry ice cream, but I've totally had chocolate covered strawberries, and chocolate covered dried cherries, blueberries, etc. so of course it would make sense that chocolate blueberry ice cream would be good :)

I thought I had everything I needed for this recipe because we usually keep frozen blueberries on hand for my daughter, but when I went to the make the recipe I realized that the recipe calls for blueberry preserves, not fresh/frozen blueberries! Well, I just so happened to receive some Pomegranate Jelly for my birthday in November, so I decided to puree some frozen blueberries (about 1 tbsp) and mixed it together with the Pomegranate Jelly.... resulting in the most delicious chocolate blueberry pomegranate ice cream!

If you would like the recipe, you can find here.  Make sure you also check out this page, too, so you can see what everyone else thought of this unusual chocolate ice cream!

And if you haven't already, don't forget to enter my Peeled Snacks Giveaway!

Sunday, December 11, 2011

Cake Pop Maker for $1.99!

Right now Kohl's has this Babycakes Cake Pops Maker on sale for just $14.99
Get an additional 20% off with code SECRETSANTA and use coupon code XMASFREE for FREE shipping.

You’ll pay only $11.99 (+ tax) out of pocket. Then submit this $10 mail in rebate (only valid if item is purchased between 12/11 - 12/12 so purchase any time after midnight), making it $1.99 + tax!

Don't forget you can also get 5.5% cashback through ShopAtHome with their 110% guarantee.  Simply go to the Kohl's page on ShopAtHome, then click on 110% guarantee (it's on the right hand side) and tell them that you found 5% cashback at Mr. Rebates with this link: http://www.cashbackmonitor.com/?mrr-kohls

Then proceed to click on Kohl's through ShopAtHome as usual and they will give you 5.5% cashback!

Please note that you won't be able to make traditional moist cake pops with these, but you can still make some sweet treats with it! :) I am thinking even waffle recipes would be great in this! Hurry, because this deal will likely sell out fast!

(Thanks, hip2save!)

Tuesday, December 6, 2011

Peeled Snacks Giveaway


I often get asked by my friends and family why I try so hard to feed my daughter healthy things when I myself eat so many sugary sweets! If you read my blog, you might wonder the same thing ;) Well, the answer is easy - I want her to have a better and healthier lifestyle.  They say that what a baby/toddler eats during the first few years will help establish their eating habits for the rest of their lives.  So if I can get her off to a right start now, I will hopefully raise a healthy eater.  (Clearly, I was fed way too much sugar when I was a child because I have the worst sweet tooth of anyone I know!)

So, I do many things to ensure that she is eating well.  I limit her salt intake and avoid processed foods whenever possible.  I feed her fresh or frozen vegetable instead of canned vegetables.  I only give her milk or water, never fruit juice (pediatricians discourage giving children fruit juice due to the high sugar content and low nutritional value).  I limit her sugar intake - she did not have any refined sugar until she was 22 months old and now that she is older she is allowed to have some, but I try to limit the amount of refined sugar she consumes.  Refined sugar has a higher glycemic index and will cause her to get a super sugar high (and then a big crash, which makes tantrums more likely).

Given all of this, I've had quite a time trying to find healthy snacks for her to eat.  You don't realize how everything has sugar in it until you start reading labels and looking for things that don't have added sugar! (Not to mention how manufacturers will sometimes try to hide the sugar in their ingredients list by using dextrose, sucrose, high fructose corn syrup, etc.) So, when I stumbled upon Peeled Snacks at Starbucks, I was really excited.  Could a dried fruit snack with no added sugar, just fruit, really taste good?

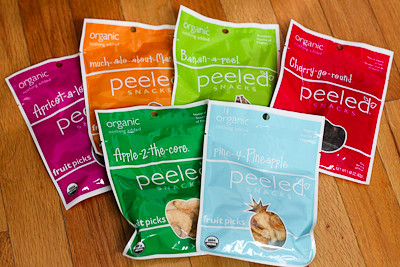
Well, the folks at Peeled Snacks were kind enough to send me one of their Organic Fruit Picks Variety Packs that includes several of their organic fruit snacks: pine-4-Pineapple, much-ado-about-Mango, Banan-a-peel, Apricot-a-lot, Cherry-go-round and Apple-2-the-core.  My favorite was the apricot; I'm not sure what it is about them (maybe they're sweeter?), but I found them to be much better than the ones we usually get from Sam's Club.  I loved them all, but didn't care much for the dried banana - the pieces were a little tough (my daughter still loved them).

What did my little girl think about the variety pack? Well, her favorites are the dried pineapple, dried apples, and dried cherries.  She will pretty much oblige to anything for some Peeled Snacks! :) I can't tell you nice it is, as a parent, to be able to find healthy snacks that my daughter loves.

Would you like to try some Peeled Snacks, too? Enter now to win your own Organic Fruit Picks Variety Pack.  Just go to the Peeled Snack website and check out their Organic Fruit Picks Variety Pack, then leave me a comment here, telling me which type of dried fruit is your favorite (or which one you'd like to try most).  For one additional entry, "like" Good Eats 'n Sweet Treats on Facebook, then come back here leave a second comment telling me that you "liked" my page.

This giveaway is open to US Residents only, and will be open until midnight Central Time on December 20th.  Please note that comment moderation is in place, so your comment may not appear immediately.  Also please make sure that you leave your email address if you don't have one associated with your profile! (I already have one comment from "unknown" and would have no way to contact him/her if he/she wins!)

Sunday, December 4, 2011

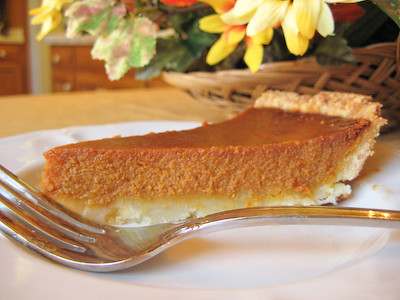
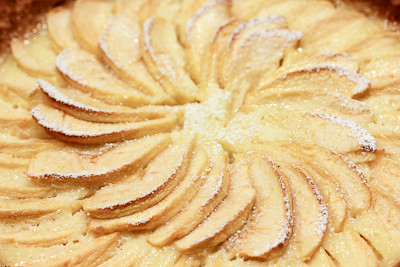
Sour Cream Pumpkin Tart and Normandy Apple Tart (TWD)


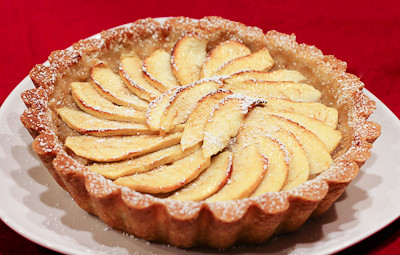
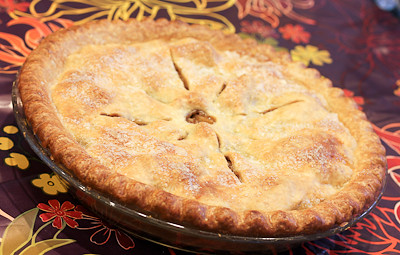
This week for Tuesdays with Dorie (TWD) we had two recipes! (I actually had this post ready to go on Tuesday night and just realized I never posted it! oops!) The recipes were chosen by Tracey of Tracey’s Culinary Adventures and Judy of Judy’s Gross Eats. Tracey chose the Normandy Apple Tart and Judy chose the Sour Cream Pumpkin Pie/Tart.  I was ambitious this week and made both :)

The Normandy Apple Tart is a very rustic and homey dessert.  It's basically a tart shell filled with delicious homemade (or store bought) applesauce, then layered with apples on top.  It's amazing how something so simple can be so delicious.  I think using your own homemade applesauce really makes a difference in this dessert.  I am also a huge fan of Dorie's tart shell recipe and use it all the time.... I even used it for the Sour Cream Pumpkin Pie recipe because Dorie mentions that as an alternative to your traditional pie crust.


The sour cream pumpkin pie was one of my husband's favorite desserts this Thanksgiving.  He said he liked it better than traditional pumpkin pie because it wasn't so heavy.  I thought that was interesting, given the amount of heavy cream in it ;) It has a nice blend of spices to it and I think the addition of some rum to the filling really makes it stand out.


While the pumpkin pie can be served cold or at room temperature, I thought the flavors were a bit muted when it was chilled, so I would definitely recommend serving it at room temperature.

Thanks, Tracey and Judy, for hosting this week! I really enjoyed both recipes.  I don't normally eat pumpkin pie except around Thanksgiving, but I could definitely see myself making the Normandy Apple Tart a few times each fall :) If you'd like the recipes, please click here for the Normandy Apple Tart and here for the Sour Cream Pumpkin Pie.

* Recipe notes:
- Make sure to put a pie crust shield (or some foil) around the edge of your tart about 20-30 minutes into baking to avoid burning the edges.

Sunday, November 27, 2011

Sans Rival (DB)


Catherine of Munchie Musings was our November Daring Baker’s host and she challenged us to make a traditional Filipino dessert – the delicious Sans Rival cake! And for those of us who wanted to try an additional Filipino dessert, Catherine also gave us a bonus recipe for Bibingka which comes from her friend Jun of Jun-blog.

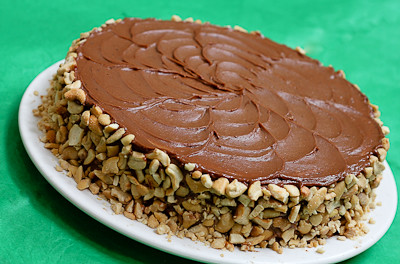
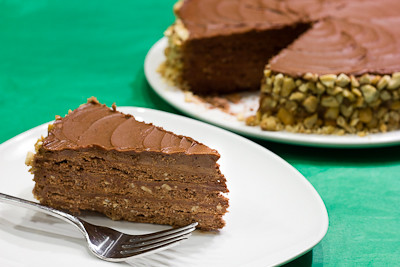
With all the cooking and backing involved with the Thanksgiving holiday, I only had time to make the Sans Rival cake. “Sans rival” means “without rival” and any Filipino will argue with you that this is true. Although it’s one of the most popular desserts in the Philippines, its origins are certainly French. In the 1920’s to 30’s there were many Filipinos who went abroad to study. A good number went to France and learned many French cooking techniques which they then brought home. A Sans Rival is made with layers of dacquoise, typically using crushed cashews, with very rich French buttercream frosting. The dacquoise is allowed to bake and dry to a crispy layer so that there is the crunch of pastry and nuts with the buttery, silky frosting. I went the traditional route with cashews, but the non-traditional route by making mine chocolate based.


The recipe really isn't more difficult than any other layered cake.  In fact, it's a little easier because each layer is baked as is so you don't even need to halve the layers and worry about slicing them perfectly!  It's basically meringue with crushed nuts folded in, then layered with buttercream.

It was fun to make, but I have to be honest and say that it didn't really "wow" me.  I like cashews but wasn't a big fan of a cashew flavored cake.  Perhaps almonds or peanuts would have been a better choice for me? Both my parents thought the cake was good, while my husband didn't really care for it.  So I guess it just depends on who you ask!


Thanks Catherine, for hosting this month's challenge.  Make sure you check out the Daring Bakers' Blogroll to see how everyone else enjoyed this Filipino cake!

Sans Rival
from Catherine of Munchie Musings 

Ingredients
10 large egg whites, room temp
1 cup (240 ml) (225 gm) (8 oz) white granulated sugar
1 teaspoon (5 ml) (3 gm) cream of tartar
¼ cup (60 ml) (20 gm) (2/3 oz) Dutch processed cocoa (optional and not traditional)
2 cups (480 ml) (240 gm) (8½ oz) chopped, toasted cashews

Directions:

Note: You will need four layers which will mean that you might have to bake in two batches. Be sure to use fresh parchment paper and cooled pans for each batch.

1. Preheat oven to moderate 325°F/160°C/gas mark 3.
2. Line cake pan bottoms with parchment paper and butter and flour the sides really well.
3. In a large clean, dry glass or metal mixing bowl, beat egg whites on medium until foamy (2 mins.). Sprinkle with cream of tartar. Gradually add sugar, a couple of tablespoons at a time, continuing to beat now at high speed until stiff shiny peaks form. (about 7-10 mins.)
4. Fold in nuts, reserving enough to use for decoration.
(Note the more finely ground for folding into meringue. The coarsely ground for is decoration of finished cake.)
5. Divide meringue into four equal parts. Spread in pans, evenly to edges. If doing batches, use fresh parchment paper and cooled pans for each batch.
6. Bake in preheated oven for 30 minutes, or until golden brown. Remove the meringue from the baking pans while still hot; allow to cool slightly. Peel off the parchment paper while it is still warm, it is difficult to remove sometimes when they have completely cooled.
7. When cool, trim edges so that all 4 meringue layers are uniformly shaped. Set aside.

French Buttercream:

Ingredients
5 large egg yolks, room temperature
1 cup (240 ml) (225 gm) (8 oz) white granulated sugar
1/4 cup (60 ml) water
1¼ cup (300 ml) (2½ sticks) (285 gm) (10 oz) unsalted butter, room temperature
Optional Flavorings: 2 oz (55 gm) unsweetened chocolate, melted, or 1½ teaspoon (7 ½ ml) almond extract, or 1½ teaspoon (7 ½ ml) vanilla extract, or any flavor you like

Directions:
1. Put the egg yolks in a mixing bowl. Beat at high speed until the yolks have doubled in volume and are a lemon yellow.
2. Put the sugar and water in a heavy pan and cook over medium heat, stirring the sides down only until all the sugar is dissolved and the syrup reaches 235°F/112°C (or thread stage).
3. With the mixer on high, very slowly pour the syrup down the sides of the bowl, until all has been added. Be careful as the very hot syrup could burn you if it splashes from the beaters. Continue beating on high until the mixture is ROOM TEMPERATURE (about 15 mins). Still on high, beat in the soft, room temperature butter a tablespoon at a time. Add flavoring after you beat in the butter. Refrigerate the buttercream for at least an hour, and whip it smooth just before you use it.

Assembly:

Set bottom meringue on cake board with a dab of butter cream to hold it in place. Spread a
thin layer of buttercream and then place another meringue on top. Repeat with a thin layer of
buttercream, meringue, thin layer of buttercream, meringue, and finally buttercream the top and
sides. Decorate with reserved nuts.
Refrigerate until ready to serve. It is easier to cut cold. May freeze.

Yield: 12 Servings

Notes:
• Brushing the parchment paper with some oil will help you to peel it off after the dacquoise is baked.
• Do not grind the nuts down to a fine flour/powder. This recipe is better with the nuts in a grainy/sandy grind.
• It is important to peel off the parchment within a couple of minutes of it coming out of the oven. Certainly while it is still warm.
• After you’ve removed the paper, return it into the warm oven to dry out more as the oven is cooling down. You want crunchy layers.

Friday, November 25, 2011

Ginger Jazzed Brownies and Fall Butternut Squash Pie (TWD)

I hope everyone had a wonderful Thanksgiving filled with lots of good eats and sweet treats! We had a pretty impressive spread at our house, and of course we're still enjoying leftovers today.

This week we're posting for Tuesdays with Dorie (TWD) on Friday.  This was to allow everyone the time to get ready for Thanksgiving.  There was no specific recipe chosen for this week, we were simply given the liberty to do a "rewind," meaning we could go back and bake a recipe from the past that we may have missed.  I'll be posting about the Ginger Jazzed Brownies and the Depths-of-Fall Butternut Squash Pie.

The ginger jazzed brownies were actually chosen by Hindy of Bubie’s Little Baker as the recipe of the week for October 18 and I made them a few weeks ago.  I just never got around to posting about them! I didn't have any fresh ginger on hand, so I added extra ground ginger to the brownies, as Dorie suggested.  My brownies came out with very little ginger flavor to them, which was a big disappointment because I love ginger.  I had contemplated adding in chopped candied/crystallized ginger to the brownies, and should have... because I munched on some while eating these brownies and found that the ginger and chocolate flavors together were great.  So, next time I make these, I will definitely add in chopped crystallized ginger instead of fresh ginger.  Otherwise, these brownies were super moist and dense like you would expect brownies to be.


The Fall Butternut Squash Pie was chosen by Valerie of Une Gamine dans la Cuisine. I am not a big butternut squash fan, but I still wanted to try this pie because that's what TWD is all about - trying recipes you wouldn't otherwise try. So, I made this one for Thanksgiving. Aside from the butternut squash, this pie is filled with pears, brown sugar, spices, walnuts, and raisins (or dried cranberries or diced apples).


This pie was met with mixed reviews. I really didn't care for it much. I think I would have liked it better if there had been more sugar in it because I think it was lacking in sweetness. My mom thought it was good, but attributed that to the fact that there was a lot of other filling ingredients besides squash. I think if it had a little bit less squash and lots of pears and apples, it would be very good. Just enough to have a hint of squash in it, but not overwhelmingly squashy ;)


If you're interested, head on over here for the Ginger Jazzed Brownies recipe and here for the Fall Butternut Squash Pie recipe.

Friday, November 18, 2011

Thanksgiving Favorites

Can you believe that Thanksgiving is just less than one week away? I sure can't. Of course my favorite part of Thanksgiving (aside from gathering all together with my family), is the delicious food :) I only put a little bit of everything on my plate, and yet somehow I always end up stuffed! I don't know what it is about Thanksgiving food, but it is always hard not to want to eat all of it!

Here's a roundup of some of my favorite fall treats that I've made over the years; all of these would be perfect to bring to your Thanksgiving table. Hope you'll try one or two of them, and come back to tell you me what you thought of them!

(And if you haven't already, click here to see how you can earn a $10 Amazon gift card for FREE!)

sorry, no blog post about this one yet but it is a great stuffing recipe


Tuesday, November 15, 2011

Get a Free $10 Amazon Gift Card

Free $10 Amazon Gift Cardwhen 5 Friends Sign up for StumbleUpon

StumbleUpon is offering an easy way to earn Amazon gift cards – all you need to do is refer your friends to sign up for StumbleUpon and when 5 friends sign up for StumbleUpon using your link, you’ll earn a $10 Amazon gift card. For every additional 5 friends who sign up – you’ll earn an additional $10 Amazon gift card. So if you refer 20 friends, you'll receive $40 in Amazon gift cards! Wouldn't it be nice to treat yourself and buy that bakeware you've been eyeing forever? Or maybe you'd want to get some gourmet chocolate with your gift card? Whatever your desires may be, it's certainly nice to get some free cash to spend!

In case you're wondering, what is StumbleUpon? It is another social media site which gives you an opportunity to find new websites, blogs, articles, photos & more.  The interesting thing about StumbleUpon is that it is based on recommendations made by your family & friends. It bases the information on your personal preferences & interests.

Here’s how to refer your friends:
  • Sign up for a new StumbleUpon account - thanks for using my link! :)
  • Get your referral link.  Simply click on the "Stumblers" tab and you'll see "Email an invite."  In the message box, you'll see some text, including your personalized referral link.  Highlight your referral link and copy it.
  • Share your referral link by sending out an email yourself or sharing on Facebook or Twitter using that direct link.
  • For every 5 friends you refer, you should receive a $10 Amazon gift card (it does not say that there is a limit to the number of gift cards you can earn)
Fine Print:
Referrer shall receive one Reward valued at $10 in for each five Qualified Referrals generated by Referrer. For every 5 referrals who register for the StumbleUpon Share Program, you will receive one $10.00 Amazon gift card. Sorry, no partial credit. You will only receive a gift card for every 5 Qualified Referrals. Delivery of gift card will be made within 6 weeks. Self-referrals not allowed. Gift Cards subject to terms of card. Gift cards may be delivered digitally to recipient. StumbleUpon is not responsible for gift cards delivered to spam folders and will resend original link, but not replace link.

Alsatian Apple Tart (TWD)


I am back with Tuesdays with Dorie (TWD) and will be back to posting weekly with the group from now until the end of the year.  Even though we're down to the last few recipes in the book, we've got a lot of great recipes lined up. Believe it or not, we'll be done baking through the entire book by the end of the year! Isn't that crazy?!

This week's TWD recipe was chosen by Jessica of Cookbook Habit: Alsatian Apple Tart.  It is a tart lined with "thick slices of sweet apples and a vanilla-flavored mix of eggs, cream and sugar that is poured over the apples and, under heat, transformed into a soft custard."

When I think of custard filled tarts, I think of fruit tarts that are topped with fruits like strawberries, blackberries, kiwi, blueberries, etc.  I have never had a custard fruit tart with apples! Interestingly enough, the rich and creamy custard that envelopes the apples is absolutely delicious.  I think the tart would be great with pears, too, which Dorie suggests in the "Playing Around" section.

I only added one egg and omitted the extra egg yolk in the custard, just because I didn't want to have another egg white in my freezer.  The custard was still rich despite this omission thanks to the heavy cream.  Only thing I would do differently next time would be to remember to put my pie crust shield on the tart sooner! I forgot and didn't realize the edges were burning until I started to smell it! (That's why you don't see a picture of the entire tart!)

Thanks, Jessica, for hosting this week! I love baked apple desserts and this one was no exception.

* Recipe notes:
- Make sure to put a pie crust shield (or some foil) around the edge of your tart about 20 minutes into baking to avoid burning the edges.

Sunday, November 6, 2011

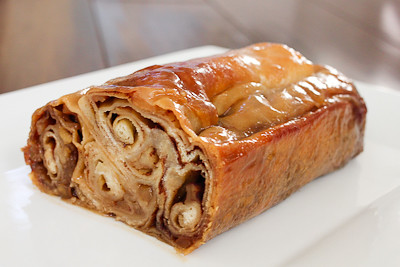
Povitica (DB)

 
The Daring Baker’s October 2011 challenge was Povitica, hosted by Jenni of The Gingered Whisk. Povitica is a traditional Eastern European Dessert Bread that is as lovely to look at as it is to eat! It is a specialty bread that normally costs $25 a loaf! Yes, $25!

Yes, I know it's November and October is long gone, but I am so terribly behind in my blogging.  I actually finished this dessert bread before the posting deadline and have several other things I have made that I just haven't gotten around to blogging about! Please bear with me as I get back into my blogging groove.... being sick for most of September and part of October just threw me for a loop and then the last week I was very very busy making a super special birthday cake for my daughter (post to come)!

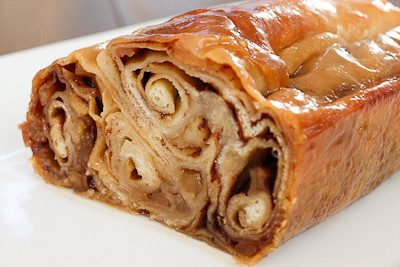
So on to the challenge... this dessert bread was different from anything I've tried before, but certainly delicious.  You basically make your regular yeast dough, then roll it out super thin (kind of like making phyllo dough) and then add in whatever filling you like.  Then you roll it up like you would a cinnamon roll and coil it up onto itself into a loaf pan.  The result is a beautiful spiral filled dessert bread.
 
We were given the liberty to either fill our bread with an English walnut filling, or the filling of our choice... and since I don't really like nuts I went with a cinnamon apple filling.  I browned some butter and brown sugar in a pan, sauteed the apples, and then layered them into the bread with cinnamon and sugar.  I didn't have enough apples at home (only 3) so my filling was a little scarce, and I would definitely add more next time. 

When I first removed my pan from the oven, there were lots of juices from the baked apples bubbling in the pan.  I found, however, that after leaving the pan out overnight that most of it had been soaked up by the bread, making it oh so gooey and delicious. It almost tasted like cinnamon apple cinnamon rolls but with thin layered dough.

Thanks Jenni, for hosting this month's challenge.  Make sure you check out the Daring Bakers' Blogroll to see how everyone else this specialty bread!

Povitica
(makes 4 loaves)

Ingredients

To activate the Yeast:
2 Teaspoons (10 ml/9 gm) Sugar
1 Teaspoon (5 ml/3 gm) All-Purpose (Plain) Flour
½ Cup (120ml) Warm Water
2 Tablespoons (30ml/14 gm/½ oz/2 sachets) Dry Yeast

Dough:
2 Cups (480ml) Whole Milk
¾ Cup (180 ml/170gm/6 oz) Sugar
3 Teaspoons (15 ml/18 gm/2/3 oz) Table Salt
4 Large Eggs
½ Cup (120ml/115 gm/one stick/4 oz) Unsalted Butter, melted
8 cups (1.92 l/1.12 kg/39½ oz/2½ lb) All-Purpose Flour, measure first then sift, divided

Walnut Filling:
7 Cups (1.68 l/1.12 kg/2.5 lbs) Ground English Walnuts
1 Cup (240ml) Whole Milk
1 Cup (240ml/225 gm/2 sticks/8 oz) Unsalted Butter
2 Whole Eggs, Beaten
1 Teaspoon (5ml) Pure Vanilla Extract
2 Cups (480ml/450 gm/16 oz) Sugar
1 Teaspoon (5 ml/4 gm) Unsweetened Cocoa Powder
1 Teaspoon (5 ml/3 gm) Cinnamon

Topping:
½ Cup (120 ml) Cold STRONG Coffee
2 Tablespoons (30 ml/28 gm/1 oz) Granulated Sugar
Melted Butter

To Activate Yeast:
1. In a small bowl, stir 2 teaspoons sugar, 1 teaspoon flour, and the yeast into ½ cup warm water and cover with plastic wrap.
2. Allow to stand for 5 minutes

To Make the Dough:
3. In a medium saucepan, heat the milk up to just below boiling (about 180°F/82°C), stirring constantly so that a film does not form on the top of the milk. You want it hot enough to scald you, but not boiling. Allow to cool slightly, until it is about 110°F/43°C.
4. In a large bowl, mix the scalded milk, ¾ cup (180 gm/170 gm/6 oz) sugar, and the salt until combined.
5. Add the beaten eggs, yeast mixture, melted butter, and 2 cups (480 ml/280 gm/10 oz) of flour.

6. Blend thoroughly and slowly add remaining flour, mixing well until the dough starts to clean the bowl.

7. Turn dough out onto floured surface and knead, gradually adding flour a little at a time, until smooth and does not stick. Note: I did not use all 8 cups of flour

8. Divide the dough into 4 equal pieces (they will each weight about 1.25 pounds/565 grams)
9. Place dough in 4 lightly oiled bowls, cover loosely with a layer of plastic wrap and then a kitchen towel and let rise an hour and a half in a warm place, until doubled in size.


To Make the Filling
10. In a large bowl mix together the ground walnuts, sugar, cinnamon and cocoa.
11. Heat the milk and butter to boiling.
12. Pour the liquid over the nut/sugar mixture.
13. Add the eggs and vanilla and mix thoroughly.
14. Allow to stand at room temperature until ready to be spread on the dough.
15. If the mixture thickens, add a small amount of warm milk.

To Roll and Assemble the Dough:
16. Spread a clean sheet or cloth over your entire table so that it is covered.
17. Sprinkle with a couple of tablespoons to a handful of flour (use flour sparingly)
18. Place the dough on the sheet and roll the dough out with a rolling pin, starting in the middle and working your way out, until it measures roughly 10-12 inches (25½ cm by 30½ cm) in diameter.

19. Spoon 1 to 1.5 teaspoons (5ml to 7 ½ ml/4 gm to 7 gm) of melted butter on top.
20. Using the tops of your hands, stretch dough out from the center until the dough is thin and uniformly opaque. You can also use your rolling pin, if you prefer.
21. As you work, continually pick up the dough from the table, not only to help in stretching it out, but also to make sure that it isn’t sticking.
22. When you think it the dough is thin enough, try to get it a little thinner. It should be so thin that you can see the color and perhaps the pattern of the sheet underneath.

23. Spoon filling (see below for recipe) evenly over dough until covered.

24. Lift the edge of the cloth and gently roll the dough like a jelly roll.

25. Once the dough is rolled up into a rope, gently lift it up and place it into a greased loaf pan in the shape of a “U”, with the ends meeting in the middle. You want to coil the dough around itself, as this will give the dough its characteristic look when sliced.
26. Repeat with remaining three loaves, coiling each rope of dough in its own loaf pan.
27. Brush the top of each loaf with a mixture of ½ cup (120 ml) of cold STRONG coffee and 2 tablespoons (30ml/28 gm/1 oz) of sugar. If you prefer, you can also use egg whites in place of this.
28. Cover pans lightly will plastic wrap and allow to rest for approximately 15 minutes.
29. Preheat oven to moderate 350°F/180°C/gas mark 4.
30. Remove plastic wrap from dough and place into the preheated oven and bake for approximately 15 minutes.
31. Turn down the oven temperature to slow 300°F/150°C/gas mark 2 and bake for an additional 45 minutes, or until done.
32. Remove bread from oven and brush with melted butter.
33. Check the bread at 30 minutes to ensure that the bread is not getting too brown. You may cover the loaves with a sheet of aluminum foil if you need to.
34. Remove from the oven and allow to cool on a wire rack for 20-30 minutes, still in the bread pan. Remember, the bread weighs about 2.5 and it needs to be able to hold its own weight, which is difficult when still warm and fresh out of the oven. Allowing it to cool in the pan helps the loaf to hold its shape.
35. It is recommended that the best way to cut Povitica loaves into slices is by turning the loaf upside down and slicing with a serrated knife.

Smaller batch measurements courtesy of Audax
Half Batch Dough Ingredients (Makes two loaves each 1.25 lbs/565 grams)
To activate the Yeast:
1 Teaspoon (5 ml/4 ½ gm) Sugar
½ Teaspoon (2½ ml/1½ gm) All-Purpose (Plain) Flour
¼ Cup (60 ml) Warm Water
1 Tablespoon (15 ml/7 gm/¼ oz/1 sachet) Dry Yeast

Dough:
1 Cup (240 ml) Whole Milk
6 Tablespoons (90 ml/85 gm/3 oz) Sugar
1½ Teaspoons (7½ ml/9 gm/1/3 oz) Table Salt
2 Large Eggs
¼ Cup (60 ml/60 gm/½ stick/2 oz) Unsalted Butter, melted
4 cups (960 ml/560 gm/19¾ oz/1¼ lb) All-Purpose Flour, measure first then sift, divided

Topping:
¼ Cup (60 ml) Cold STRONG Coffee
1 Tablespoon (15 ml/14 gm/½ oz) Granulated Sugar
Melted Butter

Half Batch Filling Ingredients (enough filling for the two loaves(
3½ Cups (840 ml/560 gm/1¼ lb/20 oz) Ground English Walnuts
½ Cup (120 ml) Whole Milk
½ Cup (120 ml/115 gm/1 stick/4 oz) Unsalted Butter
1 Whole Egg, Beaten
½ Teaspoon (2½ ml) Pure Vanilla Extract
1 Cup (240 ml/225 gm/8 oz) Sugar
½ Teaspoon (2½ ml/2 gm) Unsweetened Cocoa Powder
½ Teaspoon (2½ ml/1½ gm) Cinnamon

Quarter Batch Dough Ingredients (Makes one loaf 1.25 lbs/565 grams)
To activate the Yeast:
½ Teaspoon (2½ ml/2¼ gm) Sugar
¼ Teaspoon (1¼ ml/¾ gm) All-Purpose (Plain) Flour
2 Tablespoons (30 ml) Warm Water
1½ Teaspoons (7½ ml/3½ gm/0.125 oz/½ sachet) Dry Yeast

Dough:
½ Cup (120 ml) Whole Milk
3 Tablespoons (45 ml/43 gm/1½ oz) Sugar
¾ Teaspoon (3¾ ml/9 gm/0.17 oz) Table Salt
1 Large Egg
1 tablespoon (30 ml/30 gm/¼ stick/1 oz) Unsalted Butter, melted
2 cups (480 ml/280 gm/10 oz/0.62 lb) All-Purpose Flour, measure first then sift, divided

Topping:
2 Tablespoons (30 ml) Cold STRONG Coffee
1½ Teaspoons (7½ ml/7 gm/¼ oz) Granulated Sugar
Melted Butter

Wednesday, October 19, 2011

Apple Muffin Cake (TWD)

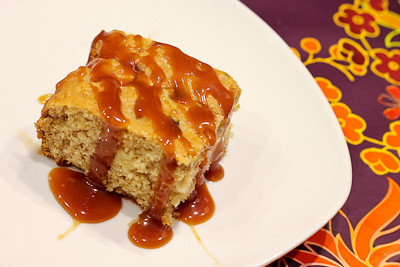
It's been weeks since my last blog post... I've been horribly sick for the last five (yes, five!) weeks and the last few were particularly terrible. I got a cold that turned into walking pneumonia and I didn't have the energy to do anything. I'm still playing catch up with my life but I finally managed to get some baking done. Too bad I'm still behind. I made Katrina's Tuesdays with Dorie (TWD) pick from October 4th finally - Apple Muffin Cake.  It was very moist but kind of plain, I thought... but it was pretty great with some caramel sauce drizzled on top :)

....and then I wanted to make the ginger jazzed brownies that were yesterday's TWD pick, but I ran out of butter! I never run out of butter! I usually try to keep the house well stocked with butter, sugar, eggs, and flour but what with being sick and all I haven't been keeping track of things so well. I hope to make those tomorrow and post them soon, so stay tuned. 

I also have a few more giveaways lined up, just have to get some time to sit down and write those posts! So if you haven't already, become a fan of my blog on Facebook so you don't miss those giveaway announcements!

* Recipe notes:
- I baked my cake in a 9 inch pan instead of an 8 inch pan and it was done at 20 minutes.

Sunday, October 2, 2011

Croissants (DB)

 
The Daring Bakers’ go retro this month! Thanks to one of our very talented non-blogging members, Sarah, the Daring Bakers were challenged to make Croissants using a recipe from the Queen of French Cooking, none other than Julia Child!

I don't typically complete the DB challenge until the last minute, but still get it posted in time.  Ironically, this month I actually completed it by mid-September, but couldn't get it posted in time.  I was supposed to get this post up on September 27th, but I've been sick, working, chasing around a toddler, and getting ready for a trip.  So you'll have to forgive me if this post is short and sweet.

Making croissants really isn't as hard as it might sound (time consuming, yes, but not very difficult).  It simply involves rolling out some dough, adding a layer of butter, and then folding it over several times until you've got layers of alternating dough and butter.  As it bakes up in the oven, it puffs up into wonderful, buttery, flaky layers. 

I filled my croissants with nutella and they were delicious.  I baked up a few and then put the rest in the freezer so that I can enjoy more at a later date.

Thanks Sarah, for hosting this month's challenge.  Nothing beats a fresh, homemade croissant and these were no exception! Make sure you check out the Daring Bakers' Blogroll to see how everyone else enjoyed these flaky, buttery, treats.

Croissants
Recipe Source: Mastering the Art of French Cooking, Volume Two. Julia Child and Simone Beck.
Download printable recipe here

Ingredients
¼ oz (7 gm) of fresh yeast, or 1¼ teaspoon (6¼ ml/4 gm) of dry-active yeast (about ½ sachet)
3 tablespoons (45 ml) warm water (less than 100°F/38°C)
1 teaspoon (5 ml/4½ gm) sugar
1 3/4 cups (225 gm/½ lb) of strong plain flour (I used Polish all-purpose flour, which is 13% protein)
2 teaspoons (10 ml/9 gm) sugar
1½ teaspoon (7½ ml/9 gm) salt
½ cup (120 ml/¼ pint) milk (I am not sure if the fat content matters. I used 2%)
2 tablespoons (30 ml) tasteless oil (I used generic vegetable oil)
½ cup (120 ml/1 stick/115 gm/¼ lb) chilled, unsalted butter
1 egg, for egg wash

Directions:

1. Mix the yeast, warm water, and first teaspoon of sugar in a small bowl. Leave aside for the yeast and sugar to dissolve and the yeast to foam up a little.
2. Measure out the other ingredients
3. Heat the milk until tepid (either in the microwave or a saucepan), and dissolve in the salt and remaining sugar
4. Place the flour in a large bowl.
5. Add the oil, yeast mixture, and milk mixture to the flour
6. Mix all the ingredients together using the rubber spatula, just until all the flour is incorporated
7. Turn the dough out onto a floured surface, and let it rest a minute while you wash out the bowl
8. Knead the dough eight to ten times only. The best way is as Julia Child does it in this video.  It’s a little difficult to explain, but essentially involves smacking the dough on the counter (lots of fun if you are mad at someone) and removing it from the counter using the pastry scraper.
9. Place the dough back in the bowl, and place the bowl in the plastic bag.
10. Leave the bowl at approximately 75°F/24°C for three hours, or until the dough has tripled in size.
11. After the dough has tripled in size, remove it gently from the bowl, pulling it away from the sides of the bowl with your fingertips.
12. Place the dough on a lightly floured board or countertop, and use your hands to press it out into a rectangle about 8 by 12 inches (20cm by 30cm).
13. Fold the dough rectangle in three, like a letter (fold the top third down, and then the bottom third up)
14. Place the dough letter back in the bowl, and the bowl back in the plastic bag.
15. Leave the dough to rise for another 1.5 hours, or until it has doubled in size. This second rise can be done overnight in the fridge
16. Place the double-risen dough onto a plate and cover tightly with plastic wrap. Place the plate in the fridge while you prepare the butter.
17. Once the dough has doubled, it’s time to incorporate the butter
18. Place the block of chilled butter on a chopping board.
19. Using the rolling pin, beat the butter down a little, till it is quite flat.
20. Use the heel of your hand to continue to spread the butter until it is smooth. You want the butter to stay cool, but spread easily.
21. Remove the dough from the fridge and place it on a lightly floured board or counter. Let it rest for a minute or two.
22. Spread the dough using your hands into a rectangle about 14 by 8 inches (35 cm by 20 cm).
23. Remove the butter from the board, and place it on the top half of the dough rectangle
24. Spread the butter all across the top two-thirds of the dough rectangle, but keep it ¼ inch (6 mm) across from all the edges.
25. Fold the top third of the dough down, and the bottom third of the dough up.
26. Turn the dough package 90 degrees, so that the top flap is to your right (like a book).
27. Roll out the dough package (gently, so you don’t push the butter out of the dough) until it is again about 14 by 8 inches (35 cm by 20 cm).
28. Again, fold the top third down and the bottom third up.
29. Wrap the dough package in plastic wrap, and place it in the fridge for 2 hours.
30. After two hours have passed, take the dough out of the fridge and place it again on the lightly floured board or counter.
31. Tap the dough with the rolling pin, to deflate it a little
32. Let the dough rest for 8 to 10 minutes
33. Roll the dough package out till it is 14 by 8 inches (35 cm by 20 cm).
34. Fold in three, as before
35. Turn 90 degrees, and roll out again to 14 by 8 inches (35 cm by 20 cm).
36. Fold in three for the last time, wrap in plastic, and return the dough package to the fridge for two more hours (or overnight, with something heavy on top to stop it from rising)
37. It’s now time to cut the dough and shape the croissants
38. First, lightly butter your baking sheet so that it is ready
39. Take the dough out of the fridge and let it rest for ten minutes on the lightly floured board or counter
40. Roll the dough out into a 20 by 5 inch rectangle (51 cm by 12½ cm). (Photo 24)
41. Cut the dough into two rectangles (each 10 by 5 inches (25½ cm by 12½ cm)) (Photo 24)
42. Place one of the rectangles in the fridge, to keep the butter cold
43. Roll the second rectangle out until it is 15 by 5 inches (38 cm by 12½ cm).
44. Cut the rectangle into three squares (each 5 by 5 inches (12½ cm by 12½ cm))
45. Place two of the squares in the fridge
46. The remaining square may have shrunk up a little bit in the meantime. Roll it out again till it is nearly square
47. Cut the square diagonally into two triangles.
48. Stretch the triangle out a little, so it is not a right-angle triangle, but more of an isosceles.
49. Starting at the wide end, roll the triangle up towards the point, and curve into a crescent shape.
50. Place the unbaked croissant on the baking sheet
51. Repeat the process with the remaining squares of dough, creating 12 croissants in total.
52. Leave the tray of croissants, covered lightly with plastic wrap, to rise for 1 hour
53. Preheat the oven to very hot 475°F/240°C/gas mark 9.
54. Mix the egg with a teaspoon of water
55. Spread the egg wash across the tops of the croissants
56. Put the croissants in the oven for 12 to 15 minutes, until the tops are browned nicely
57. Take the croissants out of the oven, and place them on a rack to cool for 10 minutes before serving.

Servings: 12 croissants

Tuesday, September 27, 2011

Flip-Over Plum Cake (TWD)


This week's Tuesdays with Dorie (TWD) recipe was chosen by Becky of Project Domestication: Flip-Over Plum Cake.  Dorie describes this cake as having "down-home, not-in-the-least-fussy good looks, an unquestionably appealing flavor and a texture that can't decide whether it wants to be a cake or your favorite nursery pudding."  I'll have to admit that when I read that description, it sounded great, up until the "nursery pudding" part! I love bread pudding (and I have no idea what nursery pudding is), but for some reason, thinking of a cake as pudding just didn't sound appetizing.  But please don't let that deter you from trying this cake - it was fantastic!

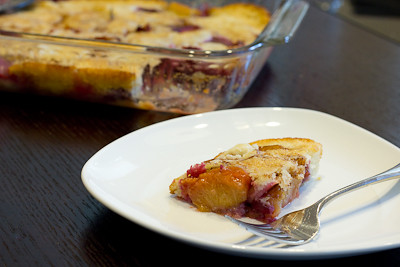
What's neat about this recipe is you pour the batter into the bottom of the pan, then top if with the fruit and pop it in the oven... and when you pull it out, the fruit has sunken to the bottom and the batter has risen to the top!

This cake has a really interesting flavor because Dorie pairs cinnamon with the plums.  Typically when you think of cinnamon being used with fruits, it's with apples, but Dorie was on to something when she paired it with plums! I'm not sure if I would describe this as a pudding, but more like a rustic cobbler of sorts.  Whatever you might want to call it, this cake was delicious.  Probably one of my favorites from this book so far if you factor in both taste and prep time (basically it has a high yield yummy factor with a low prep time factor!).  Only change I'll make when I try this again will be to decrease the sugar in the fruit by 50%, as it was just a little bit too sweet for my taste.

Thanks Becky, for hosting this week.  I loved this cake and will be making it again and again.  I think it would also be good with different types of fruits, too.  If you would like the recipe, you can find it here. Make sure you check out the TWD Blogroll, to see how everyone else enjoyed these chocolately treats!

* Recipe notes:
- I baked my cake in a 9 x 13 inch pan so my cake was a little bit thinner and was therefore done baking at about 40-45 minutes.
- I'll try reducing the sugar in the fruit by 50% next time, or perhaps cut the sugar in the batter by 50% to cut back on the sweetness just a little.

Tuesday, September 20, 2011

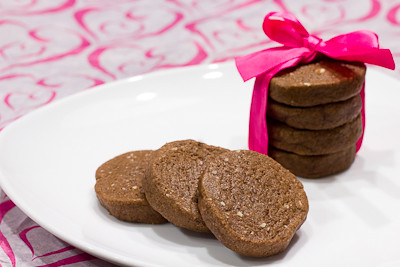
Salt and Pepper Cocoa Shortbreads (TWD)


This week's Tuesdays with Dorie (TWD) recipe was chosen by Tia of Buttercream Barbie: Salt and Pepper Cocoa Shortbread. This was our second time this month baking up chocolate slice and bake cookies. This time, our cookies were spiced up with salt and pepper. Yes, salt and pepper!

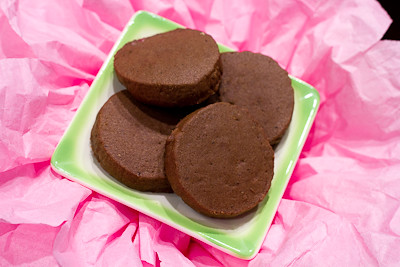
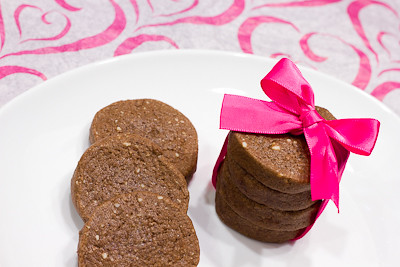
I would never think to put salt and pepper in a cookie, but it worked surprisingly well. You don't really taste the salt and pepper right away when you bite into the cookies, but as you start to enjoy them, the salt and pepper flavors start to really come to the forefront. I think you definitely need to use fleur de sel or sea salt and a coarsely ground black pepper, as regular salt or finely ground black pepper won't stand out as much on your palate next to the buttery chocolate shortbread flavor.

Thanks Tia, for hosting this week.  This was definitely something different, and I'm glad I got to try these cookies! If you would like the recipe, you can find it here. Make sure you check out the TWD Blogroll, to see how everyone else enjoyed these chocolately treats!

Tuesday, September 13, 2011

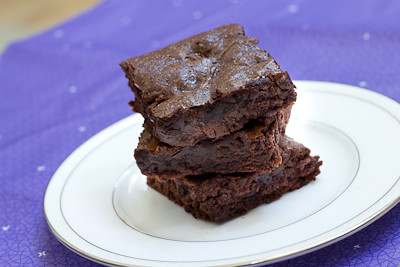
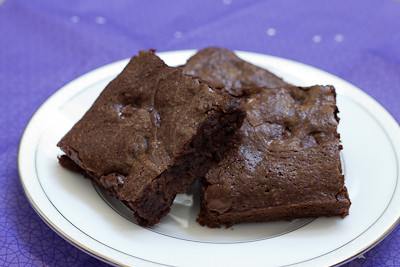
Classic Brownies (TWD)


This week's Tuesdays with Dorie (TWD) recipe was chosen by Anne of Anne Strawberry: Classic Brownies.  There's really no explanation needed for these - they're just your traditional brownies, no bells or whistles.

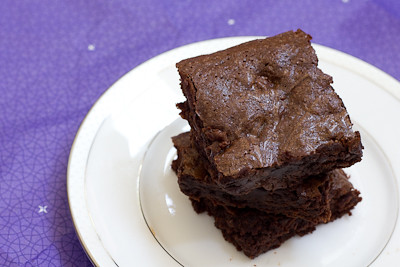
These brownies were extremely easy to make. Simply melt some butter and chocolate, add the sugar, eggs, vanilla, and then some flour. Instead of nuts, I added chocolate chips to the mix. These baked up perfectly and were slighty cakey but mostly fudgey and very chocolately.


With how simple (yet delicious) these brownies are, I really don't see any reason to use a box mix to make brownies.  The prep time was virtually the same.  I'm sure that inclusion of nuts in these brownies would be welcomed by any nut lover, but I enjoyed the extra chocolately goodness provided to these brownies by the substitution of chocolate chips :)


Thanks Anne, for hosting this week.  I'll definitely be making these again.  If you would like the recipe, you can find it here. Make sure you check out the TWD Blogroll, to see how everyone else enjoyed these chocolately treats!

* Recipe notes:
- I used semisweet chocolate chips instead of chopped bittersweet chocolate.
- I used a 9-inch pan instead of an 8-inch pan and the brownies were done baking in 20 minutes.

Tuesday, September 6, 2011

Chocolate Spice Quickies (TWD)


This week's Tuesdays with Dorie (TWD) recipe was chosen by Jessica of My Baking Heart: Chocolate Spice Quickies.  Dorie calls these "sophisticated little rounds" that are "mildly spiced, slightly chewy, almond-flecked chocolate cookies."

After reading in the P&Q that these Chocolate Spice Quickies were a little lacking in the spice department, I decided to double the spices.  I added 1/4 teaspoon of cinnamon, as well as a few pinches of cloves and nutmeg.  I also used unblanched almonds (instead of blanched almonds), simply because I was in a rush.

These cookies were easy to put together.  They were in the oven for exactly 7 minutes before they were done baking.  They were delicate, sweet, nutty, and chocolately with just a hint of spice.  I can see how others would have trouble tasting the spice if there was only 1/8 teaspoon of spice in the dough.  I don't think it really mattered that I didn't blanch the almonds, so feel free to skip that step too, if you make these cookies.


I like Dorie's suggestion of making ice cream sandwiches with these cookies, and definitely need to get my hands on some ice cream for the cookies that are remaining! As far as chocolate cookies go, these were good, but I'm not a big chocolate cookie kind of gal and my favorite chocolate cookies are still the World Peace Cookies and Chocolate Malted Whopper Drops :)

Thanks Jessica, for hosting this week.  If you would like the recipe, you can find it here. Make sure you check out the TWD Blogroll, to see how everyone else enjoyed these chocolately treats!

Saturday, August 27, 2011

Homemade Chocolate Candies and How to Temper Chocolate (DB)


The August 2011 Daring Bakers’ Challenge was hosted by Lisa of Parsley, Sage, Desserts and Line Drive and Mandy of What the Fruitcake?! These two sugar mavens challenged us to make sinfully delicious candies! This was a special challenge for the Daring Bakers because the good folks at http://www.chocoley.com offered an amazing prize for the winner of the most creative and delicious candy!

This challenge involved learning how to temper chocolate.  For those who are unfamiliar with chocolate tempering, “tempering is a method of heating and cooling chocolate in order to use it for coating or dipping. Proper tempering gives chocolate a smooth and glossy finish. Tempered chocolate will have a crisp snap and won't melt on your fingers as easily as improperly tempered chocolate.  Properly tempered chocolate is also great for molding candies because the candies will release out of the molds more easily and still retain a glossy finish.” - Ghirardelli

If you simply melt chocolate and let it cool it will set with unattractive grey streaks or spots, called blooming. If eaten, the texture will be grainy and it won’t melt smoothly in the mouth. When you temper chocolate the end result is shiny, even colored, smooth melting and with a crisp snap. Basically, tempered chocolate is what you want because it’s better in every way.  Simply put, the process involves heating the chocolate to a certain temperature, then cooling it down to a certain temperature, and then heating it back up to a working temperature that is lower than the initial temperature to which it was initially heated up.


The reason for the difference is a bit complicated, it has to do with different types of crystals forming in the cocoa butter at different times, to understand it fully you’d have to learn about the behavior of the chocolate crystals at a molecular level.  To simplify the explanation, in tempered chocolate the crystals have formed in a uniform way which gives us great looking and tasting chocolate.

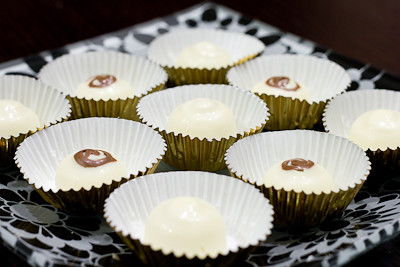
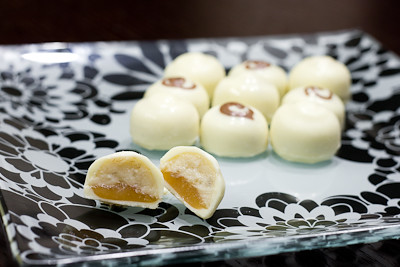
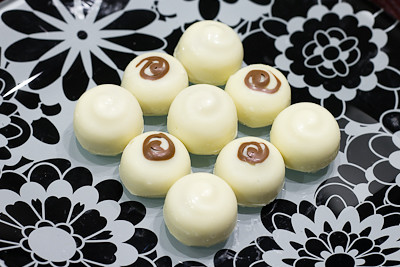
Our challenge was to make two different types of candies, with at least one being chocolate.  For the first candy, I decided to make chocolates that involved the flavors of one of my favorite desserts - Bananas Foster! I caramelized some bananas in brown sugar and rum, then pureed them and mixed them into a swiss meringue buttercream to create a bananas foster buttercream.  I then filled my white chocolate candies with this buttercream, and added in a layer of salted caramel.  These Bananas Foster Chocolates were delicious!


I used the marble slab/granite method for tempering my chocolate and although it is a fairly straightforward process, I have to admit that I had to stop, let my chocolate set, and start over multiple times because my chocolate would quickly get over the working temperature.  One second it would be way under the temperature I was shooting for and then next thing I knew, it was rising so quickly I would over heat the chocolate.  I think this may have had something to do with the fact that I was using a glass bowl for my double boiler, and the glass would retain so much heat that even after I removed the bowl from the heat, the chocolate's temperature would continue to rise dramatically.  If you work quickly, you can dump the chocolate onto the counter before it over heats, but it's hard when you're working with a very hot bowl, a thermometer, and a spatula all at the same time.  So instead of glass, I would probably recommend using a metal bowl.

I don't have a palette knife or bench scraper, but found that using a rigid spatula worked just fine.  It was a little messy, but a suitable substitute if you're not wanting to go out and buy something just for this recipe.  Funny thing was that when I first poured my chocolate onto the counter and started spreading it out and folding it to get it to cool down, I was very careful because the recipe states "keep the motions neat and tidy, if you’re not working with a lot of chocolate you don’t want to spread it too far otherwise you may end up with chocolate that begins to cool too quickly and start to set as well as drops below."


I was also glad to have my digital thermometer, because it's a multi-tasker in the kitchen! I did not realize until we did this challenge, but you cannot use a regular candy thermometer for tempering chocolate because candy thermometers do not go below 100F.  So this digital thermometer is perfect because it goes low enough for making chocolate, high enough for making candy, and of course it can be used for cooking meat as well.  It has a heat safe cord so it can be left in the oven while the meat is cooking, too.  It has been well worth the investment!

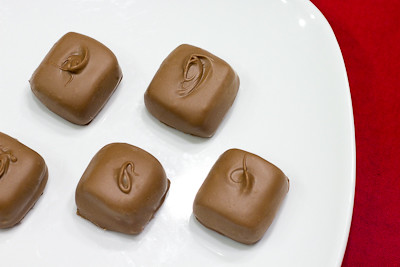
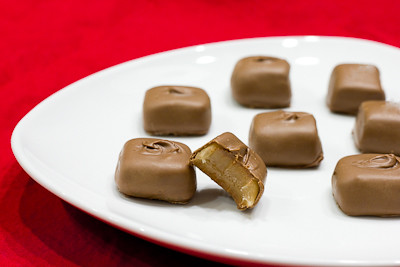
The second candy I decided to make was chocolate covered sea salt caramels. I adore anything with caramel, so it just made sense to go with that choice. I have to admit that while my white chocolate candies turned out pretty well, my chocolate covered caramels didn't turn out quite as well as I had hoped. The chocolates didn't have as much shine to them as they should have, but that was my fault because after redoing the tempering about 5 times, I just gave up and said "close enough" when it was off by 1 degree because I was too tired to redo it again.


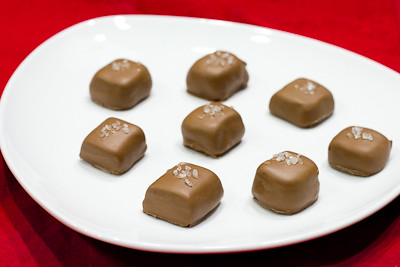
My caramel, while still soft, also came up much firmer that what was depicted in some photos by our hosts. Instead a nice gooey, drizzle-over-the-top-of-your-ice-cream-sundae caramel, I got a firm, chewy caramel.  At first I thought it was because I let the caramel get 2-3 degrees hotter than I was supposed to, but then I made a second batch, keeping close watch on the thermometer, and it still came out fairly firm. This was fine, because then instead of making filled chocolate candies, I simply made chocolate covered caramels by dipping them in the tempered chocolate.  These were delicious, with just the right amount of salt to complement the sweetness of the caramels.


Thanks Lisa and Mandy, for hosting this month's challenge.  I had a great time learning how to temper chocolate and making homemade candies! There's a lot of scrolling to do on this post to get to the recipes due to the lengthy information below on how to temper chocolate, so to jump down to the white chocolate bananas foster candies recipe just click here, and for the chocolate covered sea salt caramels click here. Make sure you check out the Daring Bakers' Blogroll to see how creative everyone else got with their chocolately confections!

* Recipe notes - 
- When tempering chocolate use a metal bowl instead of a glass bowl.  If you want to help keep it at the working temperature during the final stage, then you can transfer it to a glass bowl which will retain the heat better so you don't have to keep re-warming it so much.
- When you are getting close to your goal temperature, really do stick to heating it for 10-15 seconds at a time.  This ensures that you don't over heat the chocolate and have to start over so many times like I did!
- If you have trouble getting your chocolate down to 80.6F, you can cool down your counter/marble slab with an ice pack (or bag of frozen veggies) beforehand, just be sure to wipe it down very thoroughly before pouring your chocolate onto it, because any water droplets left on there will cause the chocolate to seize. 
- I added milk chocolate swirls on top of my white chocolate candies for contrast, but found that it is better to add the milk chocolate swirl on top after unmolding the finished chocolates (as opposed to piping the swirl into the mold and letting it set before adding in the white chocolate).

Tempering Chocolate:

Method 1: On marble or granite

Marble slab, chocolate or bench scraper, dipping forks and chocolate thermometer
Tempering Ranges:
Celcius
Dark: 45°C-50°C/ 27°C / 32°C
Milk: 45°C / 27°C/ 30°C
White: 45°C /  27°C / 29°C
Fahrenheit
Dark: 113°F-122°F / 80.6°F / 89.6°F
Milk: 113°F /  80.6°F / 86°F
White: 113°F / 80.6°F / 84.2°F

Chocolate is melted and heated until it reaches 45°C / 113°F. It is then poured onto a marble surface and moved around the surface with a scraper until it has thickened and cools to 27°C / 80.6°F. Once cooled it is then put back into the bowl and over heat to bring it back up to 32°C/30°C/29°C /// 89.6°F/86°F/84.2°F depending on the chocolate you’re tempering. It is now ready for using in molds, dipping and coating.

Tempering using a marble surface
• Finely chop chocolate if in bar/slab form.
• Place chocolate in a heatproof bowl.
• Place bowl over a saucepan of simmering water (make sure the bowl does not touch the water).
Tip: Make sure that your bowl fits snuggly into the saucepan so that there’s no chance of steam forming droplets that
may fall into your chocolate. If water gets into your chocolate it will seize!
• Using a rubber spatula, gently stir the chocolate so that it melts evenly
• Once it’s melted, keep an eye on the thermometer, as soon as it reaches 45°C / 113°F remove from heat (between 45°C-50°C / 113°F-122°F for dark chocolate)
• Pour ¾ of the melted chocolate onto a marble or granite slab or worktop
• Using a scraper or large palette knife move the chocolate around the surface to help it cool
Tip: Keep the motions neat and tidy, if you’re not working with a lot of chocolate you don’t want to spread it too far otherwise you may end up with chocolate that begins to cool too quickly and start to set as well as drops below
• the necessary temperature. Use a motion that folds the chocolate on itself
• Check temperature regularly with a thermometer
• Once it reaches 27°C / 80°F put the chocolate back into the heatproof bowl with the remaining chocolate
• Gently stir together with a rubber spatula
• Check the temperature to see if it’s risen back up to the working temperature of the chocolate (milk, dark or white) as seen in the above chart
• If the temperature has not risen to its working temperature, put the bowl back over the simmering water, stirring gently
• IMPORTANT: You really need to keep an eye on the temperature as it can rise quicker than you think, so as soon as it’s up to its working temperature, remove from heat
• It’s now tempered and ready to use
Tip: If you’re using the chocolate to dip a lot of truffles etc. which means the chocolate will be sitting off heat for a while it will naturally start to thicken as it cools. To keep it at an ideal viscosity for even coating, put the bowl over steam for 30sec-1min every 5-10mins, just do not let the temperature go over the working temperature!
Tip: Having the chocolate in a warmed glass bowl and wrapped in hot kitchen towel can also help keep the chocolate at its working temperature for longer
Tip: It is also easier to keep the heat if you work with larger amounts of chocolate rather than small amounts. Any leftover chocolate can be kept to be used later and then re-tempered
Tip: Remember, don’t let any water get into your chocolate at any stage of the tempering process!

Method 2: With tempered chocolate pieces, also called “seeding”

Tempering Ranges:
Celcius
Dark: 45°C-50°C/ 27°C / 32°C
Milk: 45°C / 27°C/ 30°C
White: 45°C /  27°C / 29°C
Fahrenheit
Dark: 113°F-122°F / 80.6°F / 89.6°F
Milk: 113°F /  80.6°F / 86°F
White: 113°F / 80.6°F / 84.2°F

Chocolate is melted and heated until it reaches 45°C / 113°F. Tempered un-melted chocolate is then stirred and melted in until it brings the temperature down to 27°C/80.6°F. It is then put back over heat and brought up to its working temperature of 32°C/30°C/29°C /// 89.6°F/86°F/84.2°F depending on the chocolate you’re using. It is now ready for using in molds, dipping and coating.

Tempering using the seeding method with couverture callets
• Finely chop chocolate if in bar/slab form (about the size of almonds).
• Place about ⅔ of the chocolate in a heatproof bowl
• Set aside ⅓ of the chocolate pieces
• Place bowl over a saucepan of simmering water (make sure the bowl does not touch the water)
Tip: Make sure that your bowl fits snuggly into the saucepan so that there’s no chance of steam forming droplets that may fall into your chocolate. If water gets into your chocolate it will seize!
• Using a rubber spatula, gently stir the chocolate so that it melts evenly
• Once it’s melted, keep an eye on the thermometer, as soon as it reaches 45°C / 113°F remove from heat (between 45°C-50°C / 113°F-122°F for dark chocolate)
• Add small amounts of the remaining ⅓ un-melted chocolate (seeds) and stir in to melt
• Continue to add small additions of chocolate until you’ve brought the chocolate down to 27°C/80.6°F (You can bring the dark chocolate down to between 80°F and 82°F)
• Put it back on the double boiler and bring the temperature back up until it reaches its working temperature of the chocolate (milk, dark or white) as seen in the above chart. (32°C/89.6°F for dark, 30°C/86°F for milk and 29°C/84.2°F for white)
• If you still have a few un-melted bits of chocolate, put the bowl back over the simmering water, stirring gently and watching the thermometer constantly.
IMPORTANT: You really need to keep an eye on the temperature so that it doesn’t go over its working temperature
It’s now tempered and ready to use
Tip: Another way of adding the "seed" is by dropping in one large chunk of tempered chocolate (the seed). That way you only need to fish out one piece of unmelted chocolate and don't need to fish out several small bits of unmelted chocolate once the chocolate has reached temper.

Other Tips

• If you’re using the chocolate to dip a lot of truffles etc. which means the chocolate will be sitting off heat for a while it will naturally start to thicken as it cools. To keep it at an ideal viscosity for even coating, put the bowl over steam for 30sec - 1min every 10 - 15mins, just do not let the temperature go over the working temperature!
• Having the chocolate in a warmed glass bowl and wrapped in hot kitchen towel can also help keep the chocolate at its working temperature for longer
• It is also easier to keep the heat if you work with larger amounts of chocolate rather than small amounts. Any leftover chocolate can be kept to be used later and then re-tempered
• Remember, don’t let any water get into your chocolate at any stage of the tempering process!
• Unless you’ve been working with chocolate for a while and have developed a feel for the tempering process and can tell the chocolate’s temperature by touching it to your lower lip like a pro, it’s imperative that you use a thermometer to determine the temperature, as going a few degrees either way can ruin the temper.
• If at any stage you do make a mistake with the tempering process you can simply start again from the beginning.
• While a marble or granite top is ideal for cooling the chocolate in the first method, you can also cool it on a countertop that’s laminated, glass or steel. It will take longer to cool, but it’s possible! (but I definitely wouldn’t recommend a wood or rough textured counter top)
• Any chocolate left over after making your molded or dipped chocolate can be stored away in a cool place and then re-tempered before using again. There’s no need to ever waste good chocolate!
• Wooden spoons can retain moisture so it’s best to use a rubber spatula while tempering

Chocolate Covered Sea Salt Caramels
caramel recipe from CandyBarLab.com

Dark or milk chocolate melted, preferably tempered, about 1 lb / 450g
1 cup (225g / 8oz) Granulated White Sugar
1/2 cup (125ml / 4 fluid oz) Light Corn Syrup
1/2 cup (125ml / 4 fluid oz) Water
4 Tbsp (60g / 2 oz) Unsalted Butter
2 Tbsp (30ml / 1 fluid oz) Heavy Cream
1/4 cup (60ml / 2 fluid oz) Passion Fruit Puree
1/2 Tbsp salt

Place the sugar, corn syrup and water in a medium saucepan.

Set over medium-high heat and stir to combine.

Bring the mixture to a boil and cook until dark amber in color 310°F-315°F / 155°C-158°C, about 5 minutes.

Use a pastry brush, dipped in water, to wash down sides of pan to prevent crystallization as the mixture boils.

Remove saucepan from the heat and gradually whisk in the passion fruit puree, heavy cream and butter.

Transfer to an 8-inch square pan that has been lined with buttered aluminum foil.

Once cooled, removed the aluminum foil from the pan and cut the chocolates with a sharp knife (coated in butter) into 1-inch squares.

Carefully lower each square of marzipan into the chocolate with a dipping fork

Tap the fork on the side of the bowl to remove excess chocolate

Place chocolate on parchment paper

Decorate as you like

Tip: You can use transfers or sprinkle sea salt on top.  You can also wait for the chocolate to be semi set then use your dipping fork to mark the top of the chocolate

Once fully set, cut off any feet with a sharp knife

White Chocolate Bananas Foster Candies
from Good Eats 'n Sweet Treats

2 pounds of high quality white chocolate (do not use white chocolate chips)
1 bananas foster swiss meringue buttercream recipe, see below
1/2 of salted caramel recipe, see below

Coat the molds with chocolate; there are a few ways to do this.  While holding mold over bowl of tempered chocolate, take a nice ladle of the chocolate and pour over the mold, making sure it cover and fills every well. Knock the mold a few times against a flat surface to get rid of air bubbles, then turn the mold upside down over the bowl of chocolate, and knock out the excess chocolate. Turn right side up and drag a bench or plastic scraper across so all the chocolate in between the wells is scraped off cleanly, leaving you with only chocolate filled wells. Put in the fridge to set, about 5 to 10 minutes. Alternatively, you could take a small brush and paint the tempered chocolate into each mold, or spoon it in if you’d like.

Remove from refrigerator and fill each well with some of the bananas foster buttercream, leaving a little room for a layer of caramel.  Squeeze a thin layer of caramel on top of the buttercream (make sure the caramel is cool, or else it will melt the buttercream).

Again take a ladle of chocolate and pour it on top of the filled chocolate wells, knocking against a flat surface to settle it in. Scrape excess chocolate off the mold with the bench scraper then refrigerate until set.

Once fully set, carefully knock the chocolates out of the mold.

Bananas Foster Swiss Meringue Buttercream
from Good Eats 'n Sweet Treats, adapted from Baking: From My Home to Yours

1/4 cup granulated sugar
1 large egg white
6 tbsp unsalted butter, at room temperature
1 bananas foster recipe, see below
1 tsp rum

Put the sugar and egg white in a mixer bowl or another large heatproof bowl, fit the bowl over a plan of simmering water and whisk constantly, keeping the mixture over the heat, until it feels hot to the touch, about 3 minutes.

The sugar should be dissolved, and the mixture will look like shiny marshmallow cream. Remove the bowl from the heat.

Working with the whisk attachment or with a hand mixer, beat the meringue on medium speed until it is cool, about 5 minutes.

Switch to the paddle attachment if you have one, and add the butter one tablespoon at a time, beating until smooth.

Once all the butter is in, beat in the buttercream on medium-high speed until it is thick and very smooth, 6-10 minutes (during this time the buttercream may curdle or separate – just keep beating and it will come together again).

On medium speed, gradually beat in the bananas foster, waiting until each addition is absorbed before adding more, and then add in the rum.

You should have a shiny smooth, velvety buttercream. Press a piece of plastic against the surface of the buttercream and set aside briefly.

Bananas Foster Recipe (for the buttercream filling)
1 tbsp tightly packed brown sugar
1/2 tbsp rum
1/2 banana, sliced

Add the brown sugar and rum to a small saucepan over medium heat until the brown sugar melts.  Add the banana slices and cook for a few minutes on each side, until the bananas are soft and cooked through.  Remove from heat and mash well with a fork, or puree in a food processor.  Allow to cool completely before adding to the buttercream recipe.

Salted Caramel
from CandyBarLab.com

1 cup (225g / 8oz) Granulated White Sugar
1/2 cup (125ml / 4 fluid oz) Light Corn Syrup
1/2 cup (125ml / 4 fluid oz) Water
4 Tbsp (60g / 2 oz) Unsalted Butter
2 Tbsp (30ml / 1 fluid oz) Heavy Cream
1/2 Tbsp salt
Place the sugar, corn syrup and water in a medium saucepan.

Set over medium-high heat and stir to combine.

Bring the mixture to a boil and cook until dark amber in color 310°F-315°F / 155°C-158°C, about 5 minutes.

Use a pastry brush, dipped in water, to wash down sides of pan to prevent crystallization as the mixture boils.

Remove saucepan from the heat and gradually whisk in the heavy cream, butter, and sea salt.

Transfer to a medium bowl and let cool.

Transfer cooled caramel to a pastry bag fitted with a medium plain tip or a squeeze bottle.