Wednesday, March 28, 2012

Dutch Crunch Bread (DB)


Sara and Erica of Baking JDs were our March 2012 Daring Bakers' hostesses! Sara & Erica challenged us to make Dutch Crunch bread, a delicious sandwich bread with a unique, crunchy topping. Sara and Erica also challenged us to create a one of a kind sandwich with our bread!

Technically, Dutch Crunch doesn’t refer to the type of bread, but rather the topping that is spread over the bread before baking. In Dutch it’s called Tijgerbrood or “tiger bread” after the tiger-like shell on the bread when it comes out of the oven. The final product has a delightful sweet crunch to it that makes it perfect for a sandwich roll. It’s a common option at sandwich shops all over the Bay Area and is often one of the first breads to run out.
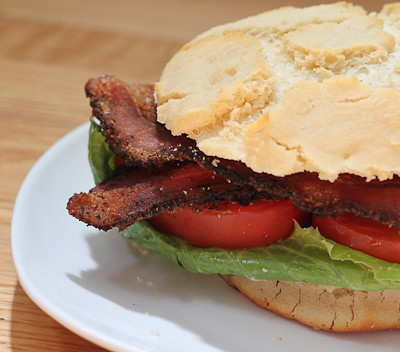
I've never had Dutch Crunch bread before, so I was curious to try this one out.  It was a pretty straightforward recipe, and I did not come across any issues making this bread.  It was actually kind of fun schmearing the topping all over the bread prior to baking :) (would be fun for the kids to get involved too!)

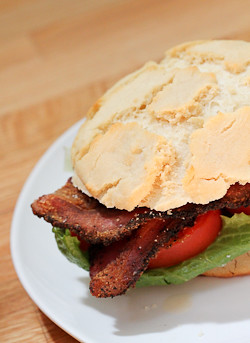
I wasn't too creative with my sandwich making.  I just went with a classic BLT.  I'm a bacon lover, so the lettuce and tomato are basically just there to make me feel less guilty (otherwise I'd just be eating plain bacon!).  The dutch crunch topping was a nice textural change to plain bread, but I think this type of soft white roll would have lent itself better to another type of sandwich.  The BLT seems to work better with traditional toasted bread.  Still, I had fun with this challenge and I am glad I tried it.
Thanks Sara and Erica, for hosting this month's challenge.  You'll find the recipe below - be sure to read the note at the bottom about rice flour if you are not familiar with this ingredient. Also be sure to check out the Daring Bakers' Blogroll to see what kind of sandwiches everyone else came up with.

Soft White Roll

Servings: Six sandwich rolls
This recipe approximates the quintessential white sandwich roll found throughout the Bay Area. The recipe is simple, quick, and addictive.

Ingredients
1 tablespoon (1 packet) (15 ml) (7 gm/ ¼ oz) active dry yeast
¼ cup (60 ml) warm water (105-110º F) (41-43°C) (No need to use a thermometer – it should feel between lukewarm and hot to the touch).
1 cup (240 ml) warm milk (105-110º F) (41-43°C) (We’ve tried both nonfat and 2%, with no noticeable difference)
1½ tablespoons (22½ ml) (20 gm/ ⅔ oz) sugar
2 tablespoons (30 ml) vegetable oil (plus additional olive or vegetable oil for greasing bowl during rising)
1½ teaspoons (7½ ml) (9 gm/⅓ oz) salt
Up to 4 cups (960 ml) (600 gm/21oz) all purpose flour

Directions:
1. In the bowl of an electric mixer or large mixing bowl, combine yeast, water, milk and sugar. Stir to dissolve and let sit for about 5 minutes (The mixture should start to bubble or foam a bit and smell yeasty).
2. Add in vegetable oil, salt and 2 cups of flour. Using the dough hook attachment or a wooden spoon, mix at medium speed until the dough comes together. (The photo to below is with the first 2 cups of flour added).
3. Add remaining flour a quarter cup at time until the dough pulls away from the sides of the bowl, as shown in the photo below (For us, this usually required an additional 1½ to 2 cups of flour).
4. Turn out onto a lightly floured surface and knead for about 4 minutes, until smooth and elastic.
5. Place in a lightly greased bowl and cover with plastic wrap. Let rise for 1 hour, or until doubled (or more) in size (see photo comparison).
6. Once the dough has risen, turn it out onto a lightly floured surface and divide it into 6 equal portions (if you’d like to make rolls) or 2 equal portions (if you’d like to make a loaf) (using a sharp knife or a dough scraper works well). Shape each into a ball or loaf and place on a parchment-lined baking sheet (try not to handle the dough too much at this point).
7. Cover with plastic wrap and let rise for 15 minutes while you prepare the topping.
8. Coat the top of each roll or loaf with the topping as described above. While the original recipe recommends letting them stand for 20 minutes after applying the topping, I got better results by putting them directly into the oven.
9. Once you’ve applied the topping, bake in a preheated moderately hot 380ºF/190°C/gas mark 5 for 25-30 minutes, until well browned. Let cool completely on a wire rack before eating.
Our finished products: Note the roll in the foreground on the left. This is what happens if you don’t put enough topping on the bread – no cracking! So be sure to load on the topping.

Dutch Crunch Topping

Servings: This recipe should make sufficient topping for two 9x5 loaves (23cmx13cm) or 12 rolls. If you make only 6 rolls in the first soft white roll recipe, you can cut the topping recipe in half.

You should not prepare the topping until the bread you’ve selected to bake is almost finished rising (~15 minutes from baking). 


Ingredients
2 tablespoons (2 packets) (30 ml) (15 gm/½ oz) active dry yeast
1 cup (240 ml) warm water (105-115º F) (41-46°C)
2 tablespoons (30 ml) (30 gm/1 oz) sugar
2 tablespoons (30 ml) vegetable oil
½ teaspoon (2½ ml) (3 gm) salt
1½ cups (360 ml) (240 gm/8½ oz) rice flour (white or brown; NOT sweet or glutinous rice flour) (increase by 1 cup or more for home-made rice flour)

Directions:
1. Combine all ingredients in a large bowl and beat with a whisk; beat hard to combine. The consistency should be like stiff royal icing – spreadable, but not too runny. If you pull some up with your whisk, as shown below, it should drip off slowly. Add more water or rice flour as necessary. Let stand 15 minutes.
2. Coat the top of each loaf or roll with a thick layer of topping. We tried coating it with a brush but it worked better just to use fingers or a spoon and kind of spread it around. You should err on the side of applying too much topping – a thin layer will not crack properly.
3. Let stand, uncovered, for any additional time your recipe recommends. With the Soft White Roll, you can place the rolls directly into the oven after applying the topping. With the Brown Rice Bread, the loaves should stand for 20 minutes with the topping before baking.
4. When baking, place pans on a rack in the center of the oven and bake your bread as you ordinarily would. The Dutch Cruch topping should crack and turn a nice golden-brown color.

A Note about Rice Flour: If it’s not in your local grocery store, check in a specialty shop (somewhere that would sell gluten-free foods) or online (e.g., amazon.com). Be sure not to buy the sweet or glutinous variety, though either white or brown rice flour works just fine.

If you are unable to find it, or if you’re just curious about how to make it yourself, it’s not very hard to do at all. There are a number of tutorials online, but the basic idea is to put rice in a spice grinder or something else that can break grains, and grind it until it is a fine flour-like powder. You will likely need to sift the final product through a sieve.

Home-made rice flour alters the balance of ingredients in the topping recipe, specifically requiring more rice flour to make it the appropriate paste-like consistency.  You want the topping to form a thick layer on the bread. If it’s too watery or drippy, it will not stay on top of the bread and crack like it’s supposed to.

Thursday, March 22, 2012

Ozeri Pronto Digital Multifunction Kitchen and Food Scale only $11.37


Do you have a kitchen scale? If you don't, now is the time to get one! Right now you can get the
Ozeri Pronto Digital Multifunction Kitchen and Food Scale (in Elegant Chrome) for just $11.37.  Just use coupon code IAMFIT12 during checkout to bring it down from $18.95 to $11.37.  (This item ships FREE with Amazon Prime or with a purchase of $25 or more with Super Saver Shipping)

A kitchen scale is a very inexpensive way to make your life easier while baking.  Weighing ingredients is much more accurate than measuring them, and a digital kitchen scale makes doing that so easy.  If you like the best chocolate chip cookie recipe from my blog, you'll definitely find that making it by weighing the ingredients is faster than measuring out the ingredients, and will give you more consistent results from batch to batch. Act fast, as items do sell out quickly and prices fluctuate quite a bit on Amazon!

Tuesday, March 20, 2012

Irish Soda Bread (TWD) and Vitacost Deal on Coconut Oil


This week's Tuesdays with Dorie: Baking with Julia was hosted by Carla of Chocolate Moosey and Cathleen of my culinary mission.  The chosen recipe was Irish Soda Bread.  So named because instead of yeast, baking soda is used as the leavening agent in this bread.

It's pretty similar to most quick bread recipes (or biscuits), in that you mix all the dry ingredients together in one bowl, then pour the liquid ingredients in and mix it all together.  This recipe does call for a quick kneading, however, and I found the dough to be way too wet to knead.  I had to add quite a bit of extra flour before I could handle it.  Otherwise, this was a super easy recipe and it came together in just a matter of minutes!  I added dried cranberries and chopped dried apricots to mine, which gave it a slightly sweet but not overwhelmingly sweet flavor.  I saw that a few other bakers added cheese to theirs and I think that will be my next rendition of this recipe :)

Thanks to Carla and Cathleen for hosting; you can find the recipe on their blogs here and here.  Make sure you check here, too, to see all the other variations on this classic Irish bread.

Also, if you missed the last Vitacost deal I posted about, their free shipping promotion has been extended through 3/26 at 9am EST.
Right now, Vitacost.com is offering FREE shipping on orders that contain over $20 in Vitacost brand products.  (Normally their shipping fee is $4.95 for orders under $49 and free shipping for orders $49+)  Pair this free shipping offer with their $10 off $10 promo (for new customers) and you can get $20 worth of products for just $10.

You can get the 54oz Vitacost Coconut Oil for just $11.95 after the discount.  It's normally $18.89 on Amazon, so this is quite a savings.

Here's how:
1) Use this link to sign up and get a $10 promo code sent to your email.  After you register for an account with Vitacost.com (it must be through the link provided) you will receive an email with the subject line "Here's your $10 coupon for Vitacost.com" (this may take an hour)

2) Then add the Vitacost Coconut Oil to your cart for $19.95 (used to be $20.99 so it would qualify for free shipping alone).  Add the apple cider vinegar ($2) as a filler to bring your total to $20+.  Then use the $10 off code sent to your email, bringing your order total to $11.95 for both the coconut oil and the apple cider vinegar!

Of course, feel free to look around their website for other items.  You can view all Vitacost brand items that qualify for this free shipping offer here

Also, don't forget to add 2 free samples to your cart before checking out (they've got a few different teas and other samples available).  Happy shopping!

Tuesday, March 13, 2012

$20 in Products for just $10 at Vitacost.com through 3/15

Did you miss the last deal I posted on free coconut oil? Well, this isn't free, but it's a pretty good deal. Right now, Vitacost.com is having a sale and they are offering FREE shipping on orders over $20 through 3/15.  (Normally their shipping fee is $4.95 for orders under $49 and free shipping for orders $49+)  Pair this free shipping sale with their $10 off $10 promo and you can get $20 worth of products for just $10.

You can get the 54oz Vitacost Coconut Oil for just $10.99 after the discount.  It's normally $18.89 on Amazon, so this is about 50% off.

Here's how:
1) Use this link to sign up and get a $10 promo code sent to your email.  After you register for an account with Vitacost.com (it must be through the link provided) you will receive an email with the subject line "Here's your $10 coupon for Vitacost.com" (this may take an hour)

2) Then add the Vitacost Coconut Oil to your cart for $20.99 to qualify for free shipping.  Then use the $10 off code sent to your email, your order will be $10.99!

Of course, feel free to look around their website for other items.  You might like the Chocolove Almonds and Sea Salt in Dark Chocolate Bar or some of these other low priced chocolate products. I also have a few mommy friends who swear by Cocyntal for the treatment of colic in cases where nothing else worked!

Also, don't forget to add 2 free samples to your cart before checking out (they've got a few different teas and other samples available).  Happy shopping!

Monday, March 12, 2012

KitchenAid Professional 6-Qt Mixer Only $195.99 Shipped (Reg. $499.99!)

Amazon has this KitchenAid Professional 600 Series 6-Quart Stand Mixer in Silver priced at just $259.99 (reg. $499.99) + FREE shipping.  That's just an ok price, but what makes this a great deal is the mail in rebate.

Right now you can submit a rebate for $40 + FREE subscription to either Travel & Leisure or Food & Win Magazine here! However, if you would rather not receive the magazine subscription, you can choose to request a $24 refund! That means that after mail in rebate, you can get this mixer for just $195.99 shipped!

Requests must be postmarked no later than 4/24/12. I know that there are sometimes deals on the KitchenAid 5-Quart Artisan Mixer for around $150, but I would urge you to spend a little extra money and invest in the professional series.  Unlike the Artisan series, the Professional series is made with all metal gears, so it will last a lot longer.  Prices on Amazon are subject to change at any time, so be sure to act quick if you want this mixer!


* Please note that the KP26M1PSL model number may not be listed on the rebate form, but KitchenAid Customer Service has verified that this model does qualify for the rebate.  If you would like to verify for yourself before ordering, simply call 1-888-474-2457.

Tuesday, March 6, 2012

Rugelach (TWD)


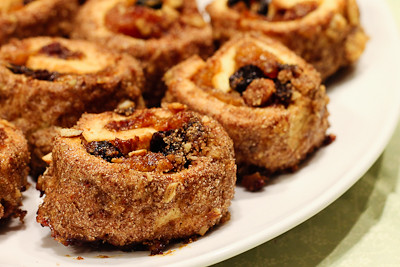
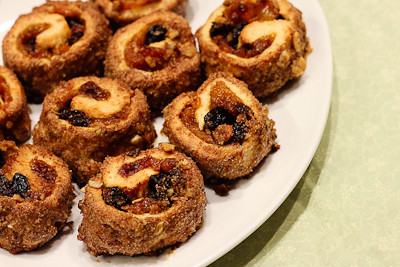
This week's Tuesdays with Dorie: Baking with Julia was co-hosted by Jessica of My Baking Heart and Margaret of The Urban Hiker.   The chosen recipe was rugelach.  Rugelach are actually Jewish pastries made with sour cream pastry dough.  They are made in the form of a crescent by rolling a triangle of dough around a filling of fruit, nuts, or fruit preserves.  The rugelach made in this recipe is slightly different in that it is made with a cream cheese pastry dough, and the rolled dough and filling is cut into slices before baking.

I've actually made rugelach a few times prior to this - love the stuff!  I love this Barefood Contessa recipe and we actually also made rugelach back in 2008 for TWD.  I'm not a nut person so I didn't put nuts in my filling, but I did put some nuts in the streusel that the pastries were rolled in.  I made apricot lekvar (homemade fruit butter) and filled my rugelach with dried cherries, raisins, and dried apricots.  I did not have any problems with this recipe, except that I did not look at it ahead of time and did not realize how much refrigeration time was required, so I did not finish baking them until very late today!

I have to say that I love this version of rugelach.  The sugar and cinnamon mixture that the pastries get rolled in caramelizes in the oven and gives it a wonderful, crisp texture.  Then you bite into the cream cheese pastry that is so light and flaky, and then you taste the apricot butter and dried fruit bits.  I think I just ate about ten of them in one sitting and my husband asked me to hide them from him because he can't stop eating them!

This recipe is definitely a keeper, and I can't wait to make it again.  Thanks to Jessica and Margaret for hosting; you can find the recipe on their blogs here and here.  Make sure you check here, too, to see how everyone else in our baking group enjoyed these pastries!

Also be sure to leave a comment below... I was visited recently by the Fairy Hobmother and received an unexpected gift... if you leave a comment here you might get a visit from the Fairy Hobmother too ;)